Nmap, short for “Network Mapper,” stands as a powerful and versatile tool in the realm of network exploration. Developed by Gordon Lyon, this free and open-source network scanner has become a go-to solution for security professionals, system administrators, and enthusiasts alike.
In this tutorial, we will explore into the top Nmap commands, offering insights into the best practices for scanning remote hosts.
Prerequisites:
Before embarking on your journey with Nmap, ensure that you have the tool installed on your system. You can do so using the following commands based on your Linux distribution:
For RedHat/CentOS:
yum install nmapFor Ubuntu:
sudo apt-get install nmap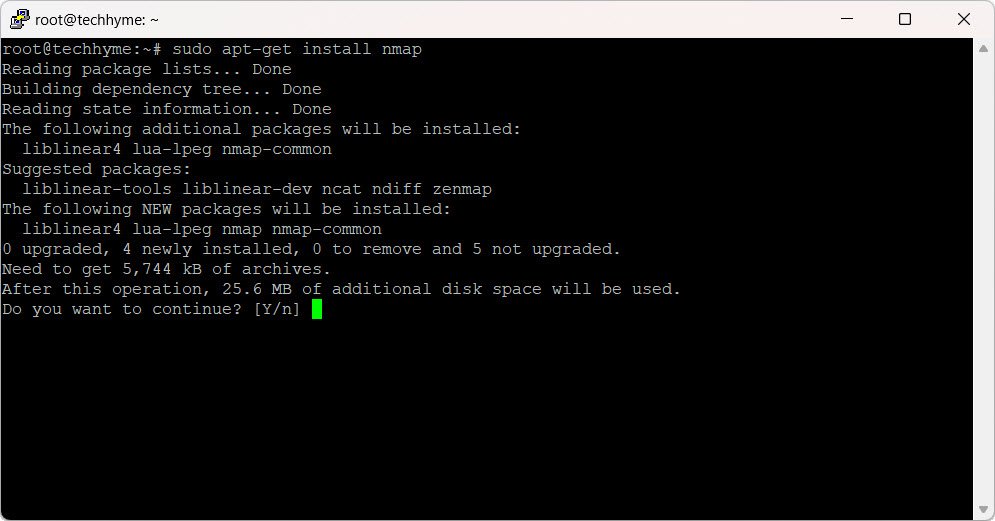
1. Basic Host Scanning
To initiate a basic scan of a remote host (e.g., 192.168.174.129), use the following command:
nmap 192.168.174.129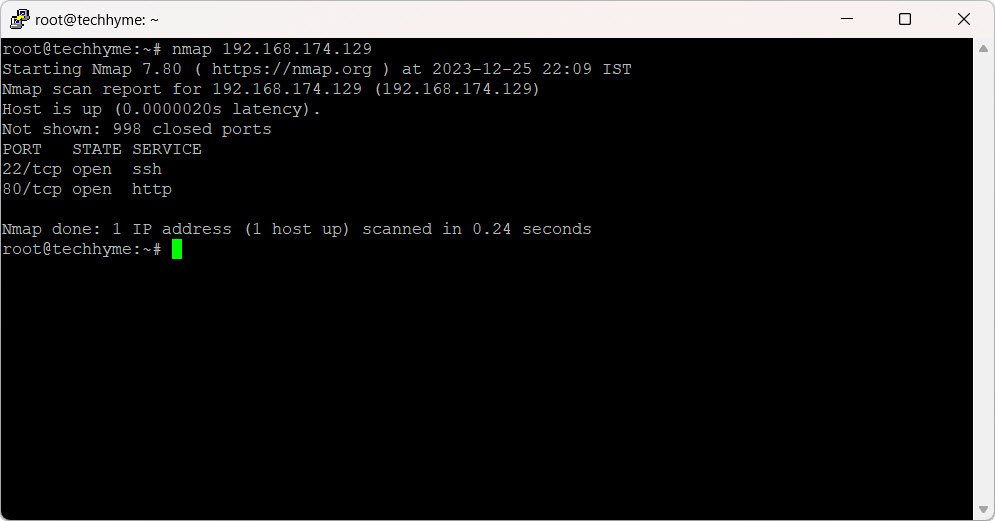
2. Scanning a Specific Port
To focus on a specific port, such as port 80 on the target host (192.168.174.129), use the `-p` flag:
nmap -p 80 192.168.174.129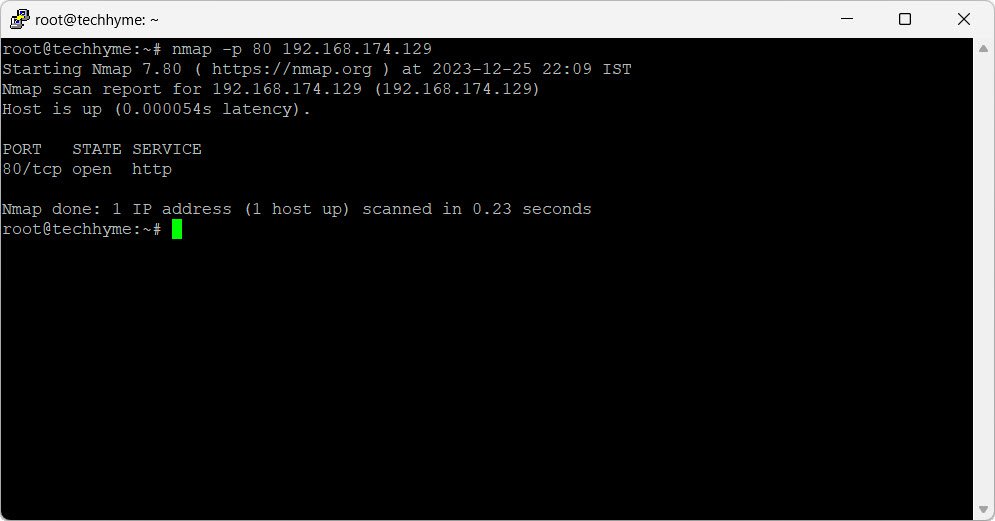
3. Scanning a Range of Ports
Explore all ports within the range of 1 to 65535 using the following command:
nmap -p 1-65535 192.168.174.129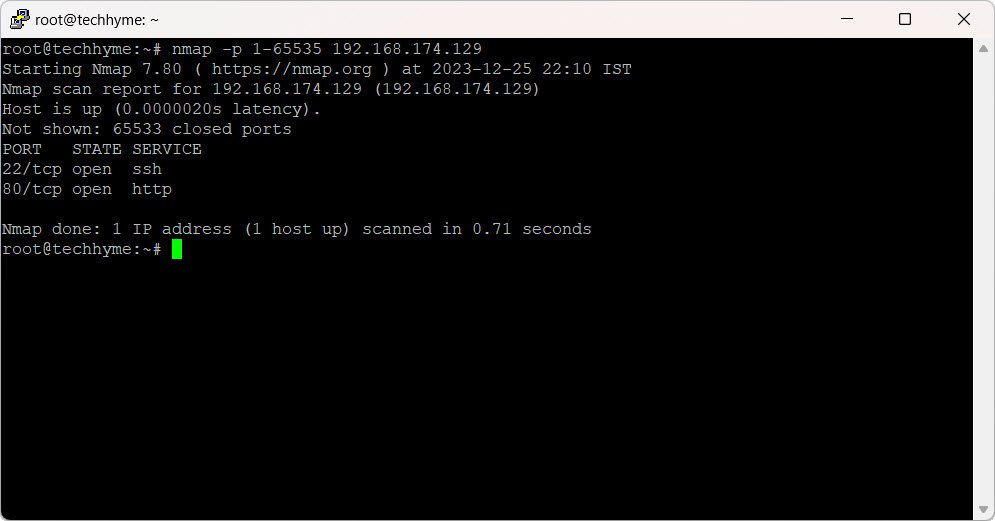
4. Scanning Entire CIDR IP Ranges
To scan an entire CIDR range (e.g., 192.168.174.129/24), use the following command:
nmap 192.168.174.129/24
5. OS Detection
To determine the operating system of a remote host (e.g., 192.168.174.129), use the `-A` switch for enhanced information gathering and the `-T4` switch for a faster scan:
nmap -A -T4 192.168.174.129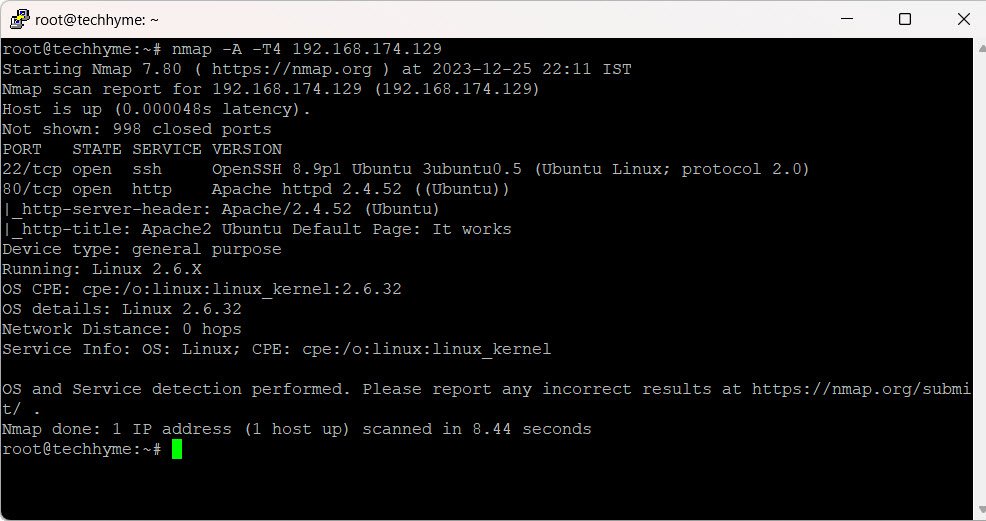
6. UDP and TCP Port Scanning
Distinguish between UDP and TCP port scanning using the `-sU` (UDP) and `-sT` (TCP) flags, respectively:
nmap -sU 192.168.174.129 # UDP Scan
nmap -sT 192.168.174.129 # TCP Scan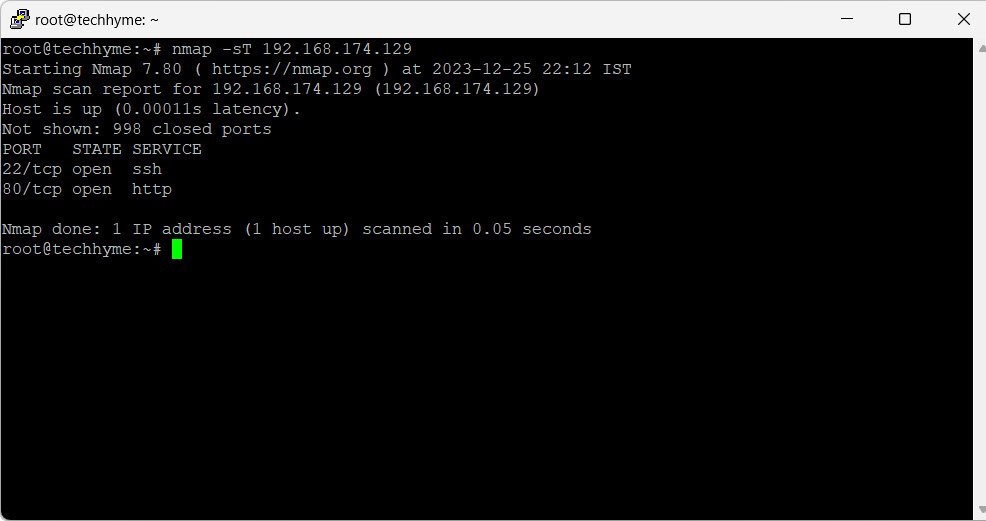

7. Scanning Multiple Hosts
Scan multiple hosts in a network while excluding a specific IP (e.g., excluding 192.168.174.1) using the `–exclude` switch:
nmap 192.168.174.* --exclude 192.168.174.1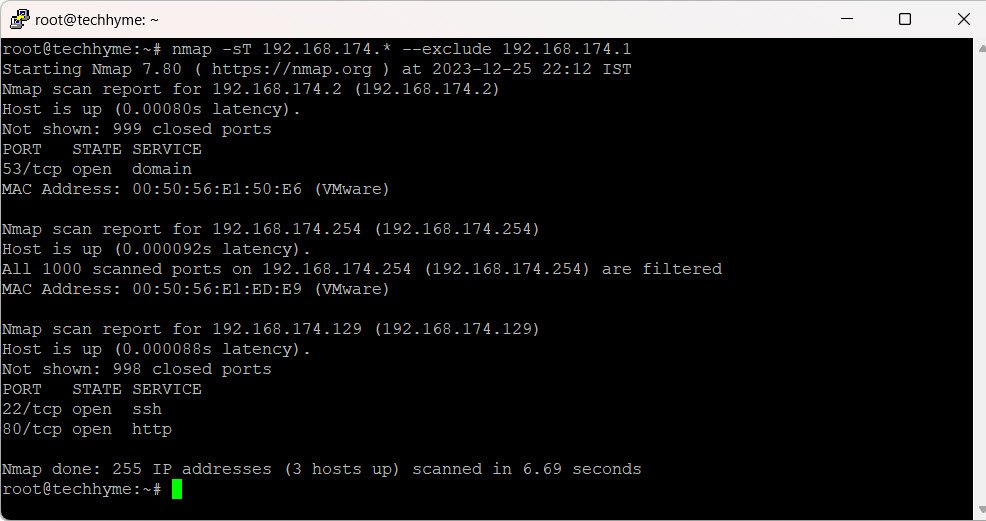
8. Checking Firewall Status
Determine if a firewall is enabled on the remote host (e.g., 192.168.174.129):
nmap -sA 192.168.174.129
9. Performing a Stealthy Scan
Execute a stealthy scan using the `-sS` switch to minimize the chances of detection:
nmap -sS 192.168.174.129
10. Vulnerability Detection
Launch the vulnerability detection script against a remote host (e.g., 192.168.174.129) using the following command:
nmap -Pn --script vuln 192.168.174.129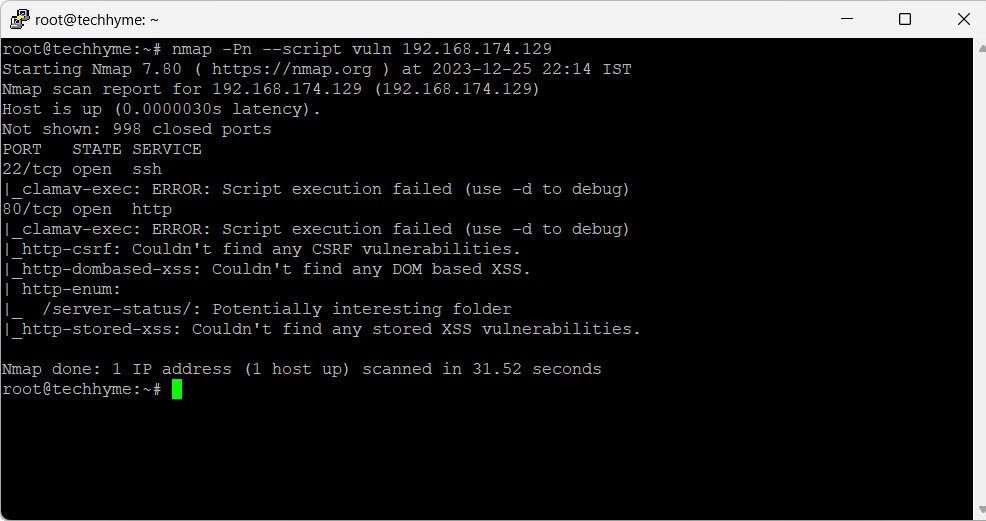
11. Detecting Malware Infection
Check for malware infection on a remote host (e.g., 192.168.174.129) using the http-malware-host script:
nmap -sV --script=http-malware-host 192.168.174.129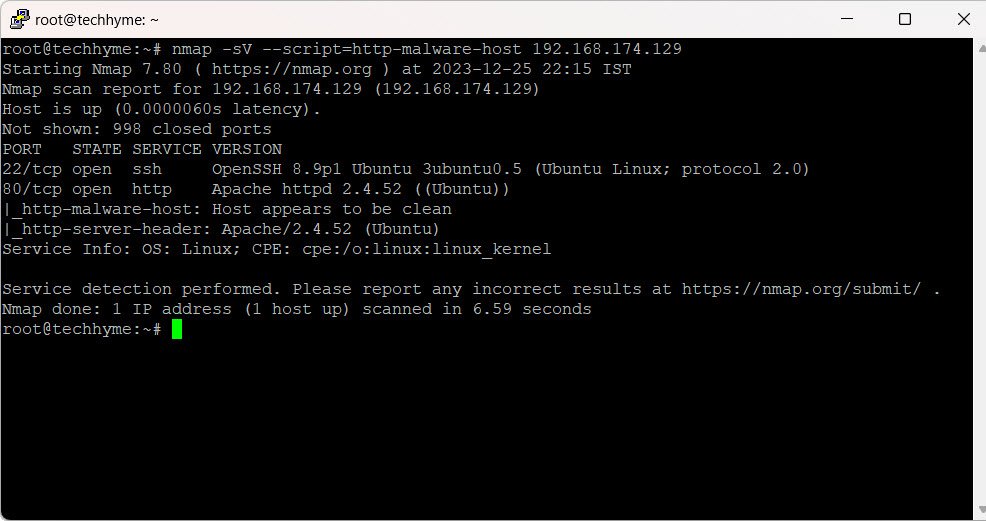
In conclusion, mastering Nmap commands empowers users to uncover the secrets of computer networks, ensuring robust security and optimal performance.
By adhering to best practices and utilizing Nmap’s extensive features, you can elevate your network exploration skills to new heights, making the digital landscape a safer and more understandable domain.


Pingback: How to Perform Network Security Audits Using Kali Linux - Tech Hyme
Pingback: Top 7 Nmap Commands for Effective Network Scanning - Tech Hyme