Penetration Testing is an attempt to exploit the vulnerabilities to determine whether unauthorized access or other malicious activity is possible. Penetration testing these days can be executed and performed automatically by software applications or can be performed manually.
The process involves gathering intel about the target before the test, analyzing the data to spot possible entry points, attempting to breach in either virtually or for real and reporting back the findings to the parent company so that they can learn about their flaws and work on fixing them immediately.
Also Read: From Reconnaissance to Covering Tracks – 5 Phases of Ethical Hacking
In this demonstration, we’re using Metasploitable2 Machine which is a test environment provides a secure place to perform Penetration Testing and Security Research. Metasploitable2 machine was created to train individuals to use Metasploit for successful exploitation.
About FTP Server –
Linux is designed for networking, and there are three major protocols associated with sharing files on a network:
NFS, FTP, and Samba.
The File Transfer Protocol is one of the original network applications developed with the TCP/IP protocol suite. It follows the standard model for network services, as FTP requires a client and a server. The FTP client is installed by default on most operating systems.
Alternatively you can use sftp for more secure access. The sftp client has the same commands as ftp, but provided Secure Shell (SSH) encryption.
Before to start, here are some prerequisites:
- FTP Server – UBUNTU (20.04) and Metasploitable2
- Attacker – Kali Linux OS-64 bit (2021.2)
- Tools – Metasploit Framework, WinSCP/Putty and Wireshark
In this demonstration, Metasploitable2 is running at IP 192.168.1.8, Ubuntu running at 192.18.1.9 and Kali Linux machine running at 192.168.1.7.
The first thing that we need to do is of course to identify which systems are running the FTP service.
Scanning always plays an important role in penetration testing because through scanning, attacker make sure which services and open ports are available for enumeration and attack.
To scan a list of all open ports and services, type the following command into terminal (Kali Linux Machine).
nmap -p0-65535 -sV 192.168.1.8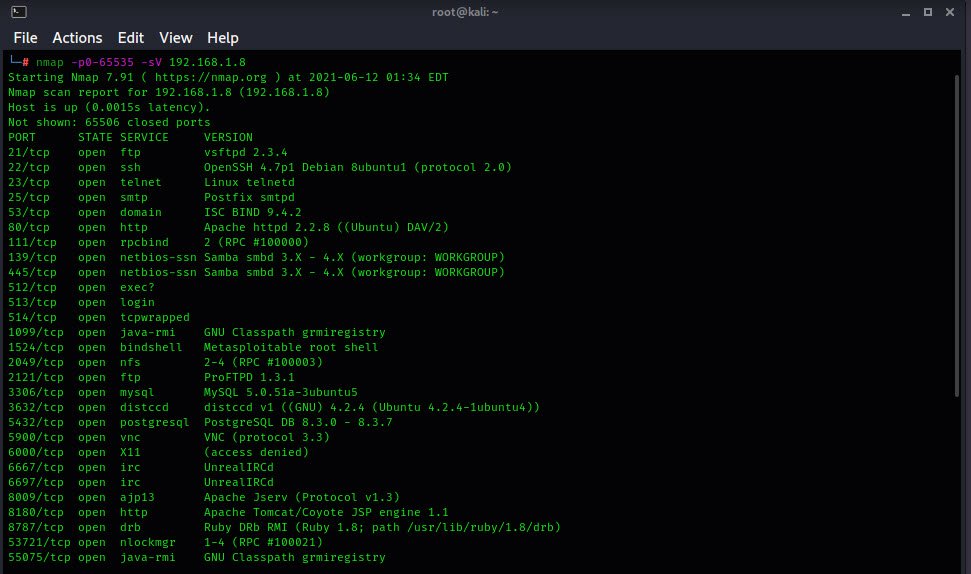
From above output, you can see that the FTP port is open and running on Port 21 of service version vsftpd 2.3.4.
vsftpd, which stands for “Very Secure FTP Daemon”,is an FTP server for Unix-like systems, including Linux. It is licensed under the GNU General Public License which supports both IPv6 and SSL.
An attacker always perform enumeration for finding more important information such as software version then launch a specific exploit against that vulnerable version.
Banner Grabbing is a technique used to gain information about a computer system on a network and the services running on its open ports. Administrators can use this to take inventory of the systems and services on their network.
In order to do, just try to connect the FTP server by typing “ftp 192.168.1.8” which will gives you the exact version of FTP service i.e. vsFTPd 2.3.4.

You can also do the same banner grabbing with Metasploit Framework by run the following commands:
msfconsole
use auxiliary/scanner/ftp/ftp_version
set RHOSTS 192.168.1.8
run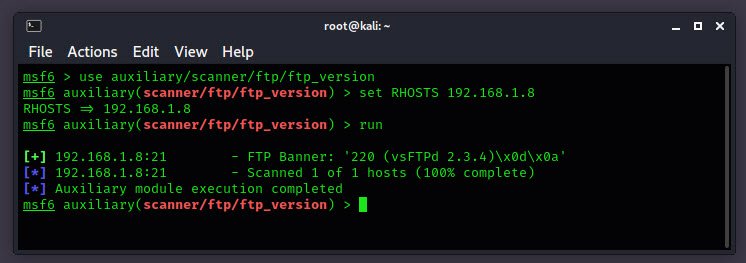
From above output, you can see that the vsftpd 2.3.4 is the installed version of FTP on target’s system.
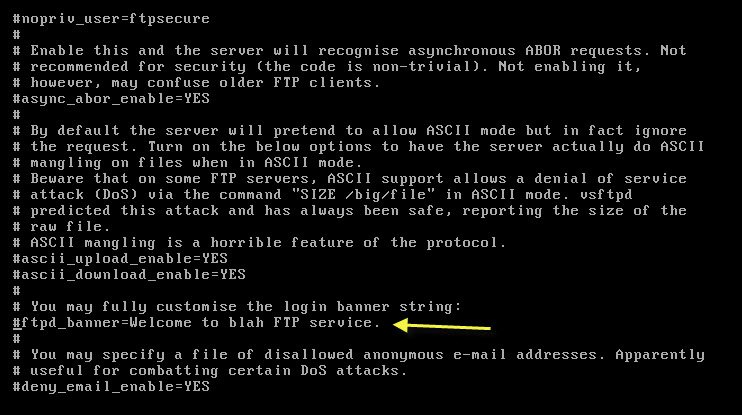
By make the following changes in /etc/vsftpd.conf file, you can easily hide the FTP version by removing the # from line “Welcome to blah FTP service.”
Let’s back to Metasploit Framework to Bruteforce the FTP server by searching the following exploit “search ftp_login“.
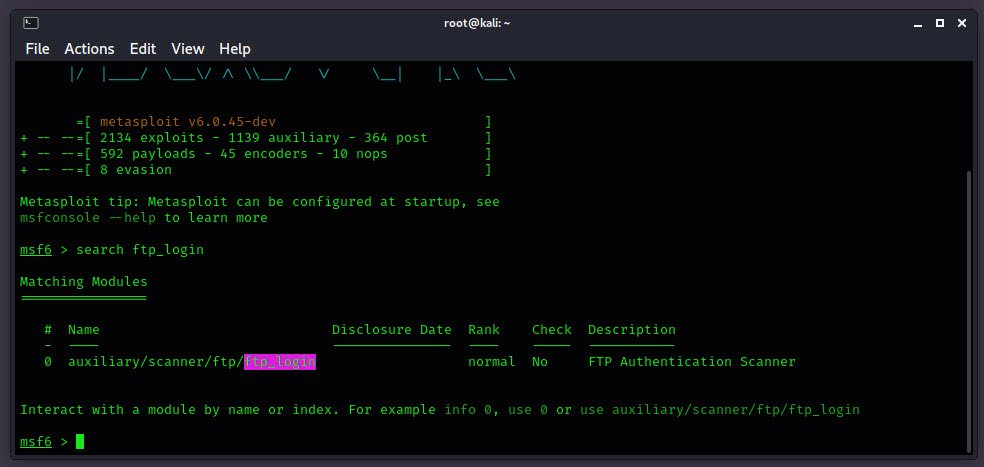
Auxiliary modules are exciting because they can be used in so many ways for so many things. To use, type “use auxiliary/scanner/ftp/ftp_login” command.
If you have selected a specific module, you can issue the “show options” command to display which settings are available and/or required for that specific module.
So in this case, you need a good dictionary file for both username and password.

In order to start the scanner, type the following commands:
set PASS_FILE passwords.txt
set USER_FILE passwords.txt
set RHOSTS 192.168.1.8
run
From above output, you can observe that the FTP server is not secure against brute force attack because it is showing matching combination of username:password.

The scanner has discovered 1 valid login credential as you can see from above output. Now let’s try to login with msfadmin:msfadmin.

We can see that we have successfully managed to login to the FTP server with above credentials.
Now you can also execute the command ls -lat to the server in order to display the list with the current directories and subdirectories.
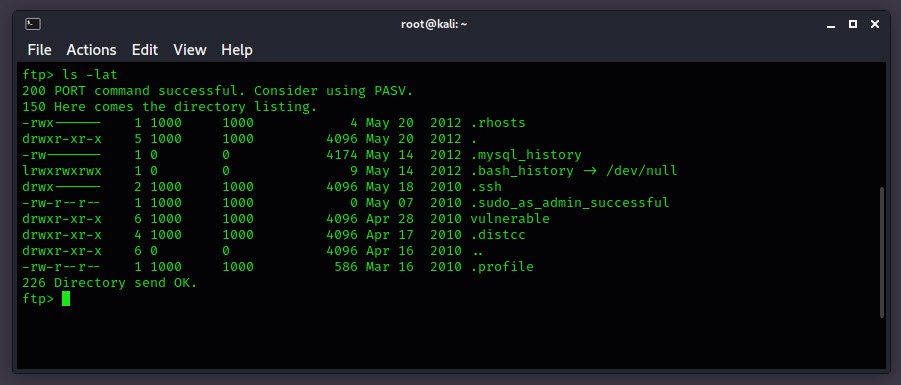
FTP users may also authenticate themselves with a clear-text sign-in protocol, normally in the form of a username and password, but can connect anonymously if the server is configured to allow it.
To check anonymous login with Metasploit Framework, type the following commands:
use auxiliary/scanner/ftp/anonymous
set RHOSTS 192.168.1.8
run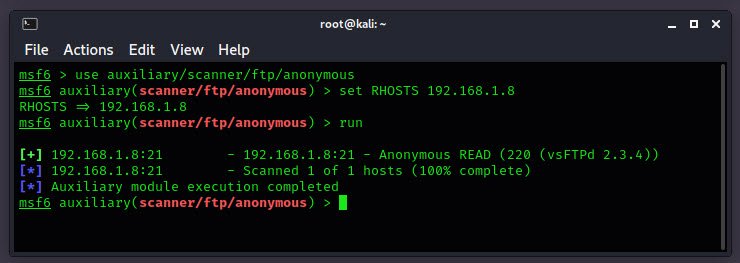
From above output, you can observe that it is showing permission READ from FTP server which means anonymous authentication is enabled.
Let’s try to login with anonymous:anonymous credentials.
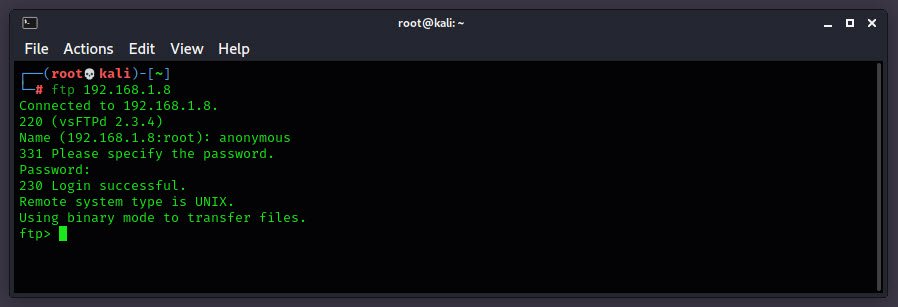
Bingo! We have got FTP access through anonymous user.
Now in order to protect your FTP server from anonymous user login, edit the /etc/vsftpd.conf file and set anonymous_enable=NO.
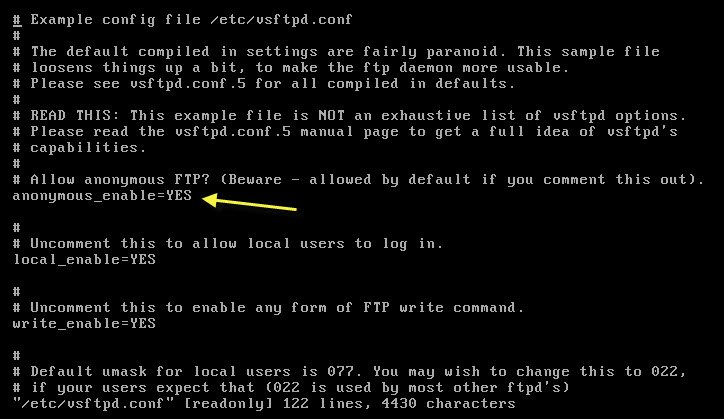
Now, you have already disabled anonymous login and hide the banner information but still there are chances that attacker can steal credentials for unauthorized access.
An attacker can take help of sniffing tools such as DSNIFF, WIRESHARK, ETTERCAP etc which can sniff the data packet traveling between server and client in a network.
Similarly we had captured TCP packet through Wireshark for sniffing FTP credentials.
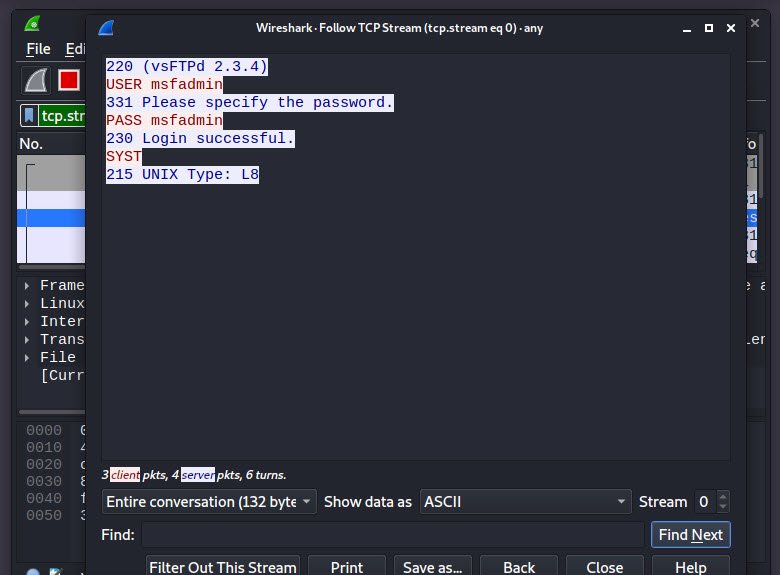
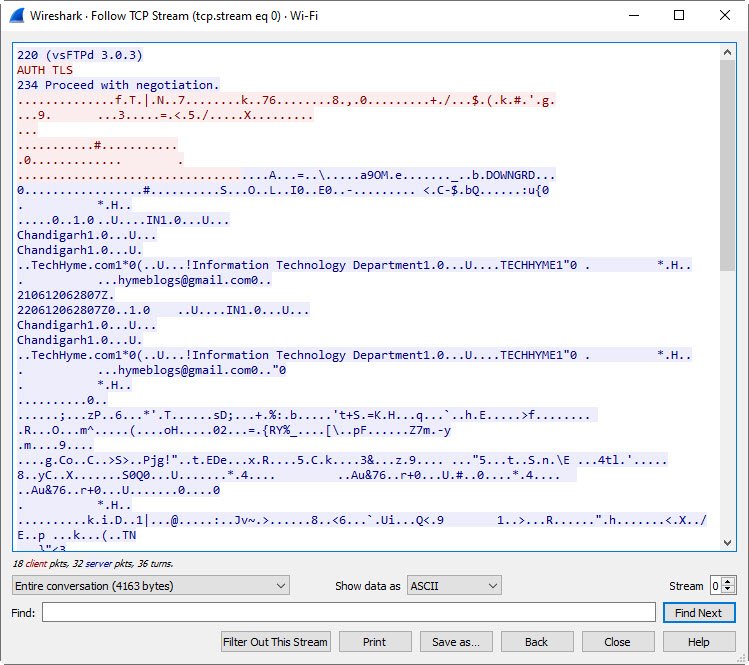
Now if you want to encrypt your network packets and data, then you need to add SSL certificate into your FTP server. With this attacker can sniff network data packet but will be not able to read fetched information because entire data will show in the form of cipher text.
As we all knows that, SSL stands for Secure Sockets Layer, the protocol which provides secure, encrypted communications between server and client.
So let’s generate a SSL certificate using RSA 2048 encryption.
mkdir /etc/ssl/cetificates
openssl req -x509 -nodes -days 365 -newkey rsa:2048 -keyout /etc/ssl/certificates/vsftpd.pem -out /etc/ssl/certificates/vsftpd.pem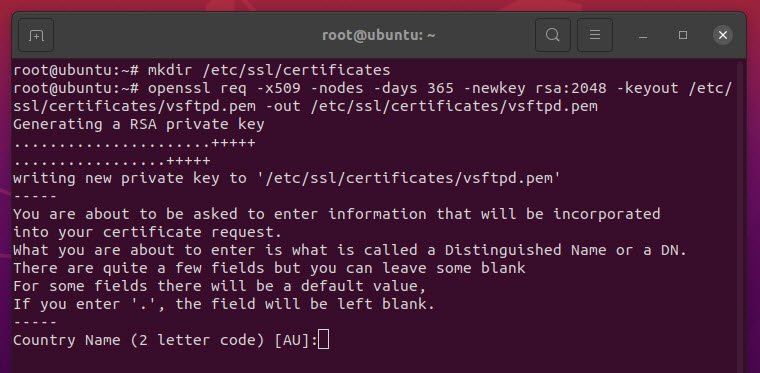
While generating new private key, the wizard requires some information such as Country name, state, email address and etc which you need to fill as show below:

After successful generation of SSL certificate, you also need to add few lines into your /etc/vsftpd.con file:
rsa_cert_file=/etc/ssl/certificates/vsftpd.pem
rsa_private_key_file=/etc/ssl/certificates/vsftpd.pem
ssl_enable=YES
allow_anon_ssl=NO
force_local_data_ssl=YES
force_local_logins_ssl=YES
ssl_tlsv1=YES
ssl_sslv2=NO
ssl_sslv3=NO
require_ssl_reuse=NO
ssl_ciphers=HIGH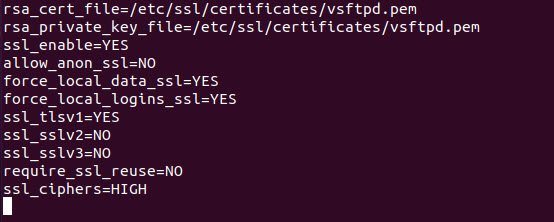
Save the configuration file and don’t forget to restart the FTP service by typing “service vsftpd restart”.
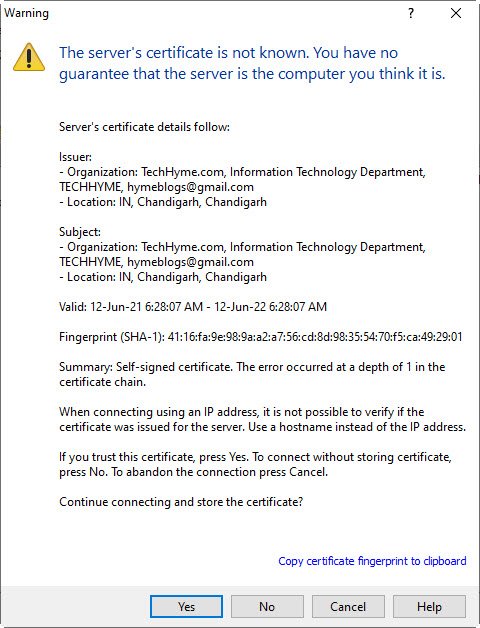
Now Let’s try with WINSCP application.
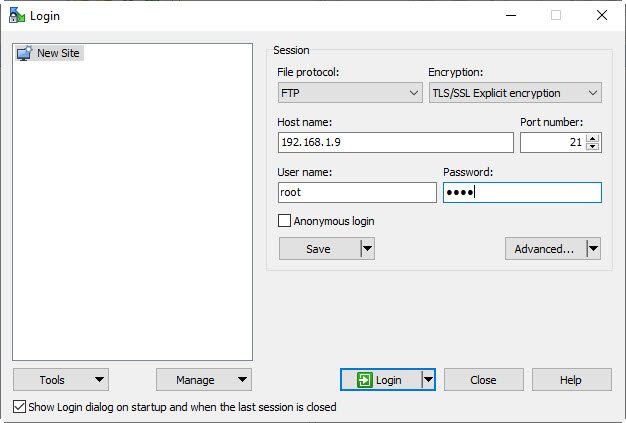
Now server will send certificate to authorized user click on yes to store certificate and continue the encrypted connecting.
In case, if attacker will sniff the network packets, he will get cipher text as shown below:
Furthermore, for account lockout security, you can also configure IPTABLES by typing the following commands which will allow only 3 chances for login into FTP server and will block the user for 120 seconds.
iptables -I INPUT -p tcp --dport 21 -i eth0 -m state --state NEW -m recent --set
iptables -I INPUT -p tcp --dport 21 -i eth0 -m state --state NEW -m recent --update --seconds 120 --hitcount 3 -j DROP
To ensure iptables are working, let’s test the same with Metasploit Framework by Brute forcing the FTP server.
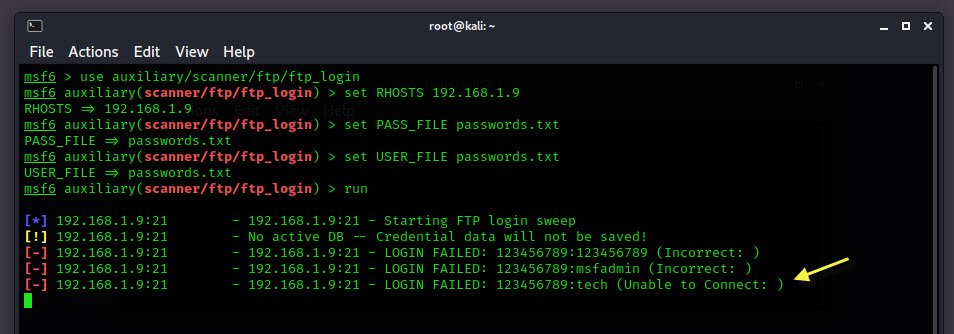
From above result, you can clearly see the error message (Unable to connect) which means the IP got blocked for 120 seconds by FTP server.
You can even check the logs with vsftpd.log file which is located under /var/logs/vsftpd.log.

In case, if you want to allow a specific IP to whom you want to give permission for establishing the connection, then you need to add the following code at the end of your /etc/vsftpd.conf file.
vsftpd: 192.168.1.7
Furthermore, we also knows that PORT 21 is the default port for FTP service, which you can also change by editing the same /etc/vsftpd.conf file and add the following changes into it.
Remove the comment from “connect_from_port_20=NO” and add “listen_port=5800“.

Now try to connect with FTP server via port 5800 with valid user credentials.
Note: Don’t forget to restart the vsftpd service after making any changes in its configuration file (/etc/vsftpd.conf).


Pingback: List of Top Email Service Providers - Tech Hyme
Pingback: Top 10 File Transfer Protocol (FTP) Softwares - Tech Hyme