
User account management is a crucial aspect of system administration, especially in a multi-user environment. To maintain the security and integrity of a system, administrators often need to set various parameters for user accounts, including password expiration, account locking, and more. The chage command is a powerful utility in Unix-like operating systems that facilitates user account management, allowing administrators to configure and view password aging information for user accounts.
In this article, we will explore the chage command with various examples and usage scenarios.
The chage command stands for “change age,” and it is used to modify the number of days between password changes and other user account attributes. Let’s dive into some practical examples and usage of this command:
1. View User Account Information:
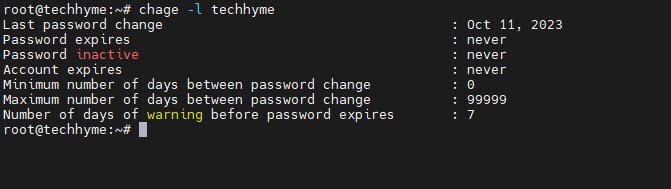
To view the aging information for a specific user, use the -l option. Replace <username> with the actual username you want to inspect.
chage -l <username>This command will display details such as the last password change date, password expiration date, and more.
2. Modify Password Expiration Date:
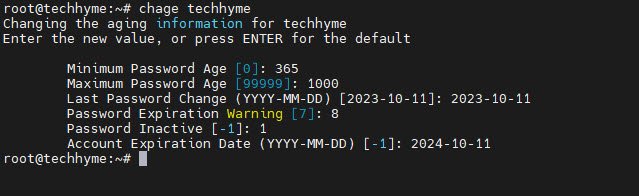
To set the password expiration date for a user, you can use the chage command without any options and provide the username as an argument. Replace <username> with the actual username.
chage <username>This command will prompt you to set various aging information, including the password expiration date.
3. Disable an Account:
To immediately disable a user account, you can set the account’s expiration date to 0.
chage -E 0 <username>This effectively locks the account, preventing the user from logging in.

In case if you want to force user to change password at next login, then the command is:
chage --lastday 0 <username>
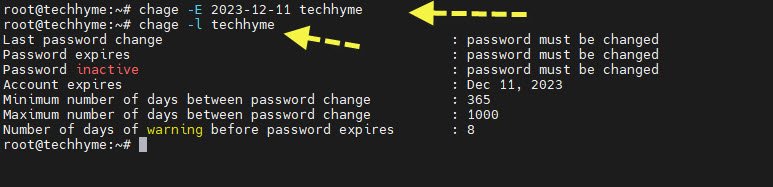
4. Set Account Expiration Date in YYYY-MM-DD Format:
You can specify the account expiration date by providing it in the `YYYY-MM-DD` format.
chage -E 2023-12-11 <username>This sets the account expiration date to December 11, 2023, allowing the user to log in until that date.
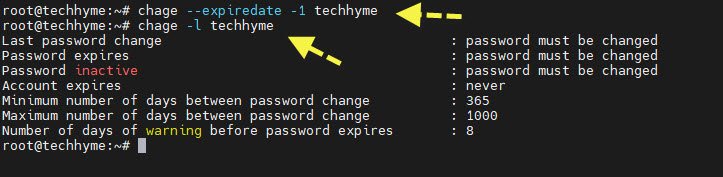
5. Disable Account Expiration:
To prevent the account from expiring, you can use the `-1` option.
chage --expiredate -1 <username>This ensures that the account remains active without any expiration date.
6. Set Maximum Number of Days Between Password Changes:
You can control the frequency of password changes by using the `-M` option.
chage -M 5 <username>In this example, the user will be prompted to change their password every five days.

7. Set Password Inactivity Period:
The `-I` option is used to set the number of days of inactivity before locking the account.
chage -I 12 <username>This means that the account will be locked if the user is inactive for 12 or more days.

8. Warn Users Before Password Expiration:
To notify users in advance about their password expiration, you can set the number of days for warning using the `-W` option.
chage -W 2 <username>Users will receive a warning message two days before their password expires.

These are just a few examples of how the `chage` command can be used to manage user accounts effectively.
By using these commands, system administrators can tailor user account settings to meet security and operational requirements. Keep in mind that the options and behavior of the `chage` command may vary slightly between different Unix-like operating systems, so it’s essential to consult the man page (`man chage`) for your specific system to understand all available options and their details.
In conclusion, the `chage` command is a valuable tool for system administrators to configure and manage user accounts’ password aging information. Whether you need to set password expiration dates, enforce password changes, or lock user accounts, `chage` provides the flexibility and control needed to maintain a secure and well-managed system.