A virtual machine is a software that, like a physical machine, runs an operating system and applications. A virtual machine uses your host system’s physical resources on which it runs. Virtual machines have virtual devices that provide the same functionality as physical hardware, but with the additional benefits of portability, manageability, and security.
Installing Ubuntu on your computer is straightforward and similar to installing other operating systems. This article helps you to create your own Linux-based virtual machine.
Prerequisites for installing Ubuntu on VMware Workstation:
In order to start the process, VMware Workstation must be installed and the Ubuntu ISO file must be downloaded as well. You can also use VMware Player as well, but for the purpose of this article, we’re here using VMware Workstation 16 Pro.
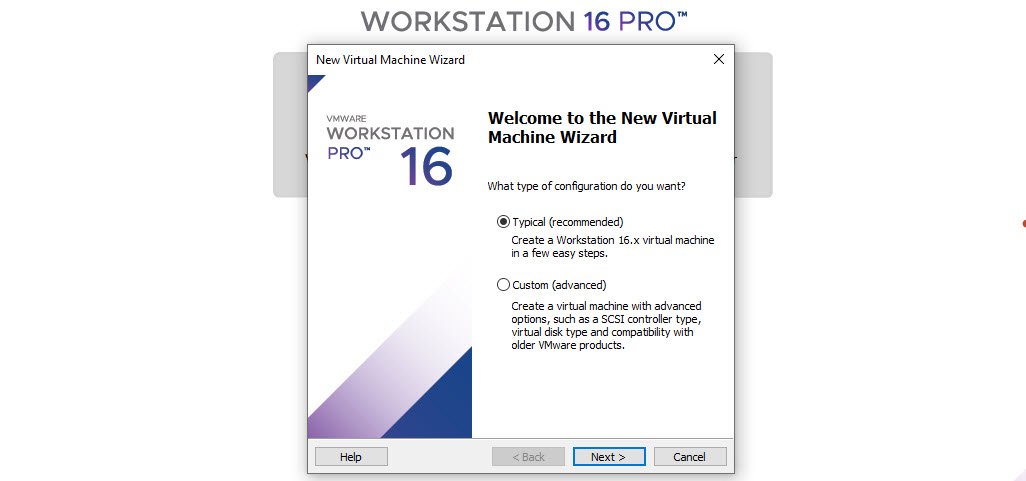
You can create a new virtual machine in Workstation Pro by using the New Virtual Machine wizard (as shown below), clone an existing Workstation Pro virtual machine or virtual machine template, import third-party and Open Virtualization Format (OVF) virtual machines, and create a virtual machine from a physical machine.
You can also create shared virtual machines, which can be used by remote users, and virtual machines that run on remote hosts.
Click on New Virtual Machine wizard to create a new virtual machine in Workstation Pro.
The wizard prompts you to make decisions about many aspects of the virtual machine and the wizard prompts you to select a typical or custom configuration.
Click on Typical Configuration option if you want to go with default hardware compatibility settings.
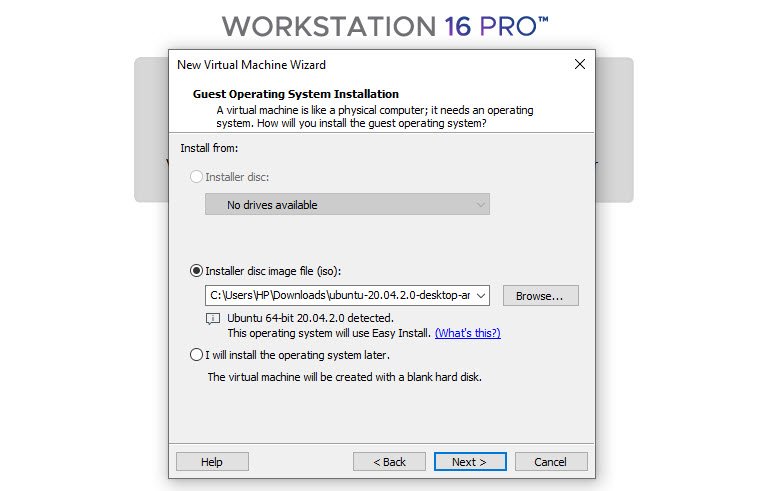
Next you have to select the source media for the operating system that will run inside the virtual machine.
If you have already downloaded the latest version of UBUNTU from their official website, then choose 2nd option i.e. Installer disc image file (ISO).
In this step, the wizard prompts you for the following information about guest OS such as Full Name, User name and Password as shown below:

Next you need to enter the name and location of your virtual machine. For standard virtual machines, the default directory for virtual machine files is located in the virtual machine directory (C:\Users\username\Documents\Virtual Machines).
Note: For best performance, do not place the virtual machines directory on a network drive.

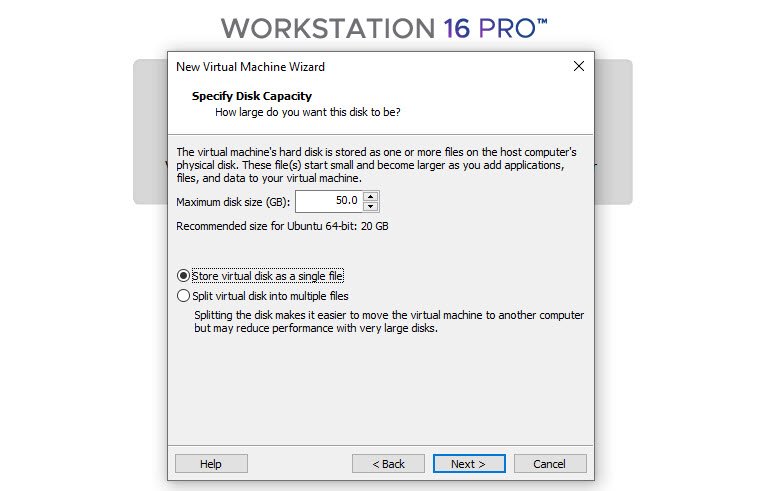
Next you need to set the size of the virtual disk and specify whether to split the disk into multiple virtual disk (.vmdk) files. You can set a size between 0.001 GB and 8 TB for a virtual disk file. You can also select whether to store a virtual disk as a single file or split it into multiple files.
Select Split virtual disk into multiple files if the virtual disk is stored on a file system that has a file size limitation otherwise go with Store virtual disk as a single file.
You can also click on Customize Hardware on the last page of the New Virtual Machine wizard to customize the virtual machine hardware. You can change the default hardware settings, including memory allocation, number of virtual CPUs, CD/DVD and floppy drive settings, and the network connection type.
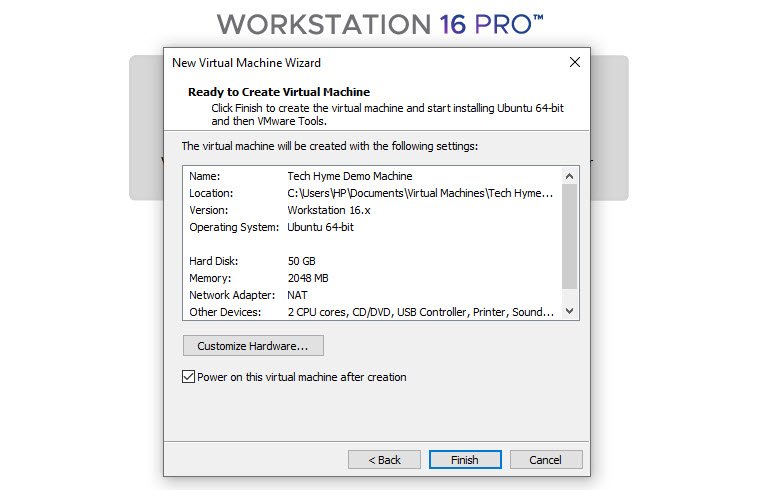
Here you can see the following screen where we’ve assigned 4GB RAM to this new virtual machine.

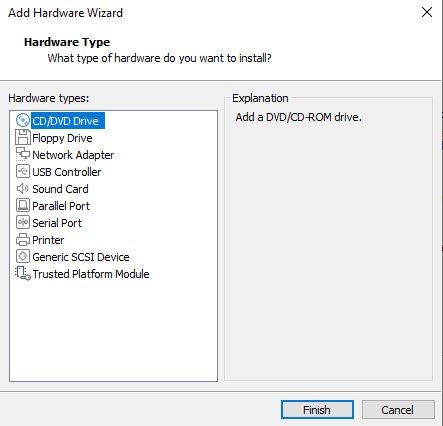
And in case, if you want to add any other hardware type such as USB Controller or CD/DVD drive, then you can click on ADD Hardware and can add any external hardware into your virtual machine.
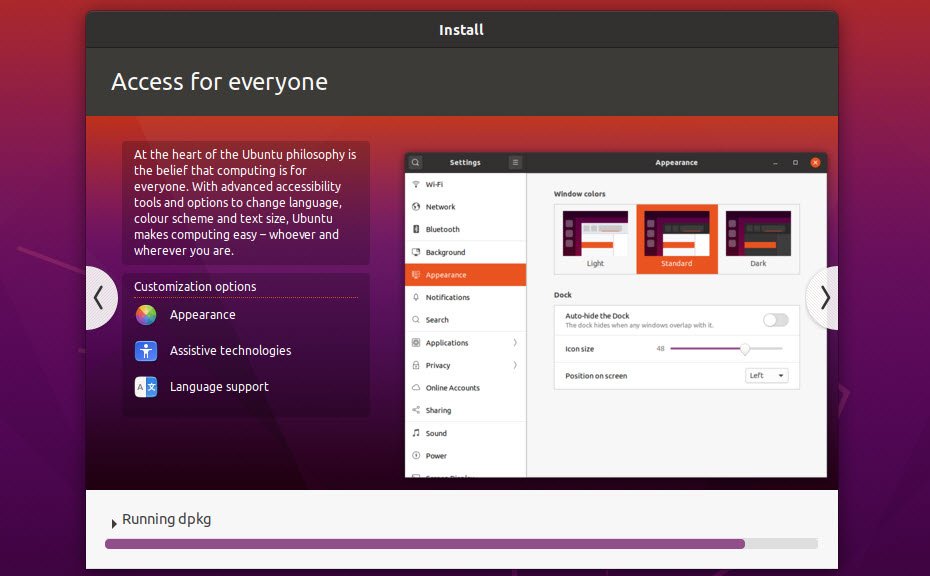
As soon as you click on FINISH, Ubuntu will then start to install, so keep waiting.
When all is done you’ll be presented with the Ubuntu login screen. So enter your password and you’re on your way.

Congratulations and enjoy! You can now experience a fully working Ubuntu inside VMware Workstation.


![[#17] – The Internet – Questions](https://techhyme.com/wp-content/uploads/2021/07/Techhyme-Computer-Fundamentals-150x150.png)

Pingback: How to Fix the VMware Workstation Error: “Unable to open kernel device ‘.VMCIDevVMX'” - Tech Hyme
Pingback: How To Install SSH Server in Ubuntu - Tech Hyme