SSH (Secure Shell) is a program to log into another computer over a network, to execute commands in a remote machine, and to move files from one machine to another. It also provides strong authentication and secure communications over insecure channels.
Also Read: Setting Up New Virtual Machine with VMware Workstation 16 Pro
Prerequisites:
- A user with sudo privileges on the server machine
- A stable Internet connection to download the required packages
- At least another system in your same network (Windows/Linux)
Let’s start by installing the SSH server (package: openssh-server) by the following command:
apt-get install openssh-server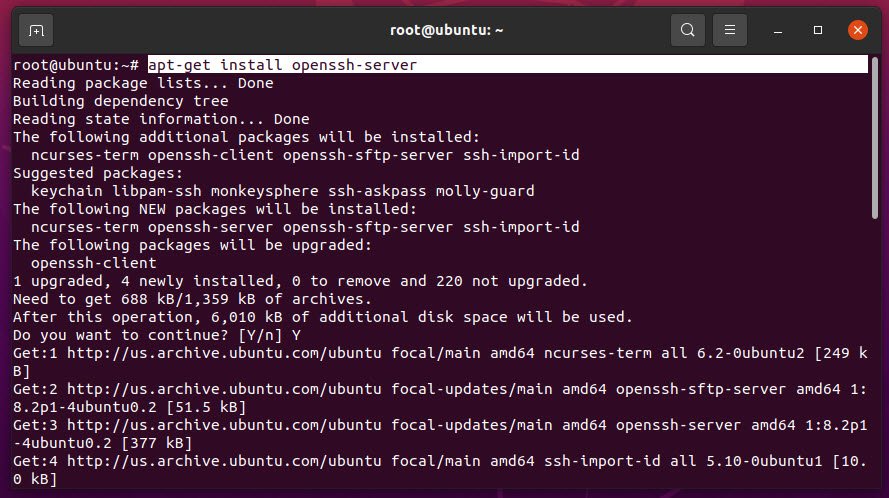
Note: Make sure that you update your Linux machine before installing new packages into it.
Once the downloading and installation of the package is done, the SSH service should be already running, but you can also check the status of your SSH service by typing the following command:
service ssh status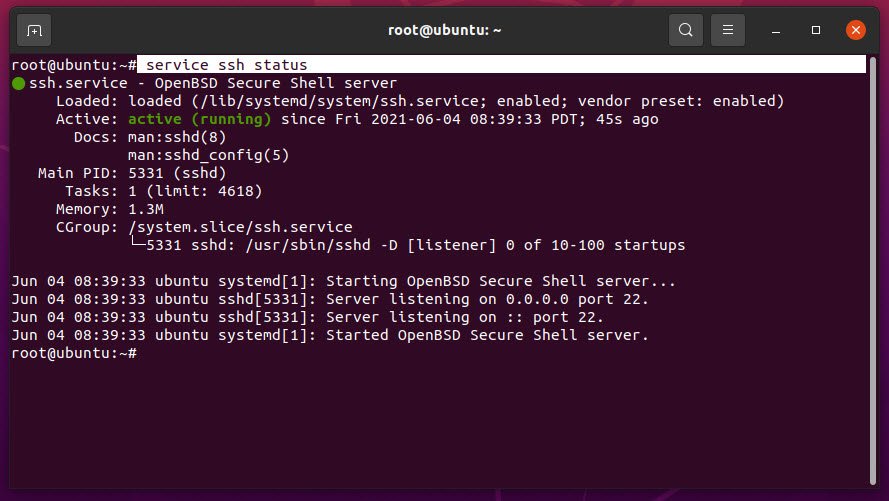
Alternatively, you can also check the status of SSH with systemctl as shown below:
systemctl status ssh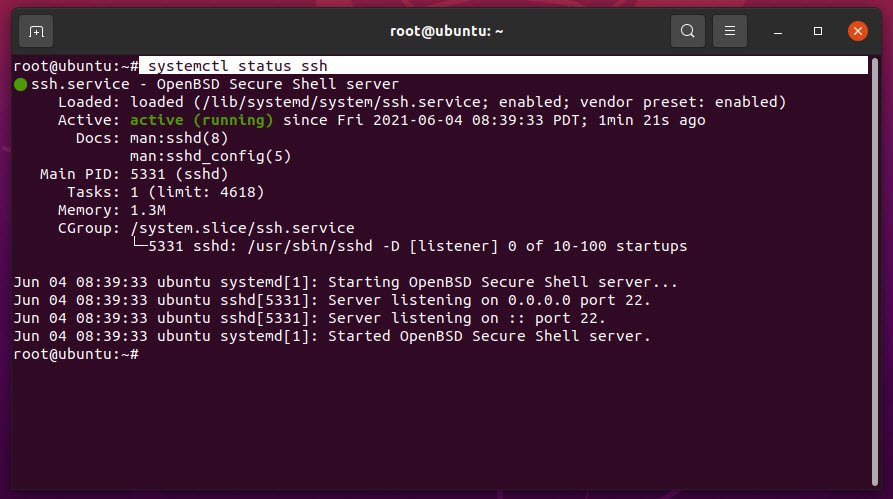
As you already knows, we’re using Ubuntu machine for this installation and Ubuntu OS comes with a firewall utility called UFW (UncomplicatedFirewall) which is an interface for iptables that in turn manages the network’s rules.
For persistent connection with SSH, you also need to run the following command:
ufw allow ssh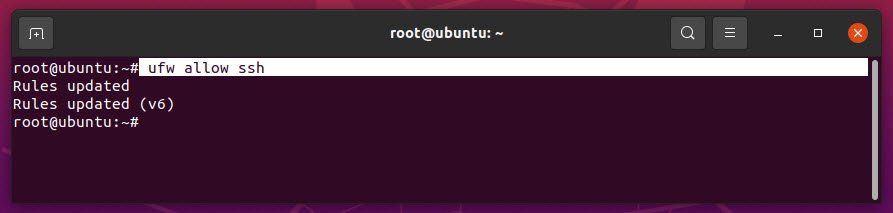
Now, You are ready to connect your machine with SSH which you can easily connect with any of the SSH client such as Putty etc.
Here’s the list of some famous SSH Clients:
- KiTTY
- MobaXterm
- WinSCP
- SmarTTY
- Bitvise SSH Client
- Terminals
- Chrome SSH extension
- mRemoteNG
- ZOC
- FileZilla
- Xshell
You can also use openssh-client package for Linux based machines (apt-get install openssh-client).
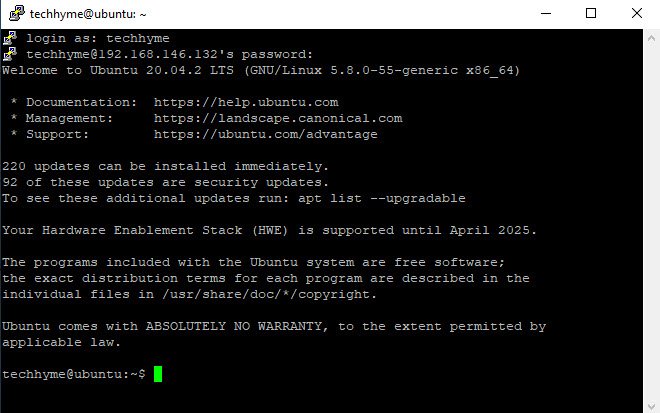
To connect, you need to know the IP address of the machine where SSH is being installed and use the following ssh command to connect:
ssh techhyme@192.168.146.132As can be seen here our testing IP address is 192.168.146.132. The first time you connect to a SSH server, it will ask for permission to add the host. Type yes and hit Enter to continue where SSH immediately tells you that your host was permanently added and then asks for the password.
Type the password and hit enter, you will be connected for sure.
For closing the SSH connection, just type exit command.
SSH Command Examples:
- To Generate SSH key: ssh-keygen
- Add Private key to Key Agent: ssh-add keylocation
- SSH login with key: ssh -i keylocation username@hostname
For more robust security, you can also change the default port of SSH (22) to some other port by changing the /etc/ssh/sshd_config configuration file and make sure that the new port must be allowed by the Firewalls.
Don’t forget to restart the service (SSH daemon) after changing the port (Command: systemctl restart sshd).
Note: It is also important to make sure the permissions of the configuration files are correct to ensure that system security is maintained.
You may also read:
- List of Variables and Metacharacters in Linux – Shell Programming
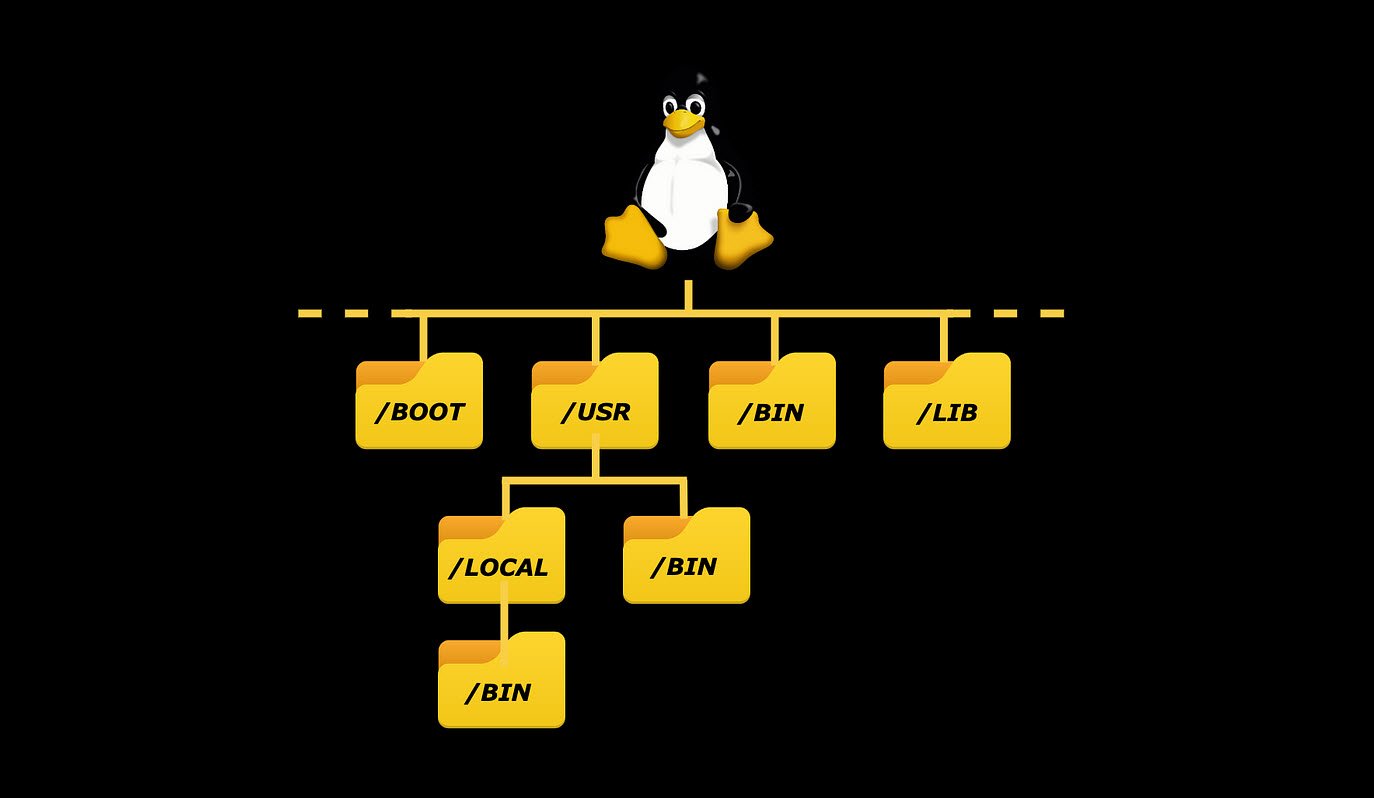
- A Quick Overview of Linux File System
- Top 77 Linux Interview Questions to Ask Candidates
- How To Install Python 2.7.18 From The Source
- How To Parse SSH Authentication Logs with Logstash
- A Comprehensive Guide to File System Commands in Linux
- Essential File Compression Commands in Linux
- Secure Shell (SSH) Protocol – A Comprehensive Guide
- Monitoring Active Connections in Kali Linux Using Netstat
- How To Easily Crack Wi-Fi Password
- 6 Most Useful Windows Command Prompt Commands
- Ripgrep – Searching for Specific File Types and Beyond
- Insert and Create Data in Elasticsearch