To find the network speed on a Windows computer, there are 3 ways:
- Using Setting
- Using Control Panel
- Using PowerShell
Method 1 – Using Settings
To see the connection speed for the network card, follow these steps:
- Step 1 – Open Settings.
- Step 2 – Click Network & Internet.
- Step 3 – Click Status.
- Step 4 – In the “Advanced network settings” section , click the “View hardware and connection properties” option .

So here you can see the connection speed in the Link speed (Receive / Transmit) field as shown below:
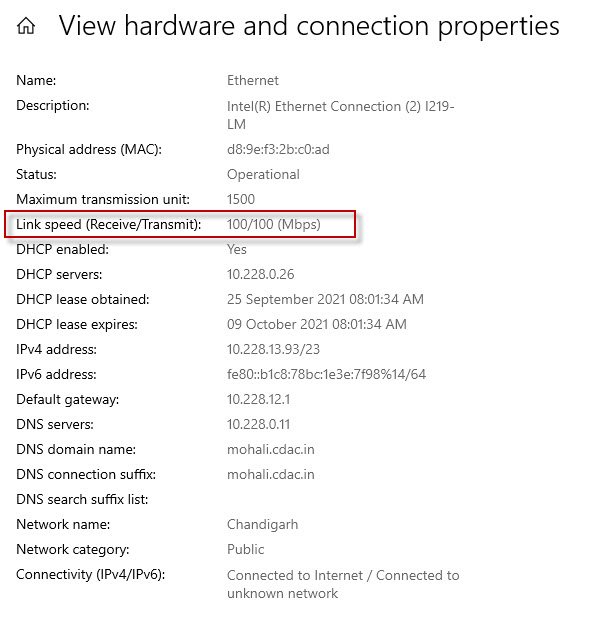
Note: If you don’t see the “Speed” listed, it may be because the network adapter is not connected to a network or because it is not supported by Windows 10.
Method 2 – Using Control Panel
To determine the network adapter speed using Control Panel settings, follow these steps:
- Step 1 – Open Control Panel.
- Step 2 – Click Network and Internet.
- Step 3 – Click Network and Sharing Center.
- Step 4 – Click Change adapter settings on the left.
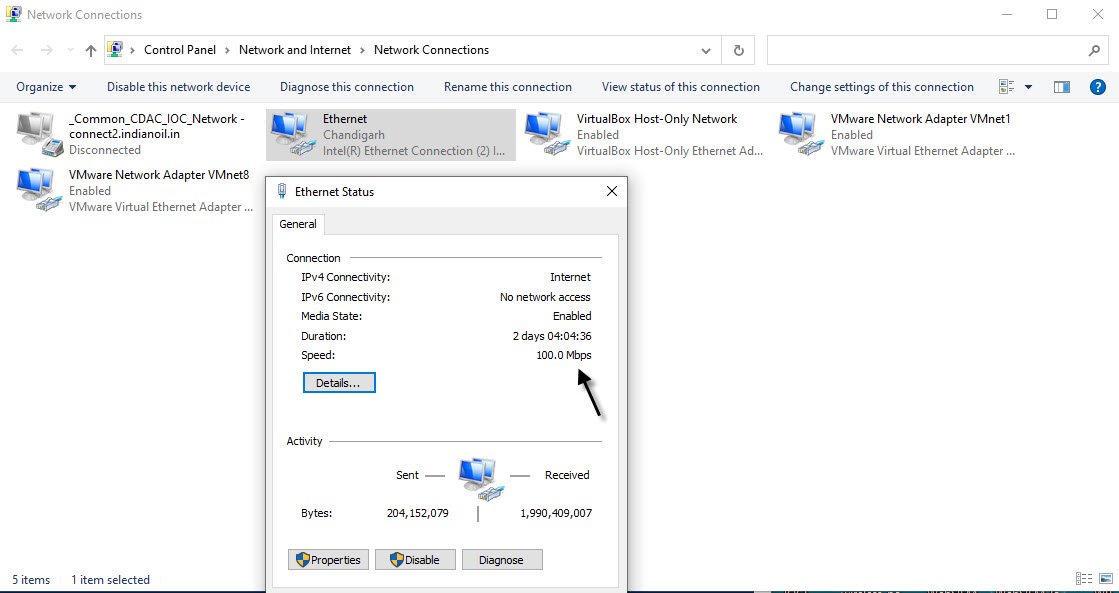
- Step 5 – Double-click the network adapter (Ethernet or WiFi).
- Step 6 – Check the connection speed in the Speed field .
Method 3 – Using PowerShell
To check the speed of Ethernet or WiFi connection on Windows 10 using Windows PowerShell, follow these steps:
- Step 1 – Open Start.
- Step 2 – Search for PowerShell and click on the top result to open the dashboard.
- Step 3 – Type the following command to define the connection speed for all network cards, and then press Enter :
- Step 4 – Check the WiFi or Ethernet network card connection speed.
Command: Get-NetAdapter | select interfaceDescription, name, status, linkSpeed

After you complete the steps, the PowerShell output will display the connection speed in a user-friendly format.