Kali Linux is one of the best operating system used by Hackers and Security Professionals. Kali Linux is an open-source, Debian-based Linux distribution geared towards various information security tasks, such as Penetration Testing, Security Research, Computer Forensics and Reverse Engineering.
Kali Linux is preinstalled with over 500 softwares, including nmap, Wireshark, Metasploit, John the Ripper, Aircrack-ng, Burp suite (Free) and many more.
Kali Linux is developed in a secure location with only a small number of trusted people that are allowed to commit packages, with each package being signed by the developer. Kali also has a custom-built kernel that is patched for injection. This was primarily added because the development team found they needed to do a lot of wireless assessments.
When people install Kali Linux OS, their goal is to use it for penetration testing or cyber security purposes. However, they often forget to secure Kali Linux itself.
There are two things to remember with these virtual machine files made by Offensive Security. First, they make these files every few months or so. As a result, Kali Linux is outdated when you install it. In our world, outdated means vulnerable. Second, everyone who installs these machines have the same settings by default.
If you are planning on doing this to work toward a career in cyber security or to improve your skills, you want to create the habit of following best security practices! So, before we exploit our security hole, let’s patch and secure our own.
1. Update
If you have a default installation of Kali Linux, you should be checking for updates every few weeks. To update Kali, first ensure that /etc/apt/sources.list is properly populated. After that you can run the following command which will upgrade kali to the latest version.
Command: sudo apt-get update
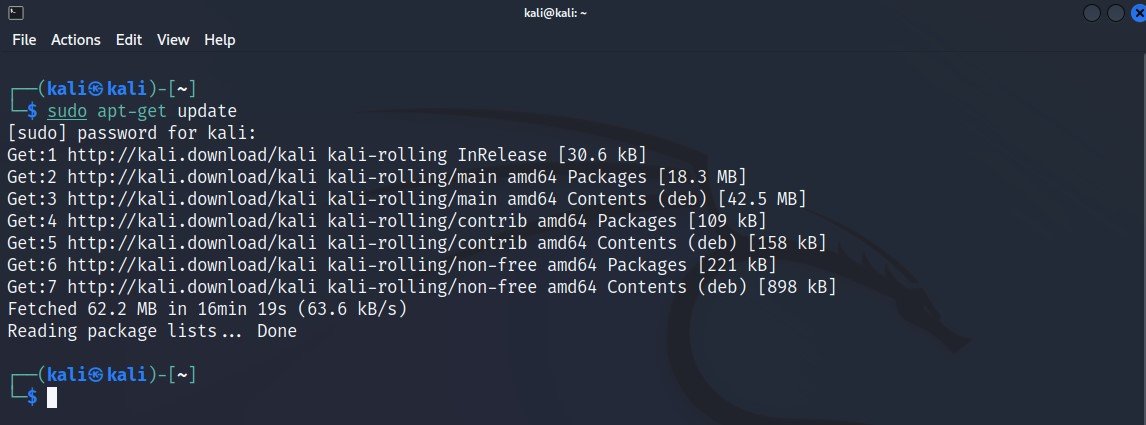
In case, if you want to upgrade all packages, then you can run sudo apt-get upgrade or sudo apt-get dist-upgrade.
2. Change Default Password
Kali Linux is set with a user named “root” and a password of “toor” by default for older versions and for new versions, the default username is “kali” and password is “kali“.
Clearly, this password is far from secure. Therefore, you must fix this issue immediately.
To change the password of current logged in user i.e. kali, type the following command.
Command: passwd
The terminal will ask you to type a new password. Type in a secure password and hit Enter. The terminal will then ask you retype the password for confirmation. Enter the same password you entered the first time and hit Enter again.
You will see a message that your password was updated successfully.

It literally takes a few seconds for an attacker to find out what OS you’re using and log in using the default Kali credentials. And with that, your computer, as well as the network behind it, is compromised.
Here are a few more tips related to password:
- Always use a strong password containing capital and small letters, numbers, and special symbols.
- Never share your passwords with anyone. If you do so, make sure you immediately change all the passwords on your system.
- Never write down your password. You never know who may see it and use it without your consent.
3. Regenerate SSH Keys
When you downloaded and installed Kali Linux, the image came with default SSH keys that allow you to authenticate to a box without a password.
The problem is that the everyone who downloaded and installed the same image have the same SSH keys. A malicious attacker will use these known keys and conduct what is known as a Man in the Middle attack on your SSH session.
This process can be inconvenient for those who just want to use Kali Linux for their lab. All the SSH keys are located in the /etc/ssh directory. The keys we need to replace are the ones labeled ssh_host_*.
To view all existing ssh_host_* files, the command is:
Command: ls -al /etc/ssh
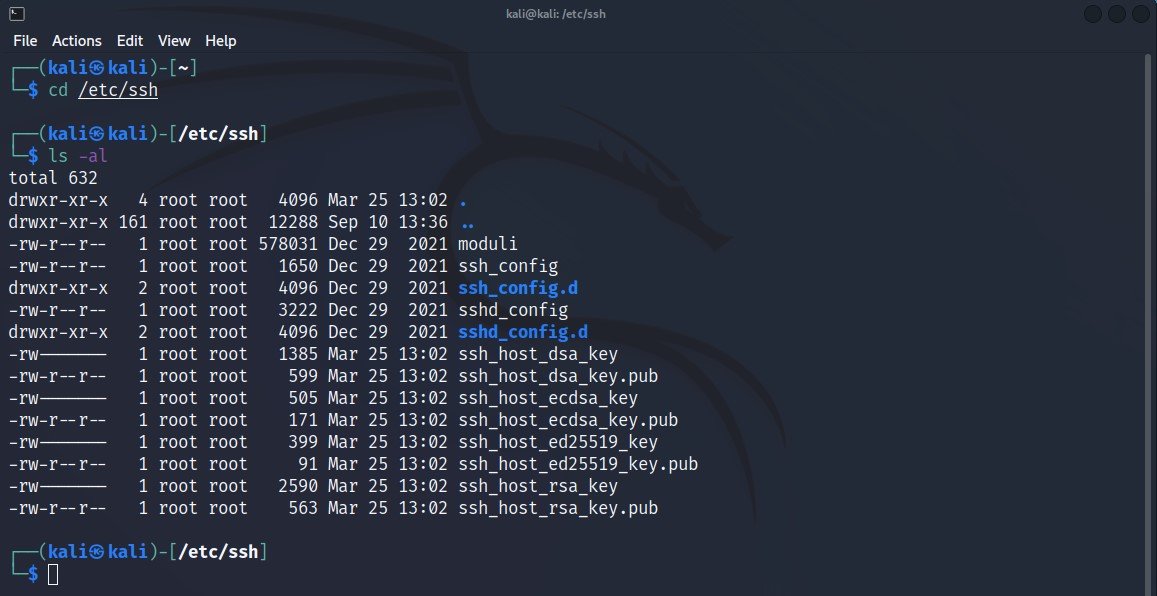
Before to replace all keys, make sure that you must take a backup of your old ssh_host_* keys.
Command: sudo mv ssh_host_* backupkeys
This will move all the keys you want to change into the folder i.e. backupkeys you just created.
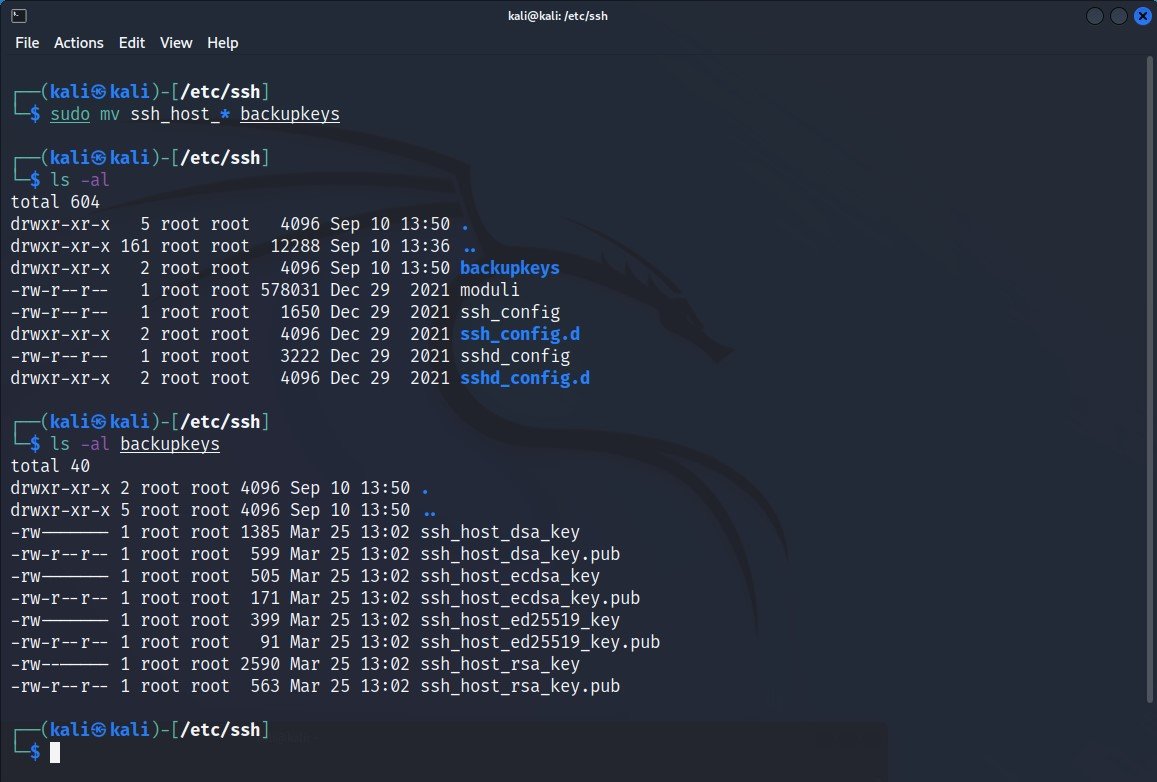
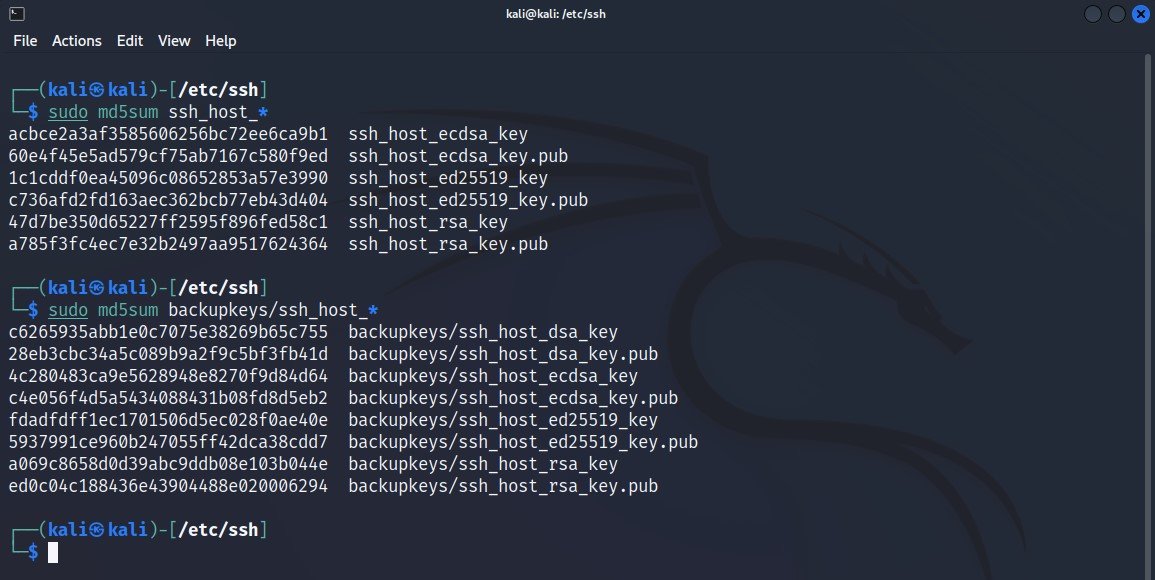
However, you do want to confirm that your new SSH keys are indeed new. To do that, you can check the MD5 hashes of your old keys and compare them to the new one.
In your command terminal and in the /etc/ssh directory, enter the following command:
Command: sudo md5sum backupkeys/ssh_host_*

Now that the keys have been successfully moved, you can move forward to the next step. Now you need to create new keys.
In the terminal, run the following command to reconfigure your ssh server.
Command: dpkg-reconfigure openssh-server
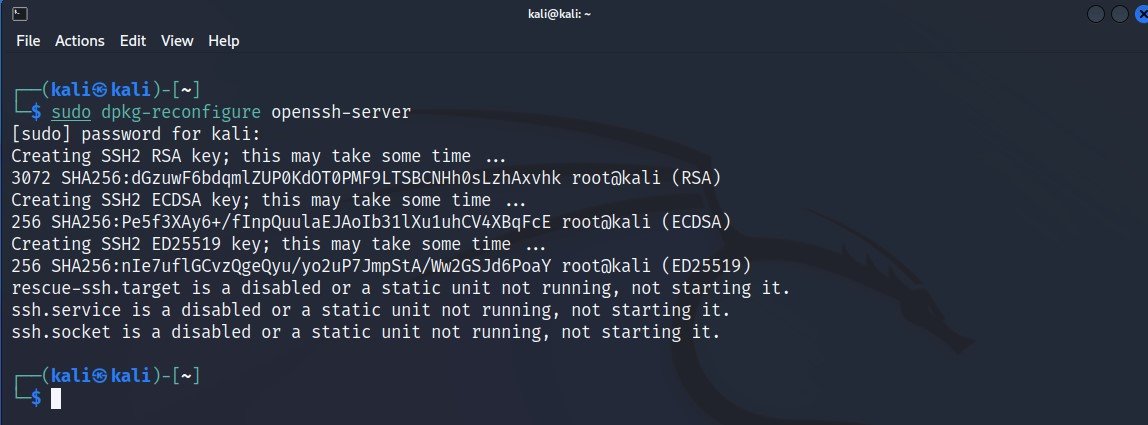
Now, let’s compare old key values to the new ones.
Command: sudo md5sum ssh_host_*
4. Add Low Privileged User
Like as we mentioned in the first step, using the Root account is very dangerous. Therefore, you must create and use an unprivileged or lowe privileged user to protect yourself.
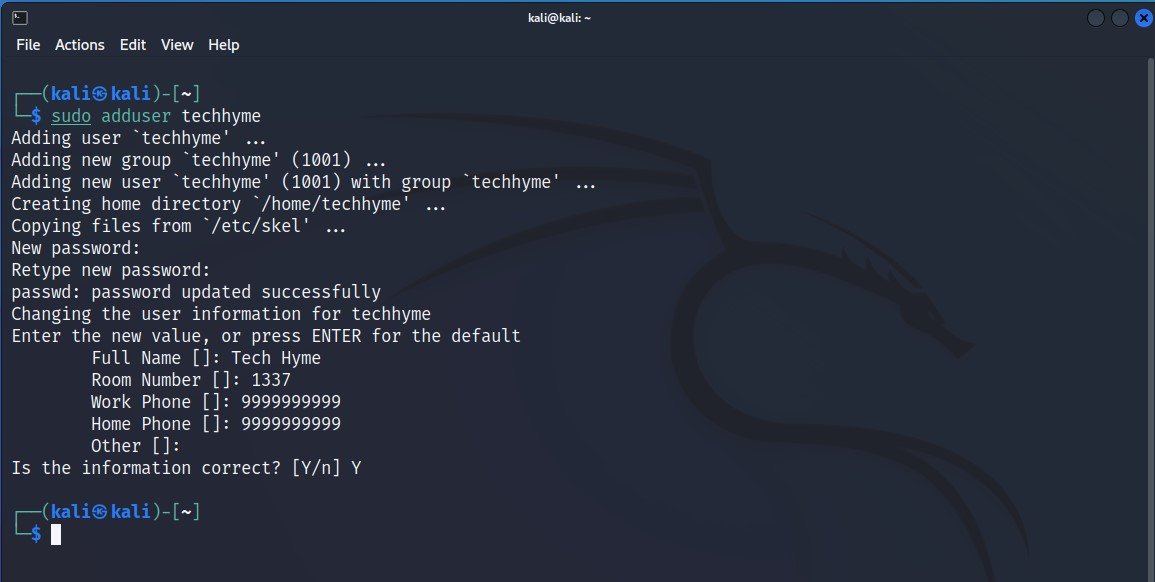
To create a new user, open a terminal and type the following command:
Command: sudo adduser techhyme
It will ask you for a password and to confirm the password. Create a secure password but be sure not to use the same password you used for your root account or any other account.
Now you want to add this new user i.e. techhyme to the “sudoers” group, so that you can use “sudo” to do administrative tasks.
Command: sudo usermod -a -G sudo techhyme
Now that you have the user created and added it to the sudoers group, you need to be able to use this account and run commands as root when needed.
Command: apt-get update
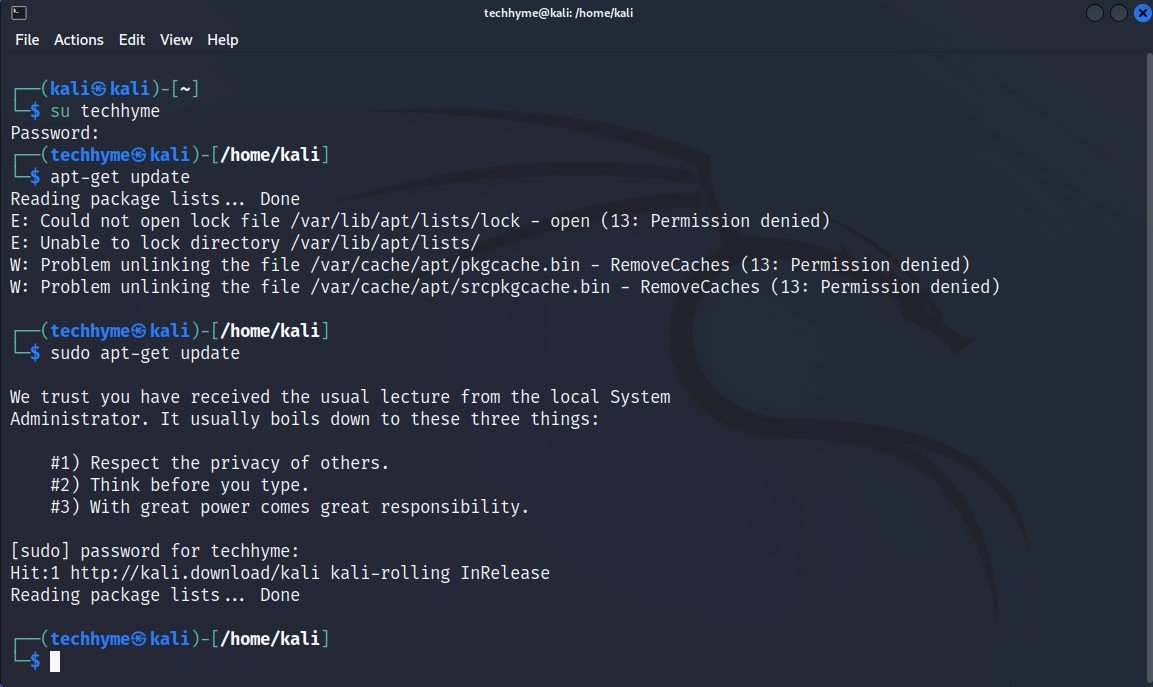
Notice the error message and the question “Permission Denied” or “Are you root?“. This tells that you don’t have permission as this user to run elevated commands. Now let’s run the command again but we type sudo before the command.


Pingback: Top 7 Best Phones (Android/iOS) You Can Buy in 2024 - Tech Hyme
Pingback: [Linux] Enable Remote Access to phpMyAdmin - XAMPP/LAMPP - Tech Hyme
Pingback: 200+ Kali Linux Commands - Updated Cheatsheet - Tech Hyme
Pingback: Mastering Ubuntu: Essential Command Line Tricks - Tech Hyme
Pingback: Top 10 Essential Linux Commands For Handling Files and Directories - Tech Hyme
Pingback: 6 Different Type of RootKits You Need To Know - Tech Hyme
Pingback: Decoding Computer Lingo - A Guide to Essential Terms - Tech Hyme
Pingback: 6 Most Useful Windows Command Prompt Commands - Tech Hyme
Pingback: Apple Ends Pay Later Loan Scheme in the US - Tech Hyme