
Windows 10 is one of the world’s most popular operating system by Microsoft. Updating the OS is very important for system maintenance, better security and faster speed. Microsoft’s Windows 10 is rapidly catching up around the world.
Also Read: How To Enable Telnet Client in Windows 10
Windows 10 is a major release of the Windows NT operating system developed by Microsoft. On Windows 10, there are many ways from where you can easily check your “windows update history” to see a list of updates installed on your computer.
The Windows 10 update history can also come in handy when you want to know more about a recently installed quality update.
1. Using Settings
Settings on Windows 10 allow you to control almost all of your computer’s activities at all times.
To view Windows Update History using Settings, navigate to Start Menu and navigate to Settings -> Update and Security.
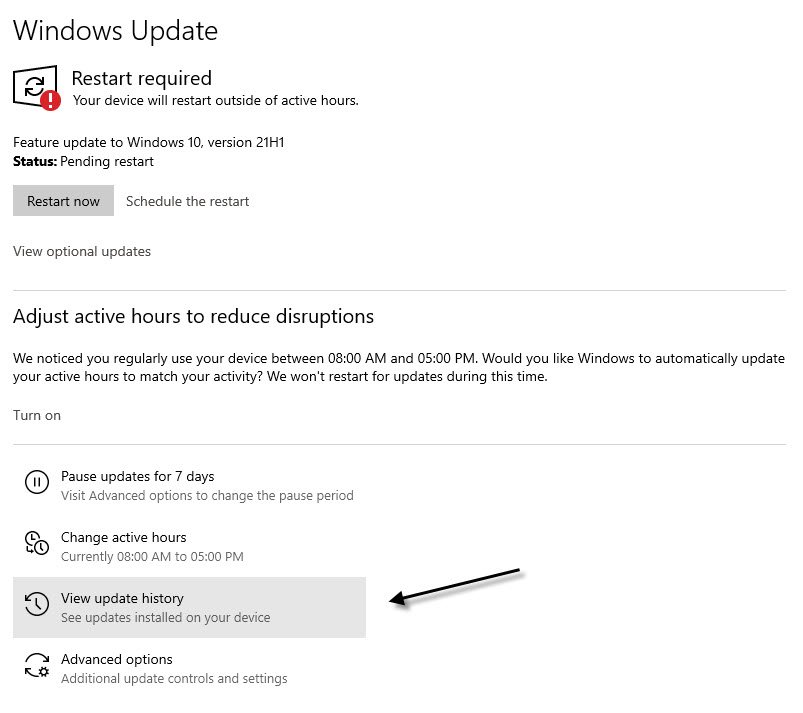
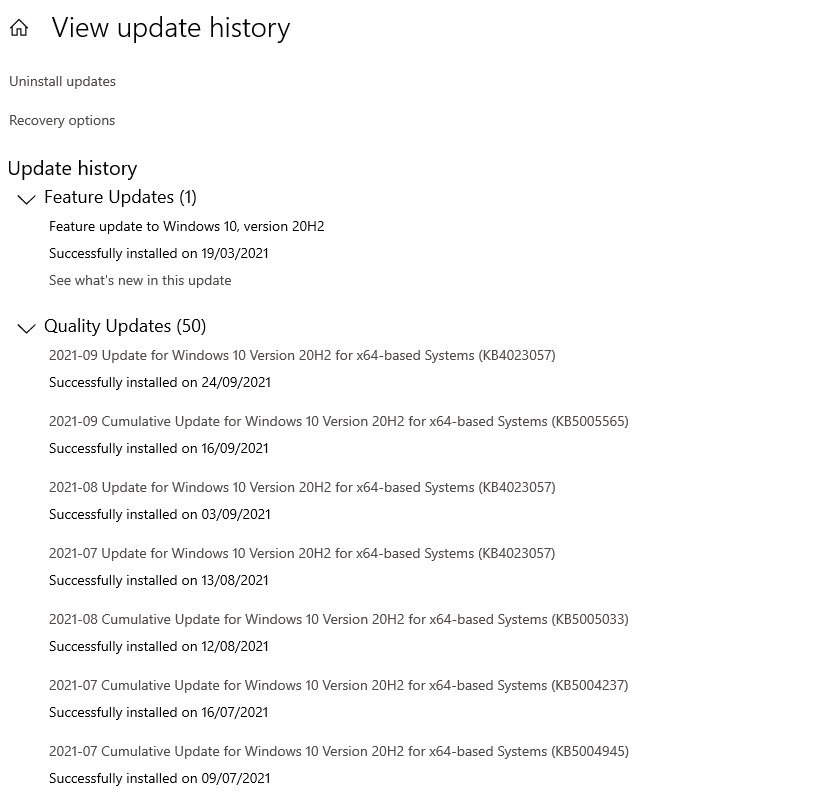
Next you need to click on View Update History. In the update history list, you will get a lot of information such as: Update name, date and time of update, version code.
2. Using Command Prompt
Command Prompt is Windows command line terminal which provides a lot of information related to your system.
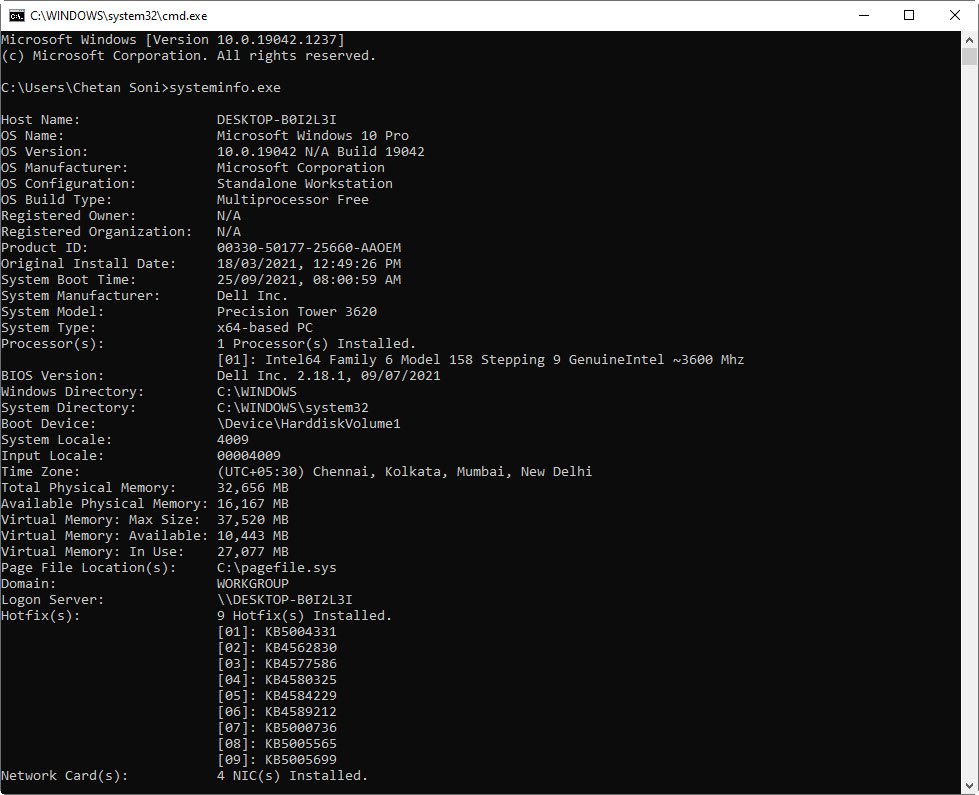
To view Windows Update History using CMD, type the following command and press enter:
Command: systeminfo.exe
3. Using Control Panel
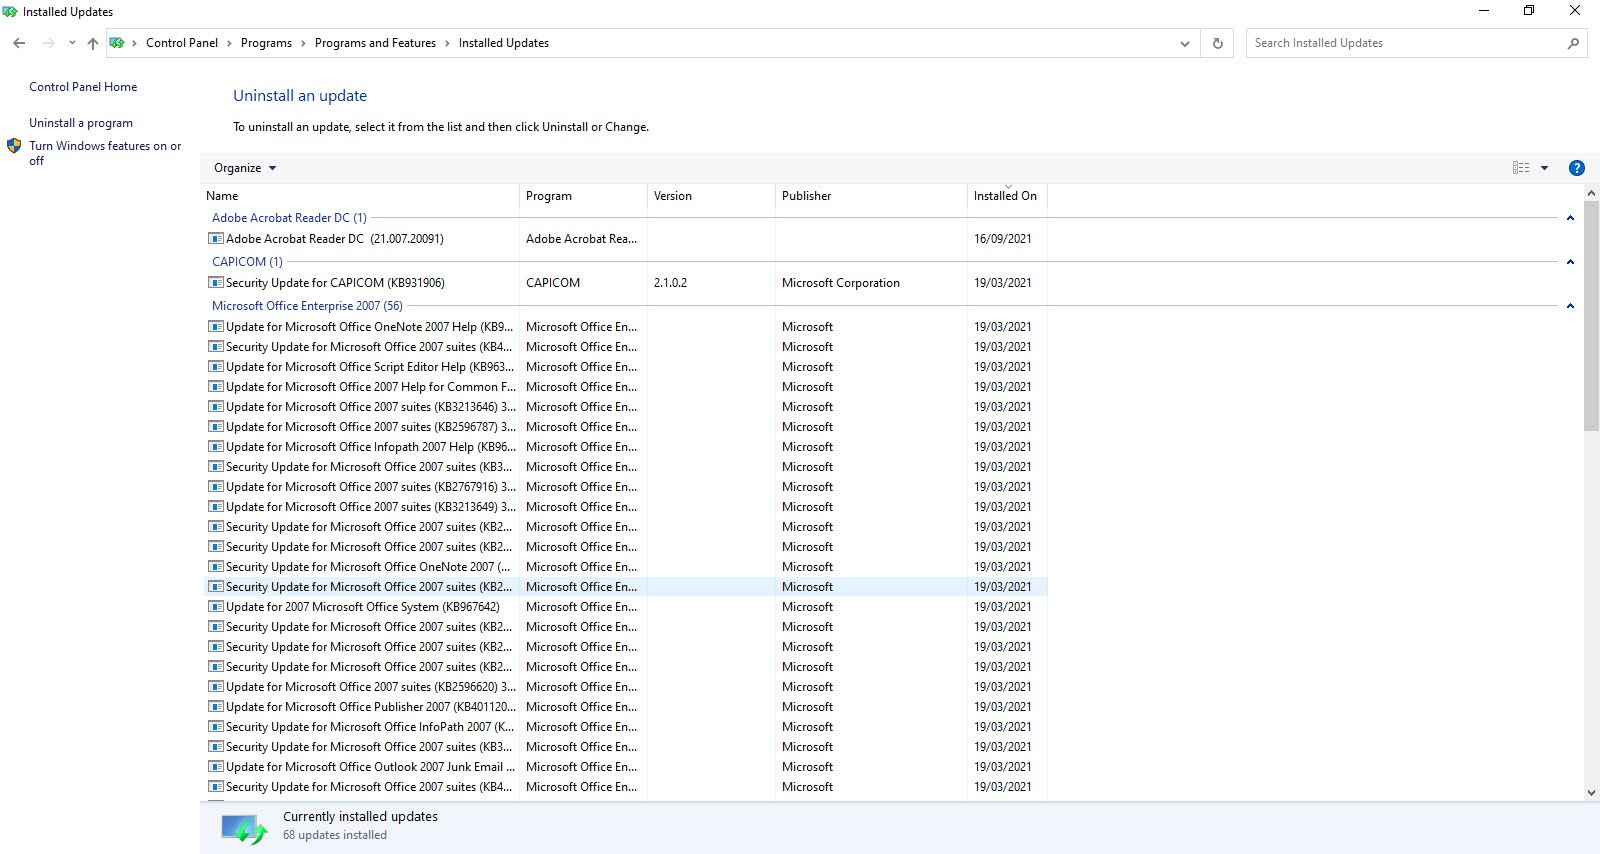
Control Panel is very special for the computer because inside this panel there are all the settings from which we can control all the things of the computer. You can use the Control Panel to change various settings for Windows.
To view Windows Update History using control panel, you have to navigate Control Panel -> Programs -> Program and Features -> View Installed Updates
4. Using PowerShell
PowerShell is an another terminal like the Command Prompt with more informative and powerful. Basically this tool has been designed for system administration and automation.
Built on the .NET Framework, Windows PowerShell enables IT professionals and developers control and automate the administration of Windows and applications.
To view Windows Update History using Windows PowerShell, type the following command and press enter.
Command: Get-Hotfix
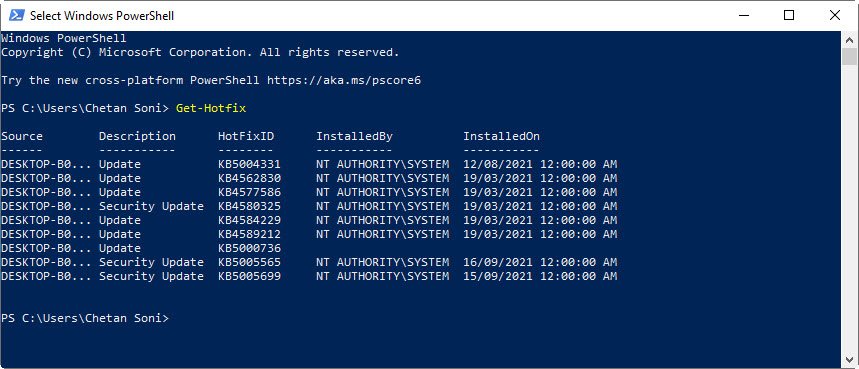
A list of updates will appear for you, and in case, if you need to look carefully, please pay attention to the Hotfix ID or you can also type the following command to get the full information about the particular Hotfix ID.
Command: Get-Hotfix KB5005699

Note: Don’t forget to run CMD or Windows PowerShell as an Administrator.
Happy Reading!
You may also like:- How to Perform Network Security Audits Using Kali Linux
- How to Harden Kali Linux for Maximum Security
- How to Use Python for Ethical Hacking in Kali Linux
- How to Write Bash Scripts in Kali Linux
- [Solution] Missing logstash-plain.log File in Logstash
- Understanding Netstat – The Network Monitoring Tool
- Using Elasticsearch Ingest Pipeline to Copy Data from One Field to Another
- Top 10 Useful Windows Commands
- Essential Commands For Process Management in Kali Linux
- How To Install Python 2.7.18 From The Source


