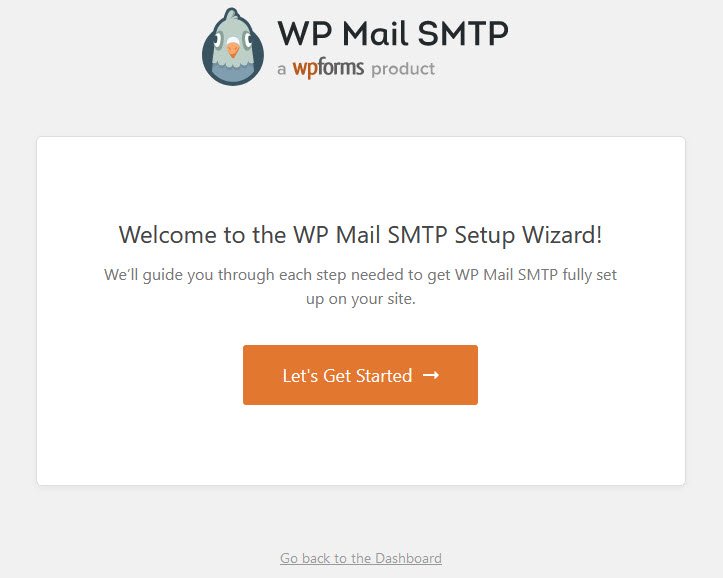
Having problems with your site not sending emails? Email has been a major part of the Internet revolution, and not just because it has streamlined the junk mail industry.
When a message is sent to your email address, it is normally stored in an electronic mailbox on your email server until you tell the email client to download the message. Email programs use a no. of application level protocols to send/received information like SMTP, POP3 and IMAP.
Over 2+ million websites use WP Mail SMTP plugin to send their emails reliably.
WP Mail SMTP plugin fixes your email deliverability by reconfiguring WordPress to use a proper SMTP provider when sending emails.
Installation of WP Mail SMTP –
First thing you need to visit the Plugins » Add New page inside your WordPress admin area. Find the plugin by typing “WP mail SMTP“. After that, you will see a bunch of listings like the example below:
Click on “Install Now” button to install the WP Mail SMTP plugin.

WordPress will now download and install the plugin for you. After this, you’ll notice the “Install Now” button will change into the “Activate” button.
Go ahead and click on the activate button.
After the activation, you’re ready to configure the plugin’s settings. You can find these settings under WP Mail SMTP » Settings.
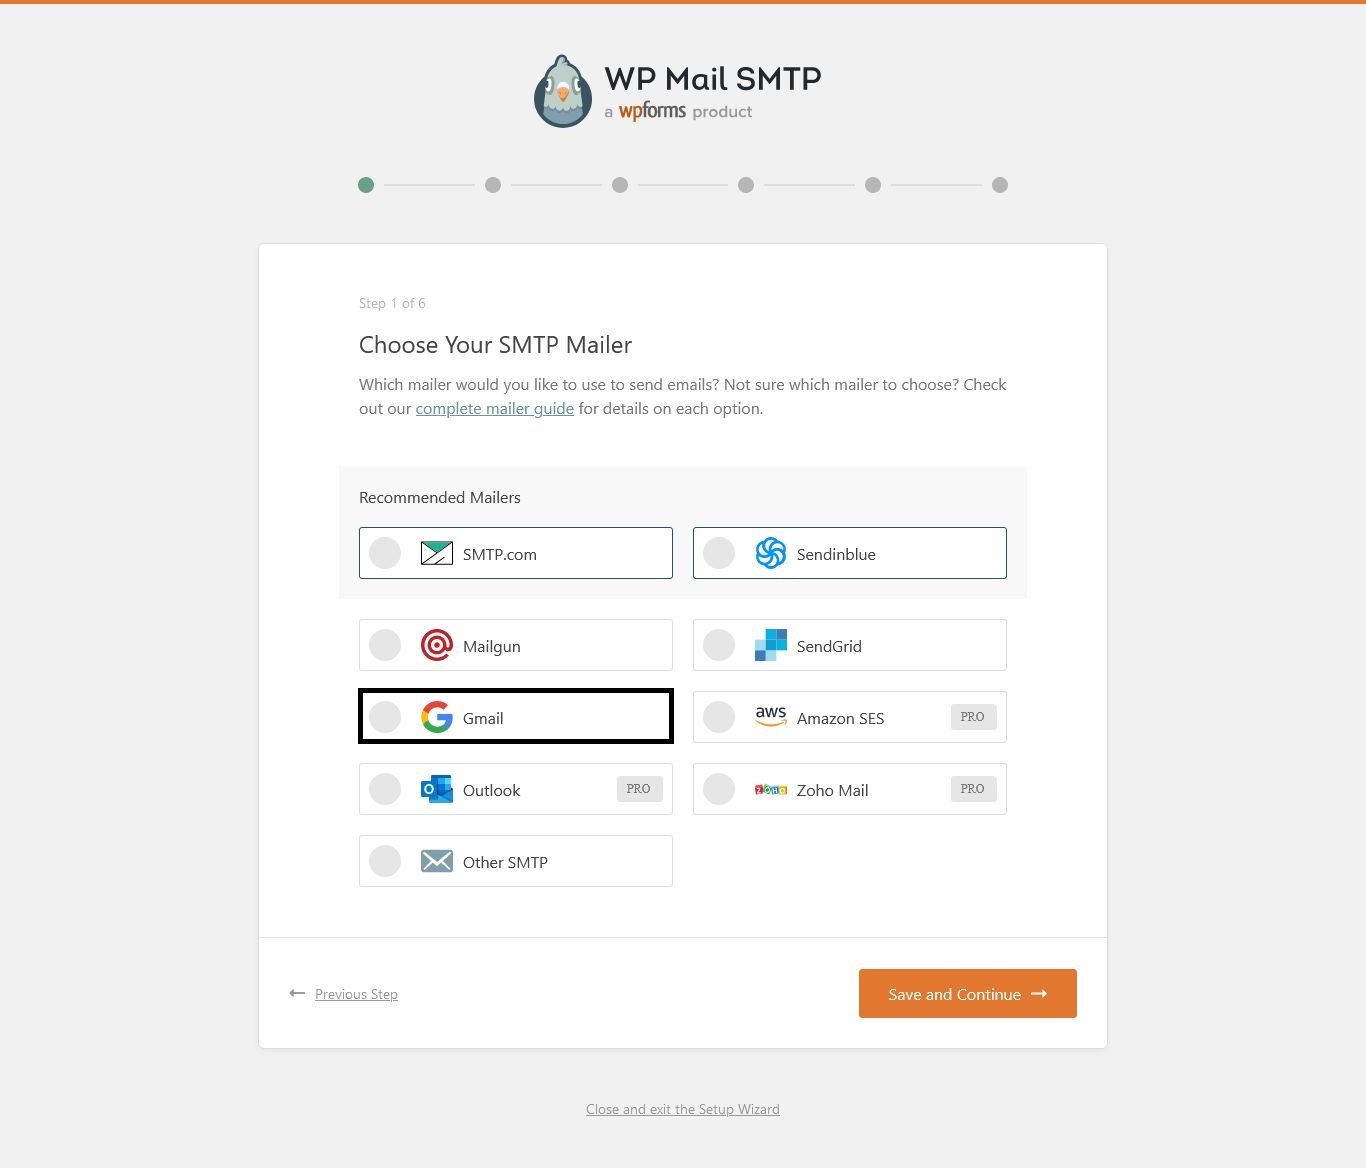
This is where you can choose which mailer you’d like your site to use.
Some recommended mailers are: SMTP.com, Sendinblue, Mailgun, Sendgrid, Gmail, Amazon SES (PRO), Outlook (PRO), Zoho Mail (PRO) and Other SMTP.
To configure the Gmail mailer, you’ll need to select the Gmail option and click on “Save and Continue” button as shown below:
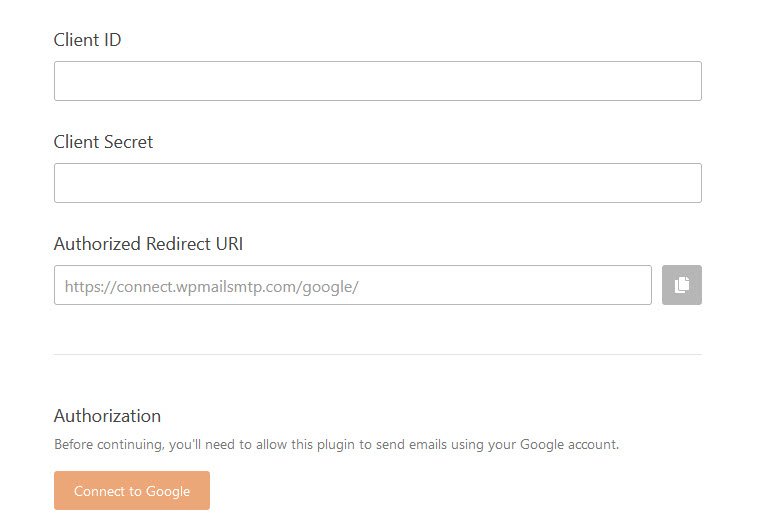
After that, you will see a new section where you need to enter the Client ID and Client Secret ID which you can easily generate by signing into your Gmail account and access Google Cloud Console application.
API Creation with Google Cloud Platform
Once you’ve logged into your Gmail account, you’ll see a form named Register your application for Gmail API in Google Cloud Platform.
You may be asked to agree to the Terms of Service if it’s your first time using Google Cloud Console.
Simply agree all terms of service and select the country of residence from the dropdown menu.
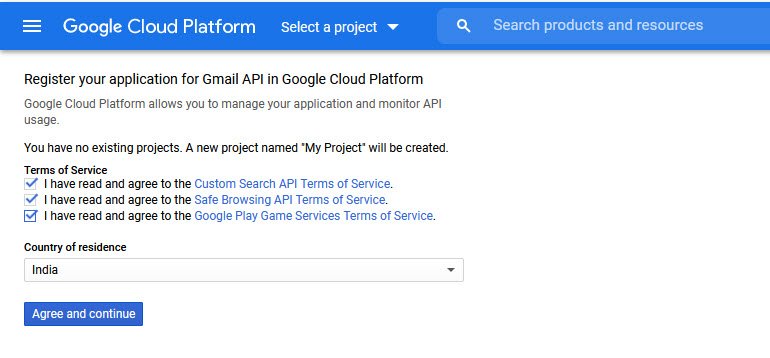
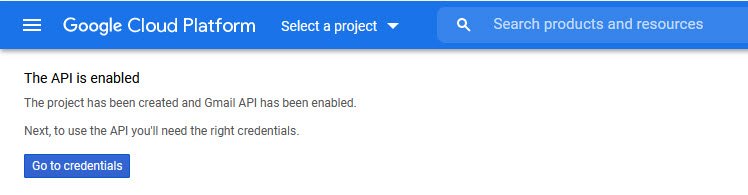
After you’ve configured, go ahead and click the Agree and Continue button to move on to the next step where you can see the confirmation message “The API is enabled“.
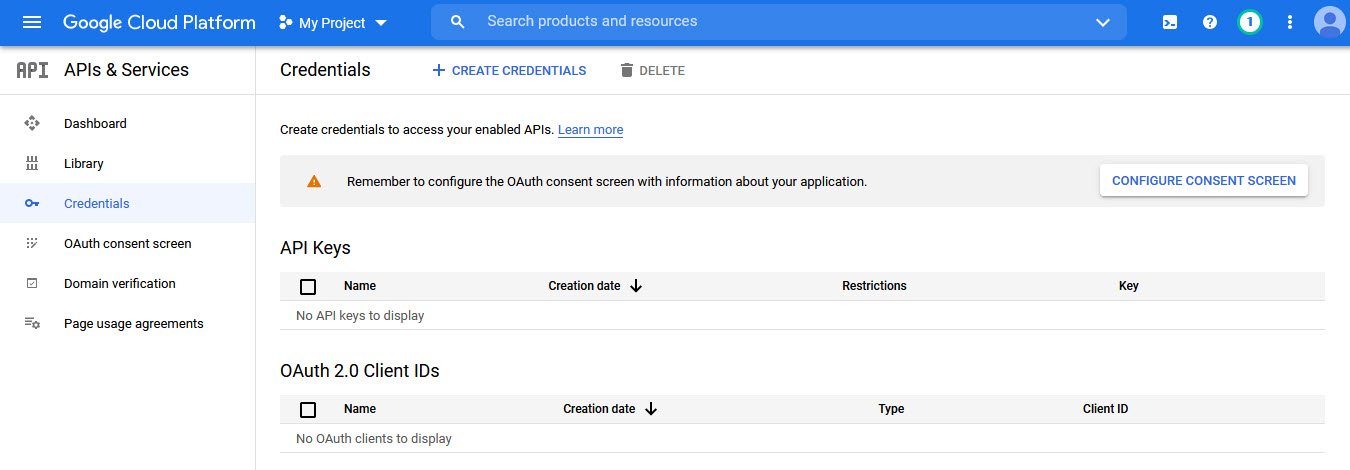
To move further, click on Go to credentials button.
On this page, you’ll be asked a few questions to help Google determine the credentials you need.
So here, click on Gmail API from dropdown menu and select either User data or Application data option and proceed further by clicking the Next button.
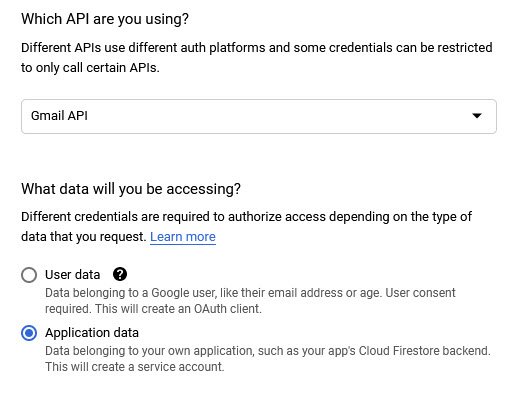
In case, if you don’t see an option for the Gmail API in the dropdown, be sure that you have the Gmail API enabled for your account.
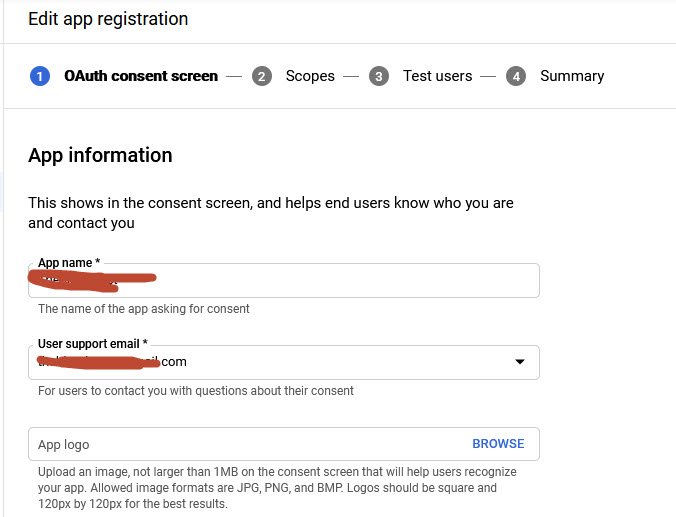
In next step, Google will ask for some basic App information by clicking on “Configure Consent Screen“.
This isn’t very important, since nobody else will be using your app, but some fields are still marked as required:
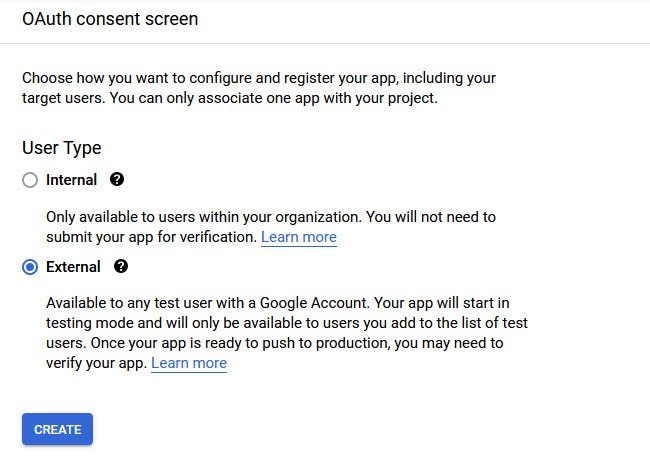
- User Type – External
- App Name –
- User Support email –
- App Logo –
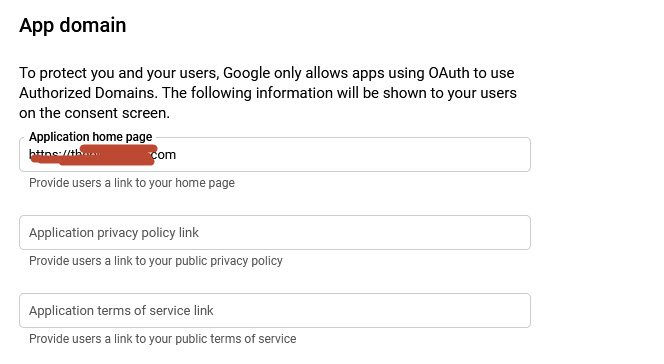
Next you also have to provide the following details to Google related to your app domain:
- Application Homepage – (required)
- Application Privacy Policy Link – (optional)
- Application Terms of Service Link – (optional)
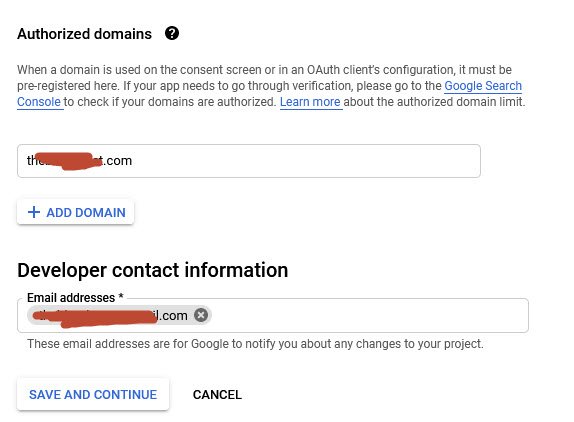
You might also need to add your domain name and developer contact information (email address) under Authorized domains section as shown below:
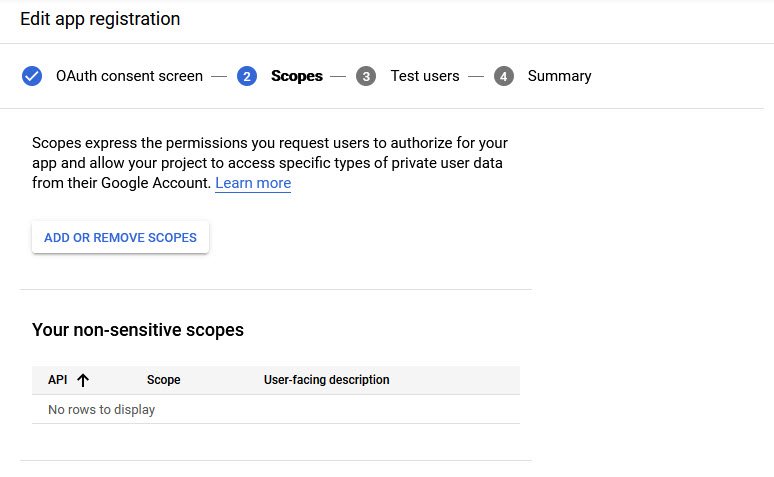
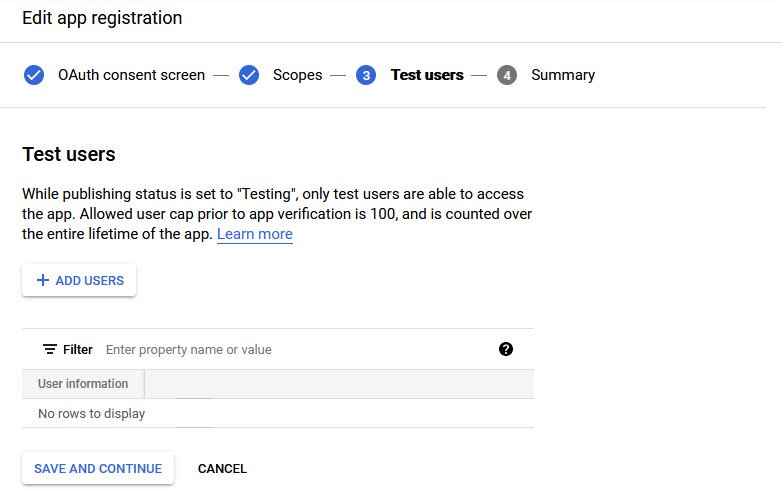
Scroll down to Scope and Test Users section, simply click on Save and Continue button.
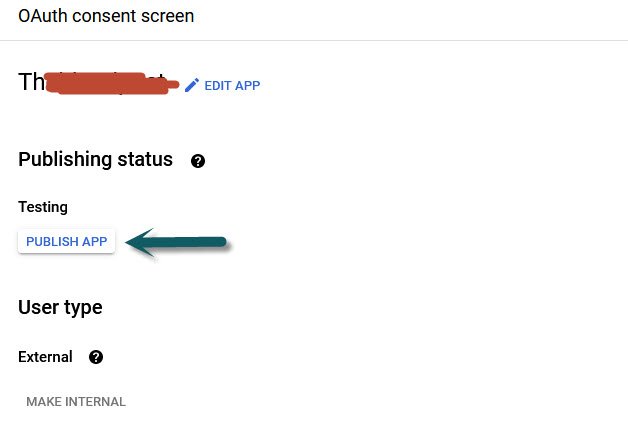
Finally you need to publish your application by clicking the “Publish App” button as shown below:
d
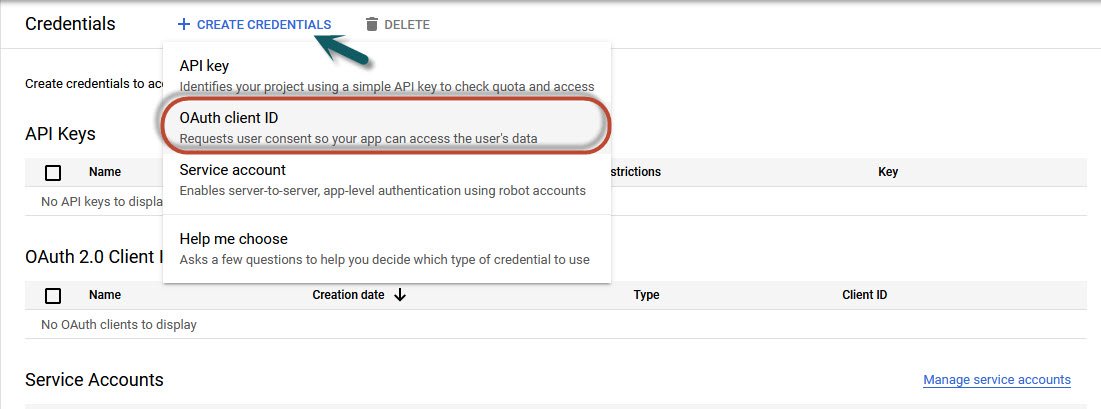
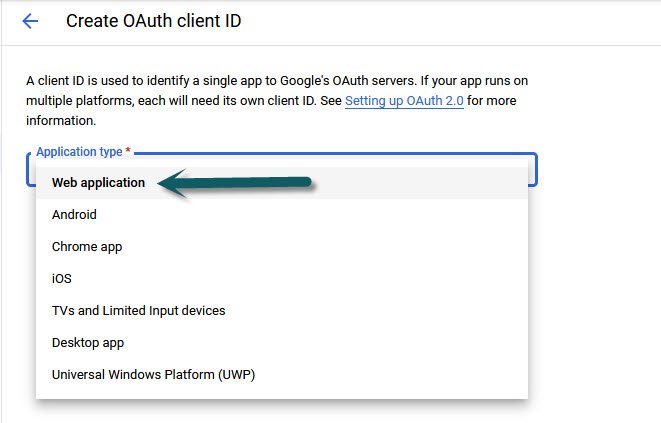
Now next step is to create the Credentials by clicking the Create Credentials button and select “OAuth Client ID” option where you need to select the Web Application option from the dropdown menu.
You can leave the Name Field as default text or you can enter any Name.
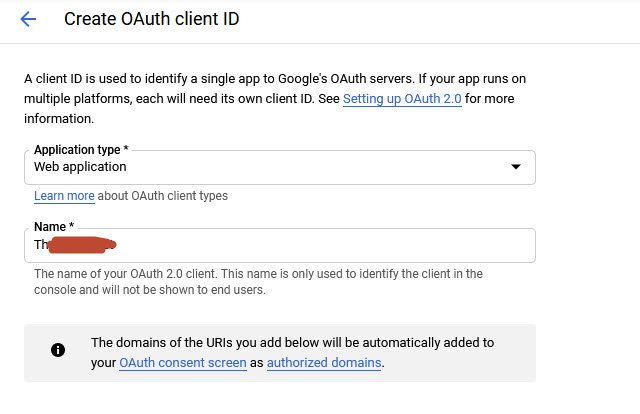
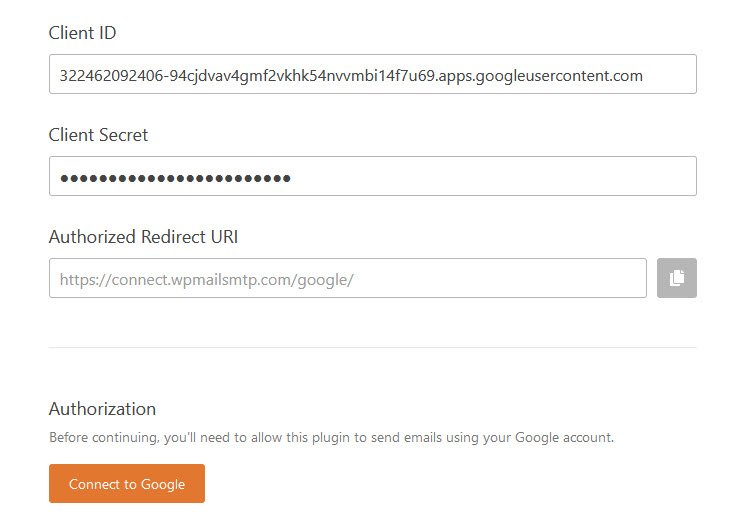
Furthermore, you also need to add your application homepage URIs under Authorized JavaScript origins section and the respective Authorized redirect URIs which will be https://connect.wpmailsmtp.com/google/.

Click on the Create button to complete this step. At this point you are done with the Create credentials setup, so you can copy the both Client ID and Client secret ID.
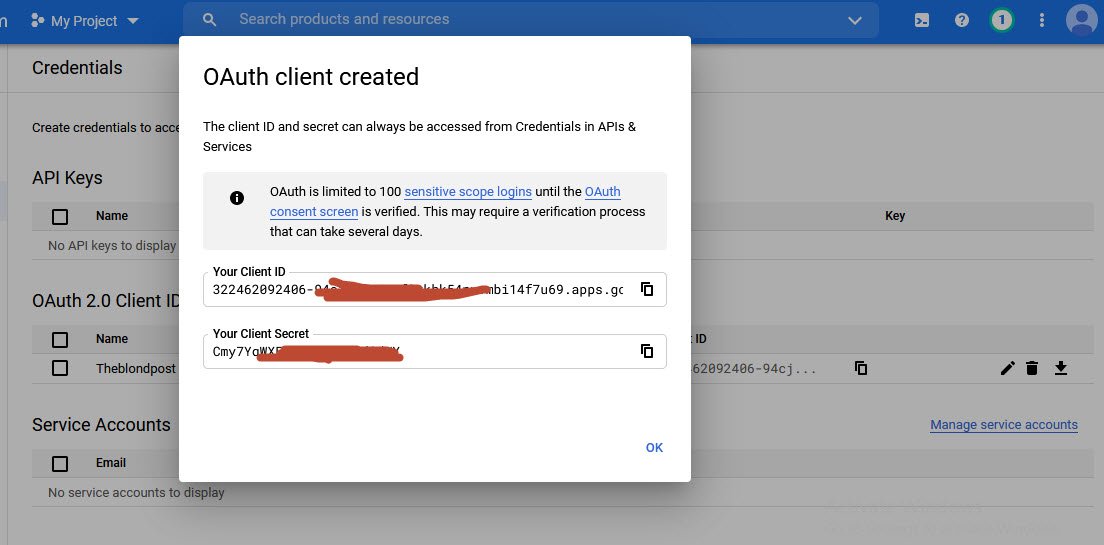
Go back to your WP Mail SMTP plugin Wizard, and copy both of these values into your WP Mail SMTP settings.
Once those have been added, click Connect to Google button.
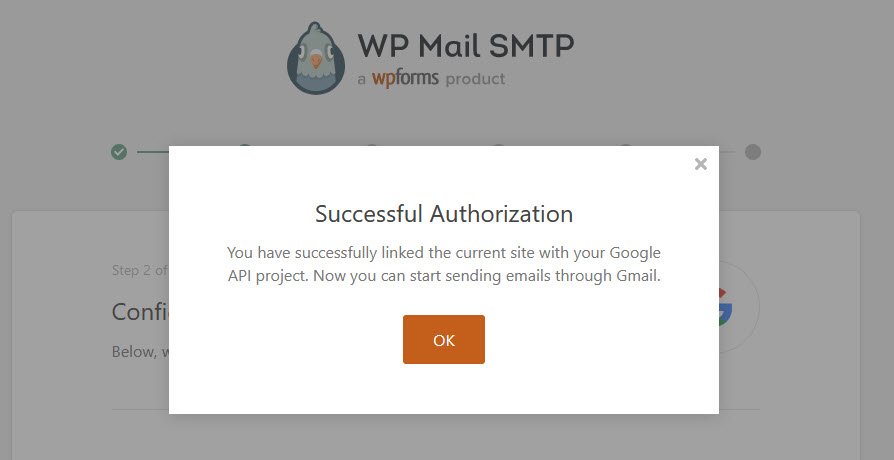
This will open a login screen for Google. Go ahead and log into the account you’re setting up SMTP with.
If you are connecting with a free Gmail account you might see the below warning screen. Click on the Advanced link in the bottom left corner and click on Go to wpmailsmtp.com (unsafe).

Don’t worry, Google only displays this warning, because the app is not verified by them. There is no need for the app to be verified since you created this app just for your own use.
Next, you’ll see a Successful Authorization message.
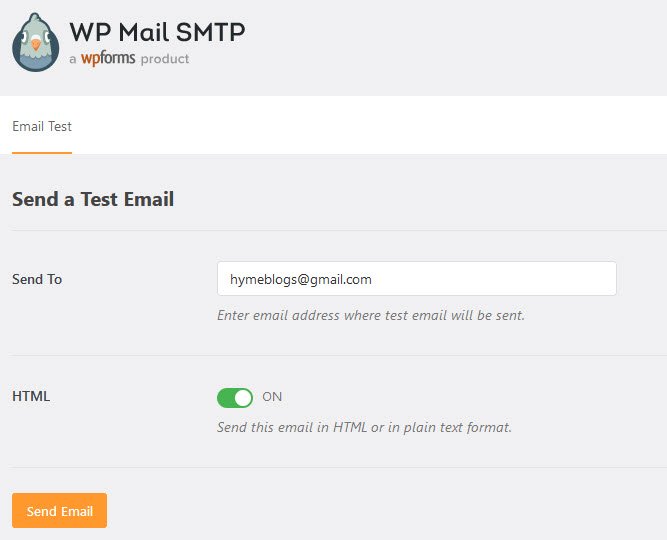
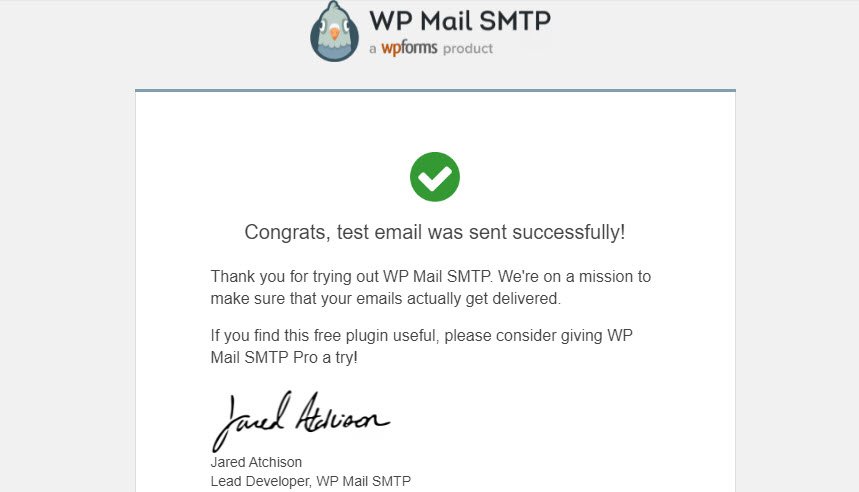
Now that the connection is complete, and you’re ready to send a test email under the Email Test tab.
Once the Test Email tab is open, you’ll need to enter a valid email address and click the Send Email button. Be sure to use an email address you have access to so you can confirm the email is delivered.
When the test message has been sent, you’ll receive the following mail at the email address you entered.
Also Read:
- How To Install WordPress – Step By Step Tutorial
- Top 10 Internet Security Threats
- Top 5 High Rated WordPress Backup Plugins
- 20 Tips and Tricks to Make Your WordPress Website More SEO-Friendly
- WooCommerce Vs Shopify – In Depth Tech Hyme Review
- Importance of SEO Tags and Keywords
- Create Social Share Buttons (Facebook/Twitter/Linkedin/Pinterest) in PHP
- [Compilation] SEO Tips and Tricks, Resources and Useful Websites
- 100+ WordPress Alternatives CMS (Content Management Systems)
- [Solution] Discovered – Currently Not Indexed & Crawled – Currently Not Indexed