SMB (Server Message Block) is a network protocol used for file and printer sharing between computers. SMB allows for seamless file and resource sharing between computers and is commonly used on local area networks (LANs) and wide area networks (WANs).
SMB is used by various operating systems, including Windows, macOS, and Linux, to share resources such as files, printers, and serial ports. There have been several versions of SMB protocol over the years, with SMB3 being the latest and most widely used version, providing improved security, performance, and functionality compared to previous versions.
Note: SMB protocol has also been used as a vector for various cybersecurity threats, such as the WannaCry ransomware attack in 2017, so it’s important to ensure that SMB protocol is properly secured and configured on networks where it is used.
The SMB2/SMB3 protocols are enabled by default in Windows. To disable SMB3 protocol, you can either use PowerShell or Command Prompt.
1. Disable SMB3 Protocol using Windows PowerShell –
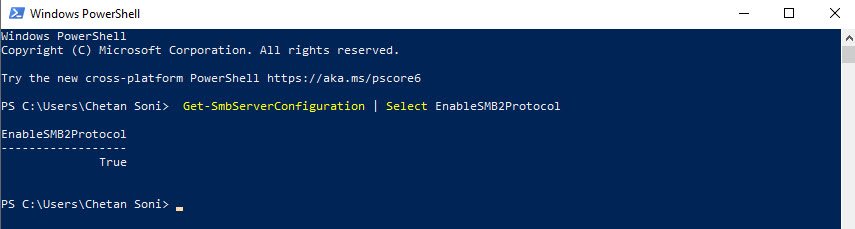
Step 1 – Open the Windows PowerShell as an administrator and run the following command:
Command: Get-SmbServerConfiguration | Select EnableSMB2Protocol
With above command, you can easily verify that SMB3 is enabled or not. If the protocol is enabled, you will see “true” in the response.
Step 2 – To turn off SMB3, execute the following command.
Command: Set-SmbServerConfiguration -EnableSMB2Protocol $false
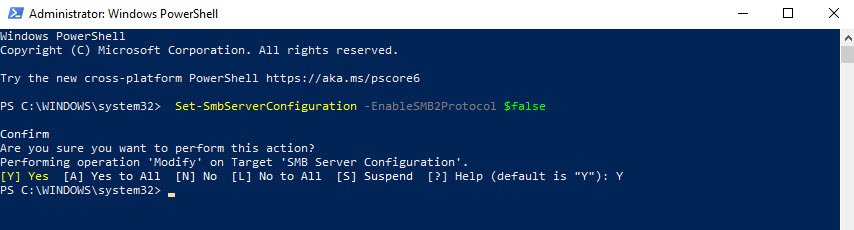
Windows PowerShell will ask for your confirmation, type Y or A and press Enter to confirm.
When disabled, you can verify it by executing the first command. If the protocol is disabled, you will see “false”.

Step 3 – To reactivate SMB3, you can use the command below.
Command: Set-SmbServerConfiguration -EnableSMB2Protocol $true

2. Disable SMB3 Protocol using Windows Command Prompt –
You can also use the Command Prompt (CMD) to disable SMB3. The only problem is that it’s not as intuitive as the PowerShell method, but it works anyway.
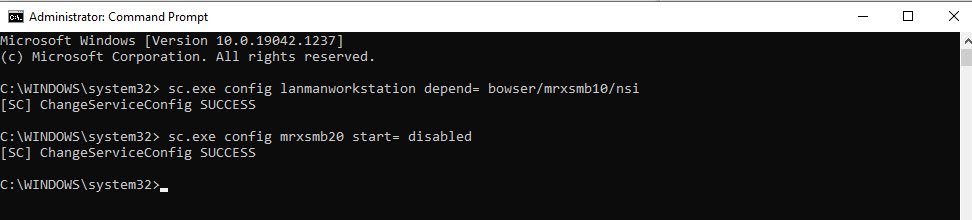
Step 1 – Open CMD, and run the following commands:
Command: sc.exe config lanmanworkstation depend= bowser/mrxsmb10/nsi
Command: sc.exe config mrxsmb20 start= disabled
When done, restart Windows to apply the changes.
After reboot, the SMB3 protocol will be disabled. To re-enable the SMB3 protocol, open the Command Prompt with administrator rights and execute the following commands one after the other.
Command: sc.exe config lanmanworkstation depend= bowser/mrxsmb10/mrxsmb20/nsi
Command: sc.exe config mrxsmb20 start= auto

You may also like:
- How To Install Python 2.7.18 From The Source
- How To Parse SSH Authentication Logs with Logstash
- How To Easily Crack Wi-Fi Password
- 6 Most Useful Windows Command Prompt Commands
- Ripgrep – Searching for Specific File Types and Beyond
- Insert and Create Data in Elasticsearch
- Manage Time and Date in Linux with timedatectl
- How to Set Network Adapter Priority on Windows 11
- How to Add a User to Sudoers on Ubuntu
- 25 Popular Linux IP Command Examples