In a Unix-like operating system, the history command is used to display a list of previously executed commands. By default, the history command will show the command number (a unique identifier assigned to each command as it is executed), the command that was executed.
For example, running the command history might produce output similar to this:
- ls -l
- cd Downloads
- pwd
- history
You can use the up and down arrow keys on your keyboard to scroll through the commands in the history.
- You can also use the ! symbol followed by the command number to execute a command from the history. For example, to execute command number 3 from the example above, you would type !3 and press enter.
- You can also use the ! symbol followed by the first few letters of a command to execute the most recent command that starts with those letters. For example, !ls would execute the last command that starts with “ls”, regardless of what command number it is.
- If you want to see a certain number of previous commands you can use history n where n is the number of commands you want to see.
As you all knows that, the history command does not show the timestamp when the command was executed.
This article could be helpful in some cases to know the time when a certain command was executed last.
You can add a timestamp to the history command by using the HISTTIMEFORMAT environment variable. In a bash shell, you can set the HISTTIMEFORMAT variable to a string that describes the format of the timestamp that you want to use.
The string should follow the format used by the strftime function.
Command: export HISTTIMEFORMAT=”%F %T “
Here, %F will show the date in YYYY-MM-DD format and %T will show the time in HH:MM:SS format.

Once you have set the HISTTIMEFORMAT variable, the timestamp will be included in the output of the history command as shown below:
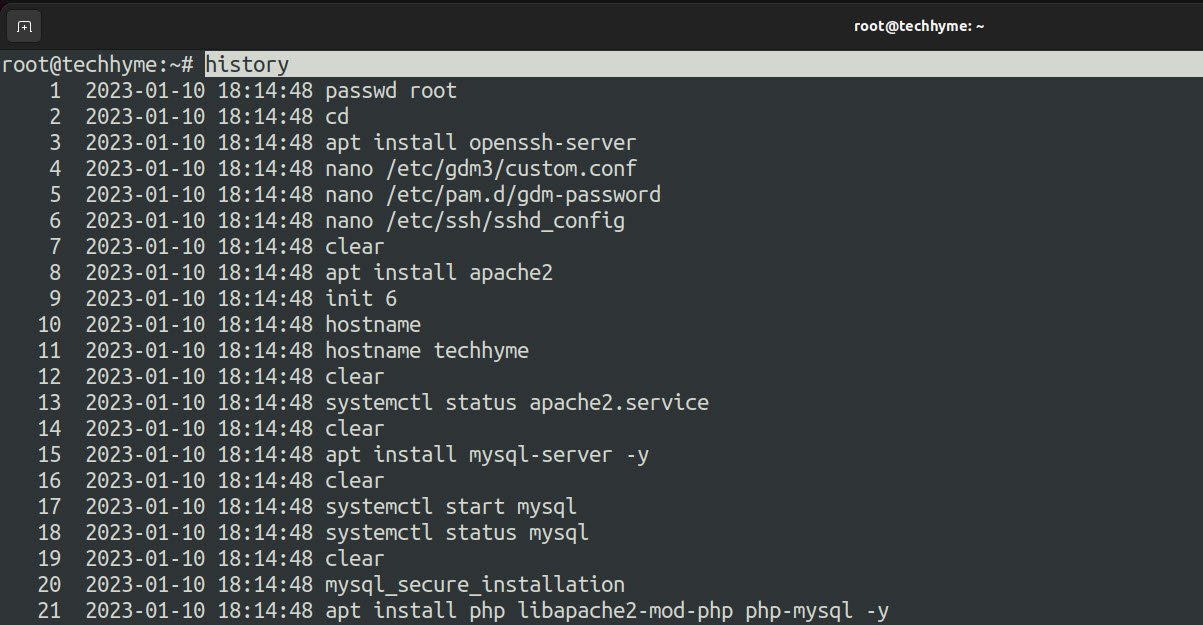
If you want to show the timestamp in the format of MM/DD/YYYY HH:MM:SS, you would set the HISTTIMEFORMAT variable like this:
Command: export HISTTIMEFORMAT=”%m/%d/%Y %T “
Furthermore, if you want the timestamp to be added automatically every time you open a new terminal, you can add the above export line to your .bashrc file (or .bash_profile on macOS) at the end.
Command: nano ~/.bashrc
Nano Editor Tip: You can use Alt + / to jump to the end of the file in Nano editor.
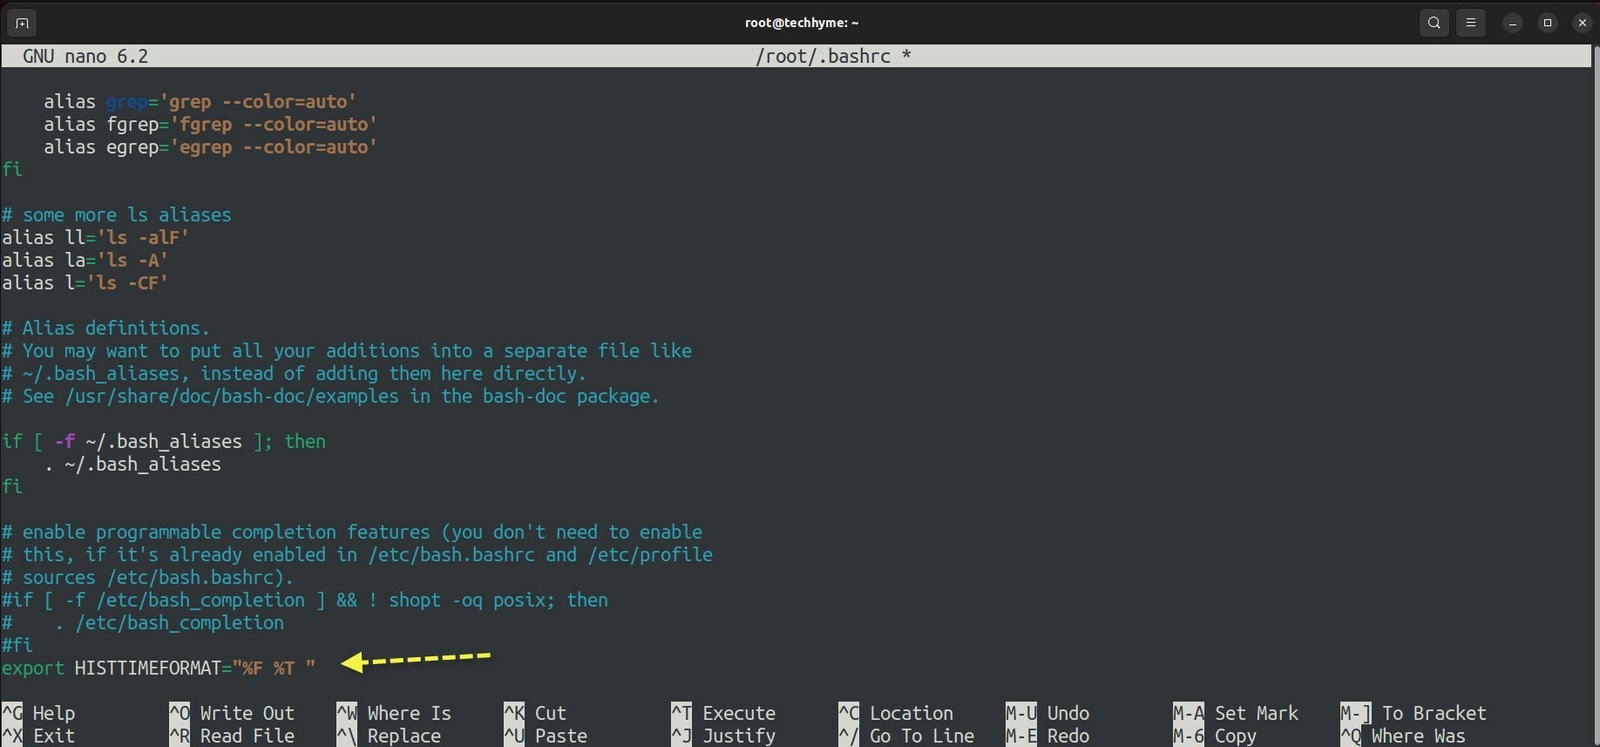
Now, to take those changes into effect, you will have to source the .bashrc file using the source command:
Command: source ~/.bashrc

And now, whenever you will use the history command, it will show the timestamps with every command.
You can also use alias in your shell profile file to have timestamp in history command when you run it,
alias history=’history | awk ‘\”{printf(“%s %s\n”, strftime(“%c”, $2), $0);}’\”’
Please note that this feature only works with bash shell, not all shells have this capability.
You may also like:- How To Install Python 2.7.18 From The Source
- How To Parse SSH Authentication Logs with Logstash
- A Comprehensive Guide to File System Commands in Linux
- Essential File Compression Commands in Linux
- Secure Shell (SSH) Protocol – A Comprehensive Guide
- Monitoring Active Connections in Kali Linux Using Netstat
- How To Easily Crack Wi-Fi Password
- 6 Most Useful Windows Command Prompt Commands
- Ripgrep – Searching for Specific File Types and Beyond
- Insert and Create Data in Elasticsearch

