PostgreSQL, also known as Postgres, is a free and open-source relational database management system emphasizing extensibility and SQL compliance. It is designed to handle a range of workloads, from single machines to data warehouses or Web services with many concurrent users. It is the default database for macOS Server, and is also available for Windows and Linux.
Some features of PostgreSQL include:
- Support for various data types, including JSON, XML, and hstore (a key-value store)
- Full-text search
- Concurrent index builds and write-ahead logging for improved performance
- Support for stored procedures, triggers, and views
- Support for foreign keys and transactions
- PostgreSQL is often used as a back-end for web and mobile applications, and is popular for its reliability and robust feature set.
Install PostgreSQL Server
Before to install the PostgreSQL database, you need to fetch an updated index from the Internet by run the following command:
Command: apt update

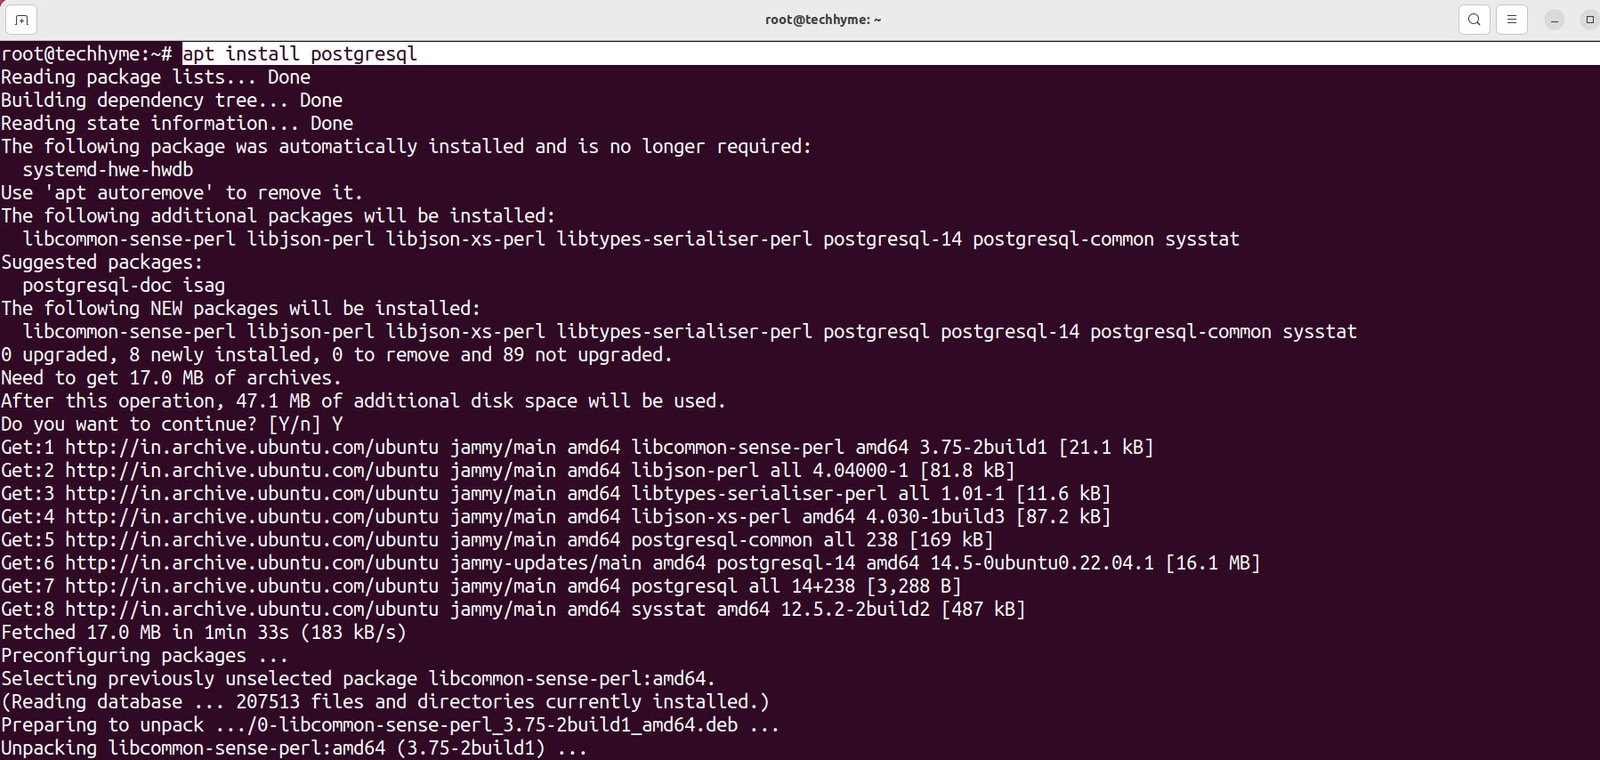
To install PostgreSQL on a Debian-based system using apt, you can use the following command:
Command: apt install postgresql
This will install the PostgreSQL server and client packages, as well as any dependencies required by those packages.
Once PostgreSQL Server has finished installing, you should be able to see it listening for incoming connections on port 5432. This is a good way to confirm that it’s up and running as expected.
Command: ss -nlt
The ss command is used to show socket statistics. It allows you to display detailed information about the sockets that are being used by various network protocols on your system.
- The -n option tells ss to use numerical addresses instead of resolving hostnames for IP addresses.
- The -l option tells ss to display only listening sockets. These are sockets that are waiting for incoming connections.
- The -t option tells ss to display only TCP sockets.

After the installation is complete you can use the systemctl command to start the PostgreSQL service
Command: systemctl start postgresql

You can also use systemctl to enable the PostgreSQL service to start automatically at boot:
Command: systemctl enable postgresql

Once the service is running, you can connect to the PostgreSQL server using the psql command-line interface. You will be prompted for the password for the postgres user.
Command: sudo -u postgres psql
You can then use SQL commands to create databases and users, and perform other tasks.
PostgreSQL Server only listens on local loopback interface 127.0.0.1 by default. If you plan to have one or more remote clients connect to your database server, you’ll need to configure PostgreSQL to listen on a different network interface. To make this change, open PostgreSQL’s configuration file (/etc/postgresql/14/main/postgresql.conf) by using nano or your preferred text editor.
Command: nano /etc/postgresql/14/main/postgresql.conf
In this file, add the following line somewhere under the “CONNECTIONS AND AUTHENTICATION” section. This will instruct PostgreSQL to listen on all network interfaces for incoming connections.
listen_addresses = ‘*’

Save your changes and exit the config file. Then, restart PostgreSQL Server for the changes to take effect.
Command: systemctl restart postgresql

You should now be able to see that PostgreSQL is listening on socket 0.0.0.0:5432. You can confirm this by executing the ss command again:
Command: ss -nlt

Next, you should add the following line to your /etc/postgresql/14/main/pg_hba.conf configuration file, which will allow incoming client connections to all databases and users. The md5 option specifies that the users must authenticate with a password.
host all all 0.0.0.0/0 md5
To add this line to your file with a single command, just execute:
sudo bash -c “echo host all all 0.0.0.0/0 md5 >> /etc/postgresql/14/main/pg_hba.conf”

Lastly, if you have UFW firewall enabled, you can open PostgreSQL Server’s listening port 5432 to any incoming TCP traffic by executing the command below:
Command: sudo ufw allow from any to any port 5432 proto tcp

If you are using a different operating system, you can find instructions for installing PostgreSQL in the official documentation: https://www.postgresql.org/docs/
You may also like:- How To Install Python 2.7.18 From The Source
- How To Parse SSH Authentication Logs with Logstash
- A Comprehensive Guide to File System Commands in Linux
- Essential File Compression Commands in Linux
- Secure Shell (SSH) Protocol – A Comprehensive Guide
- Monitoring Active Connections in Kali Linux Using Netstat
- How To Easily Crack Wi-Fi Password
- 6 Most Useful Windows Command Prompt Commands
- Ripgrep – Searching for Specific File Types and Beyond
- Insert and Create Data in Elasticsearch