The Recycle Bin is a fundamental feature of the Windows operating system, and it continues to play a crucial role in the user interface of Windows 11. Whether you’re a novice or a seasoned Windows user, understanding how the Recycle Bin works in Windows 11 is essential.
The Recycle Bin in Windows 11 retains its core functionality, which is to serve as a temporary storage location for files and folders you intend to delete but might want to recover later. However, Windows 11 brings a fresh, modern look to this familiar feature.
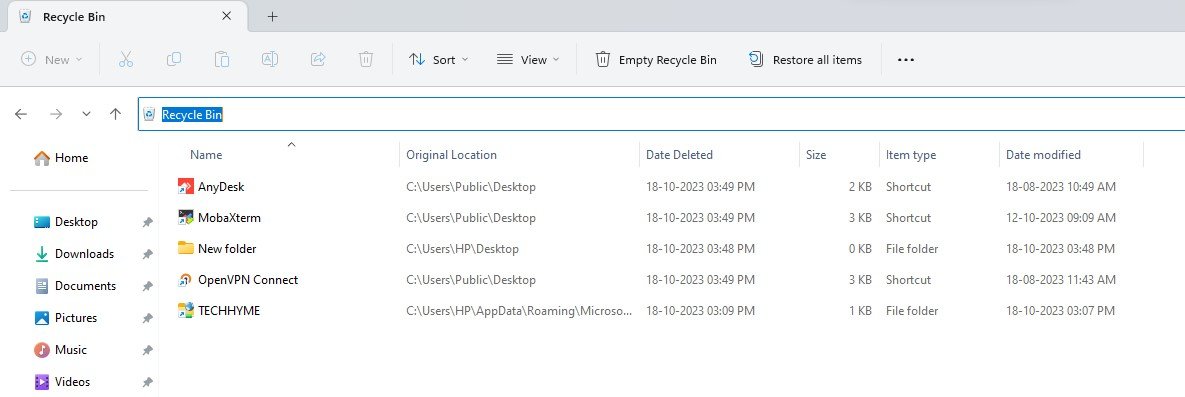
The most noticeable change is the revamped visual design. The Recycle Bin icon is now more minimalistic, featuring a flat, monochromatic design that aligns with Windows 11’s overall aesthetic. When you open the Recycle Bin, you’ll find that the contents are presented in a grid view, making it easier to see what’s inside and select items for recovery or permanent deletion. The Recycle Bin is a lifesaver when you accidentally delete an important file in Windows 11. However, failing to empty it regularly can lead to it taking up a significant amount of space on your hard drive.
Luckily, there are several ways to clear the Recycle Bin in Windows 11, and this article will guide you through these methods.
1. Right-Clicking the Recycle Bin Icon on Your Desktop
The easiest and most direct method to empty the Recycle Bin is by right-clicking the icon on your desktop.
Here’s how to do it:
- Right-click on the Recycle Bin icon on your desktop.
- Choose “Empty Recycle Bin.“
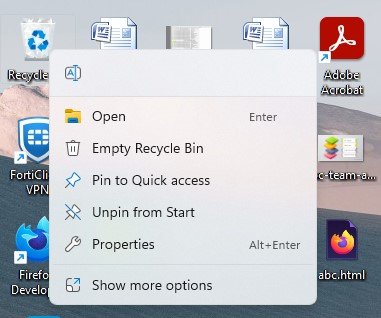
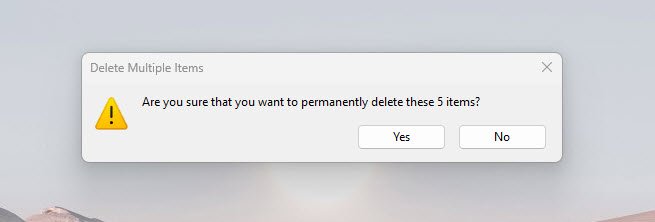
- Confirm your decision when asked if you want to permanently delete the items.
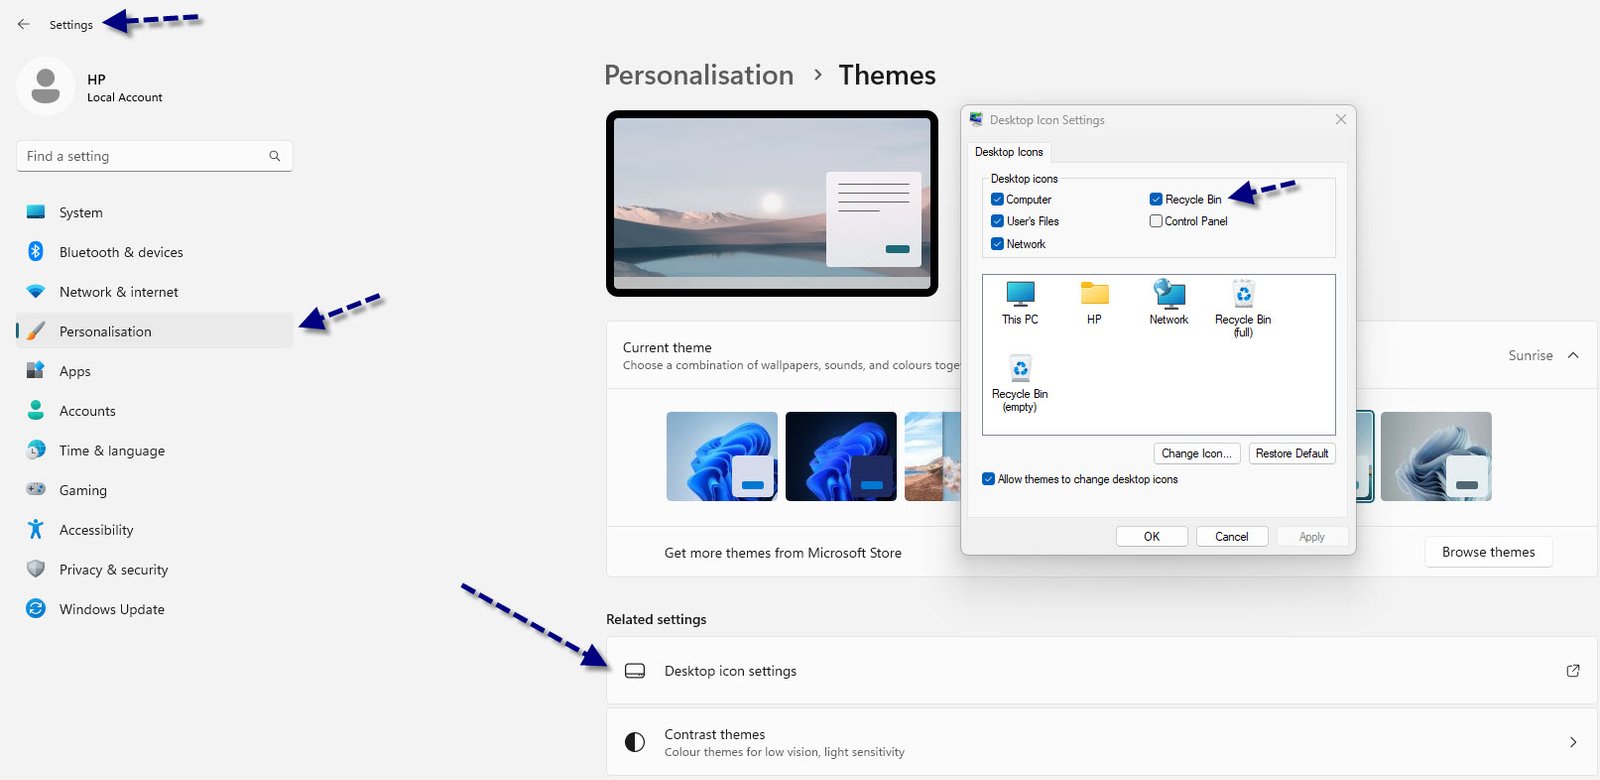
If you can’t locate the Recycle Bin on your desktop, it might be hidden. To unhide it, go to Start > Settings > Personalization > Themes > Desktop icon settings, and ensure that the Recycle Bin is checked.
2. Using Storage Sense to Schedule Recycle Bin Cleanup
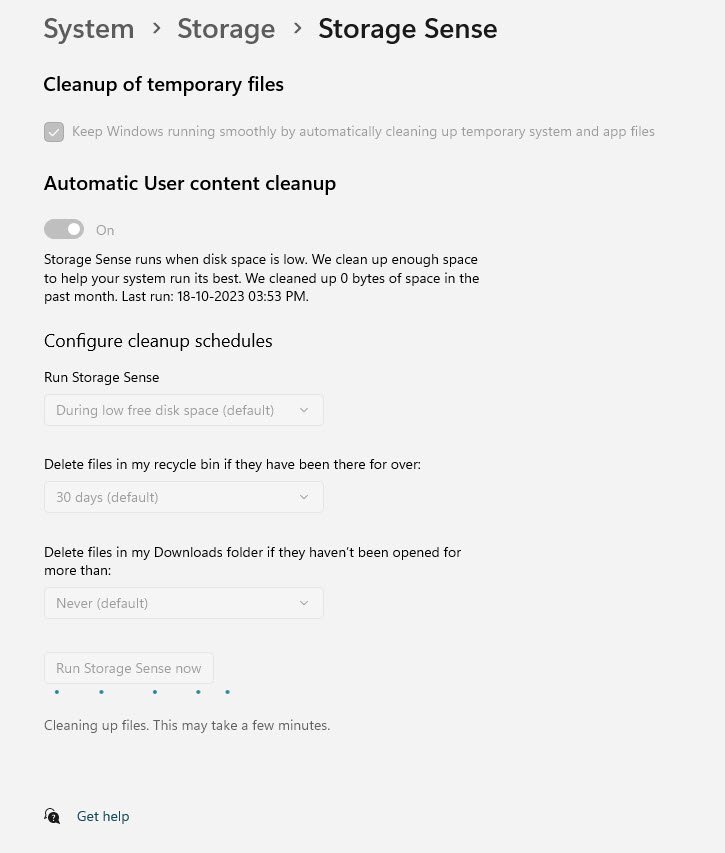
Windows 11 features a built-in tool called Storage Sense, which helps you manage your disk space efficiently. You can schedule it to automatically delete old files from your Recycle Bin.
Here’s how to set it up:
- Click on the Start button and go to Settings (the gear icon on the left).
- In Settings, select “System” and then click “Storage.”

- Turn on Storage Sense and click “Configure Storage Sense or run it now.”
- Scroll down to the “Temporary Files” section and set “Delete files in my recycle bin if they have been there for over x days” to 1, 14, 30, or 60 days.
You can also access the Settings menu quickly using the keyboard shortcut Windows + I (hold down the Windows key and press ‘I’).
Storage Sense runs in the background, periodically checking for files in the Recycle Bin that have exceeded the specified age. If, for instance, you set it to 14 days, any files older than 14 days will be automatically permanently deleted.
3. Emptying the Recycle Bin from File Explorer
The Recycle Bin can be accessed from File Explorer, and it’s straightforward to empty it from there.
Follow these steps:
- Open File Explorer.
- In the address bar, start typing “Recycle Bin.” As you type, “Recycle Bin” should appear, and you can click it to open the Recycle Bin.
- In File Explorer, click “Manage” in the menu bar under “Recycle Bin Tools.”
- In the ribbon, click “Empty Recycle Bin.”
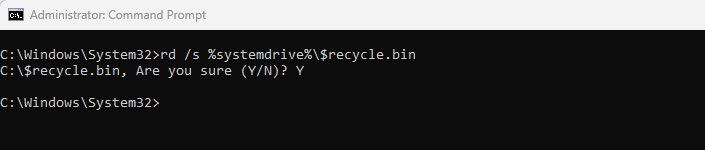
4. Using Command Prompt to Clear the Recycle Bin
For advanced users, an elevated command prompt can be employed to empty the Recycle Bin using a command-line approach. This method is particularly useful in enterprise environments with numerous desktops and servers.
Here’s how to do it:
- Open a command prompt as an administrator.
- Type the following command and press Enter: “rd /s %systemdrive%\$recycle.bin.”
5. Clearing the Recycle Bin with PowerShell
If you’re familiar with PowerShell, there’s a handy cmdlet called Clear-RecycleBin that allows you to empty all local computer’s Recycle Bins.
Here’s how to use it:
- Open an elevated PowerShell window.
- Type “Clear-RecycleBin” and hit Enter. Confirm the deletion with ‘Y.’
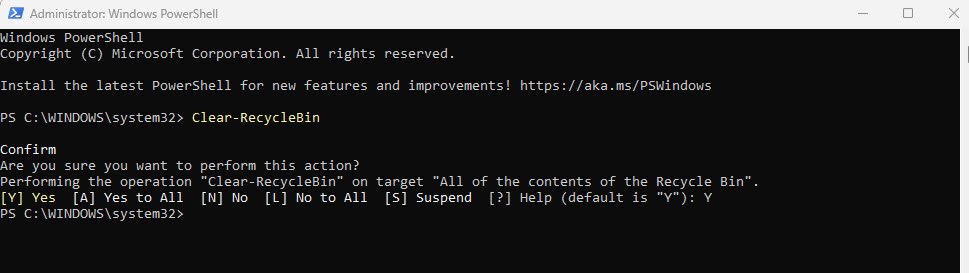
Moreover, “Clear-RecycleBin -Force” can be used to empty the Recycle Bin without warnings or confirmation.
These five methods offer flexibility for emptying the Recycle Bin in Windows 11, allowing you to choose the one that best suits your needs and expertise.
You may also like:- How To Install Python 2.7.18 From The Source
- How To Parse SSH Authentication Logs with Logstash
- How To Easily Crack Wi-Fi Password
- 6 Most Useful Windows Command Prompt Commands
- Ripgrep – Searching for Specific File Types and Beyond
- Insert and Create Data in Elasticsearch
- Manage Time and Date in Linux with timedatectl
- How to Set Network Adapter Priority on Windows 11
- How to Add a User to Sudoers on Ubuntu
- 25 Popular Linux IP Command Examples