Apache Tomcat is a popular open-source web server and servlet container that is widely used for deploying and running Java-based web applications. In this tutorial, we will walk you through the process of installing Apache Tomcat on an Ubuntu 22.04 LTS system.
Prerequisites
Before you begin the installation process, make sure you have the following prerequisites in place:
- An Ubuntu 22.04 LTS server.
- Access to a terminal with sudo privileges.
- OpenJDK 11 or a compatible Java Development Kit.
Step 1: Update the Package Repository
Start by updating the package repository to ensure you have the latest information about available packages. Open a terminal and run the following commands:
sudo apt update
Step 2: Install OpenJDK 11
Apache Tomcat requires a compatible Java Development Kit (JDK) to run. In this tutorial, we’ll use OpenJDK 11. You can install it using the following command:
sudo apt install openjdk-11-jdk
You can verify the installation by checking the Java version:
java -version
Step 3: Create a Tomcat User
For security purposes, it’s a good practice to create a dedicated user to run the Tomcat service. Run the following commands to create the user:
sudo useradd -m -U -d /opt/tomcat -s /bin/false tomcat![]()
Step 4: Download and Install Apache Tomcat
Now, download and install Apache Tomcat. First, specify the version you want to install by setting the VERSION variable. Then, use wget to download the Tomcat archive, extract it, and create a symbolic link for easy management:
VERSION=10.1.14
wget https://www-eu.apache.org/dist/tomcat/tomcat-10/v${VERSION}/bin/apache-tomcat-${VERSION}.tar.gz -P /tmp
Once the Tomcat tar file is downloaded, extract it to the /opt/tomcat directory:
sudo tar -xf /tmp/apache-tomcat-${VERSION}.tar.gz -C /opt/tomcat/Tomcat is updated on a regular basis. The updates include bug fixes, security patches, and new features.

To have more control over versions and updates, we’ll create a symbolic link named latest, that will point to the Tomcat installation directory:
sudo ln -s /opt/tomcat/apache-tomcat-${VERSION} /opt/tomcat/latestLater, when you need to upgrade your Tomcat instance, simply unpack the newer version and change the symlink to point to it.
![]()
The system user we previously created must have access to the tomcat installation directory. Change the directory ownership to user and group tomcat:
sudo chown -R tomcat: /opt/tomcat
The shell scripts inside the Tomcat’s bin directory must be executable in order to run:
sudo sh -c 'chmod +x /opt/tomcat/latest/bin/*.sh'These scripts are used to start, stop and otherwise manage the Tomcat instance.
![]()
Step 5: Create a Systemd Service Unit for Tomcat
To manage Tomcat as a system service, create a systemd service unit. Use a text editor to create and edit the service unit file:
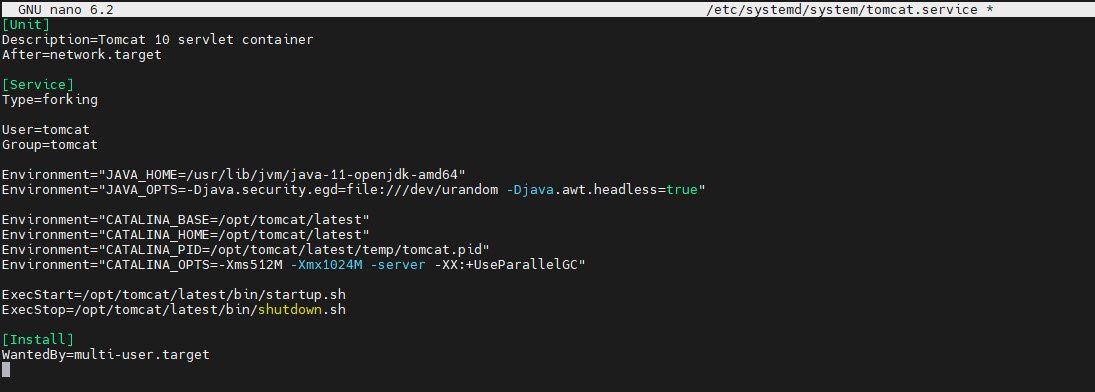
nano /etc/systemd/system/tomcat.serviceThen, add the following content to the file:
[Unit]
Description=Tomcat 10 servlet container
After=network.target

[Service]
Type=forking

User=tomcat
Group=tomcat

Environment="JAVA_HOME=/usr/lib/jvm/java-11-openjdk-amd64"
Environment="JAVA_OPTS=-Djava.security.egd=file:///dev/urandom -Djava.awt.headless=true"

Environment="CATALINA_BASE=/opt/tomcat/latest"
Environment="CATALINA_HOME=/opt/tomcat/latest"
Environment="CATALINA_PID=/opt/tomcat/latest/temp/tomcat.pid"
Environment="CATALINA_OPTS=-Xms512M -Xmx1024M -server -XX:+UseParallelGC"

ExecStart=/opt/tomcat/latest/bin/startup.sh
ExecStop=/opt/tomcat/latest/bin/shutdown.sh

[Install]
WantedBy=multi-user.target
Save the file and exit the text editor.
Step 6: Enable and Start the Tomcat Service
Reload the systemd daemon and enable Tomcat to start on boot:
sudo systemctl daemon-reload
sudo systemctl enable --now tomcat

You can check the status of the Tomcat service to ensure it’s running without errors:
sudo systemctl status tomcat
Step 7: Configure the Firewall
If you have a firewall enabled, you’ll need to allow incoming connections to the default Tomcat port, which is 8080. Use ufw to open the port:
sudo ufw allow 8080/tcp
Step 8: Configure Tomcat Users
By default, Tomcat’s Manager and Host Manager applications are password-protected. You need to configure access to these applications. Edit the tomcat-users.xml file using a text editor:
nano /opt/tomcat/latest/conf/tomcat-users.xmlInside the <tomcat-users> section, add the following lines to configure a user with manager and admin roles. Replace “admin” and “password” with your desired username and password:
<role rolename="admin-gui"/>
<role rolename="manager-gui"/>
<user username="admin" password="password" roles="admin-gui,manager-gui"/>
Step 9: Configure Manager and Host Manager Apps (Optional)
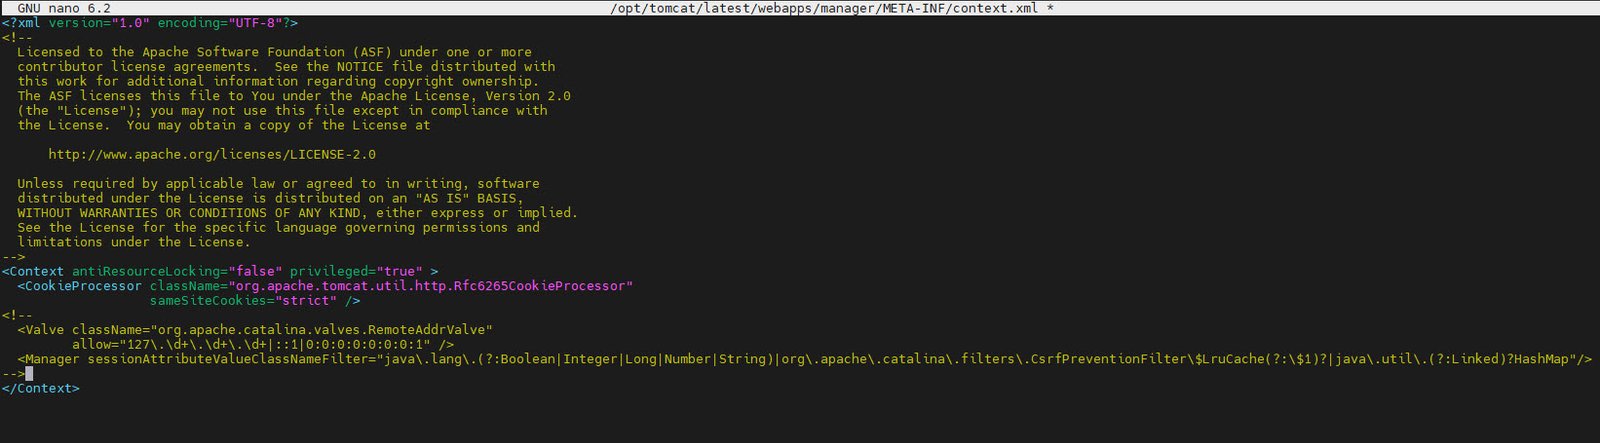
For extra security, you can configure Manager and Host Manager apps by editing their context.xml files. Use a text editor to open the context.xml files:
For the Manager app:
sudo nano /opt/tomcat/latest/webapps/manager/META-INF/context.xmlInside the file, you can comment out the IP restriction line
<!--
<Valve className="org.apache.catalina.valves.RemoteAddrValve" allow="/>
-->
to allow access from all IP addresses.
Repeat the same process for the Host Manager app:
sudo nano /opt/tomcat/latest/webapps/host-manager/META-INF/context.xml
Step 10: Restart Tomcat
After making changes, restart the Tomcat service to apply the configuration:
sudo systemctl restart tomcat
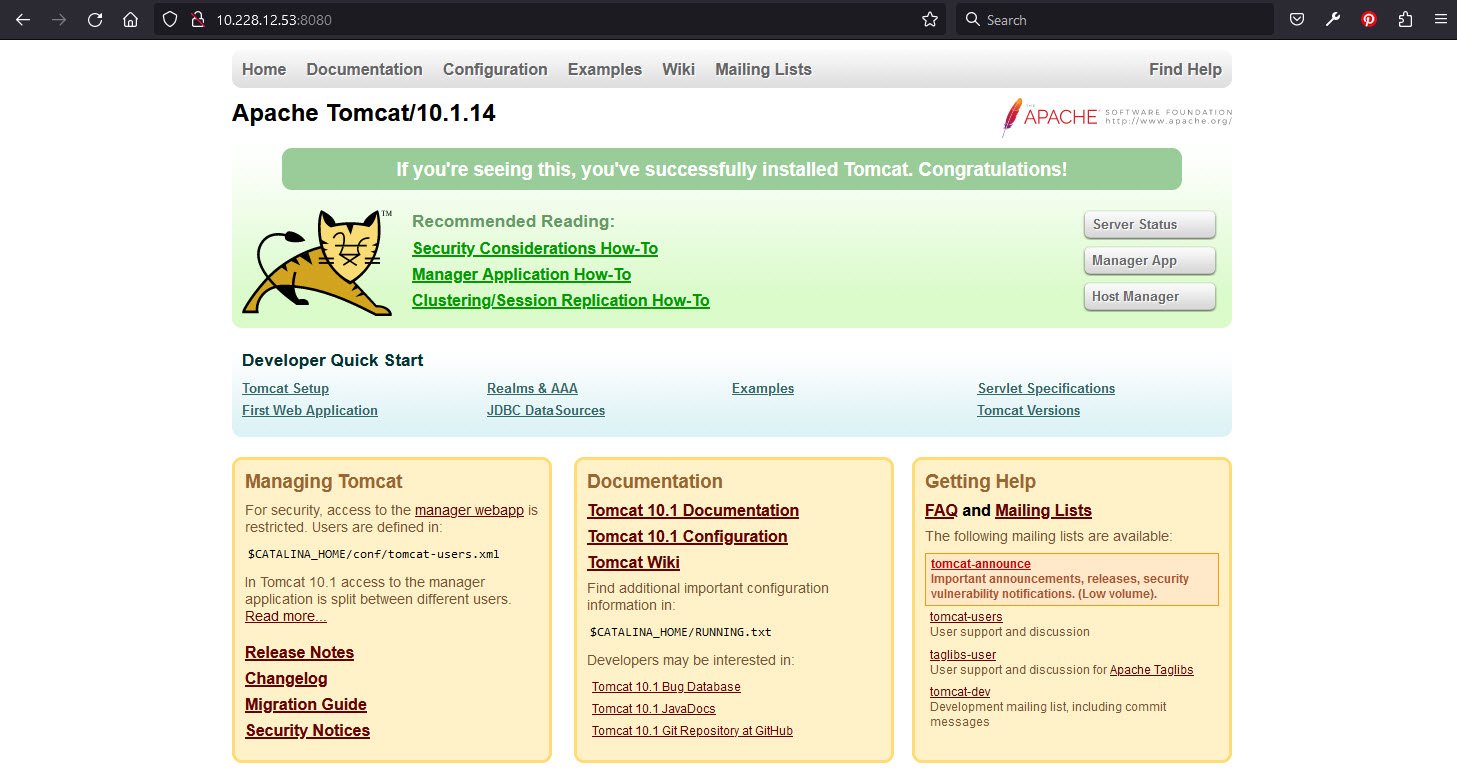
Step 11: Access the Tomcat Web Interface
You can now access the Tomcat web interface through your web browser.
Open your browser and type: http://<your_domain_or_IP_address>:8080
Tomcat web application manager is available at: http://<your_domain_or_IP_address>:8080/manager/html.

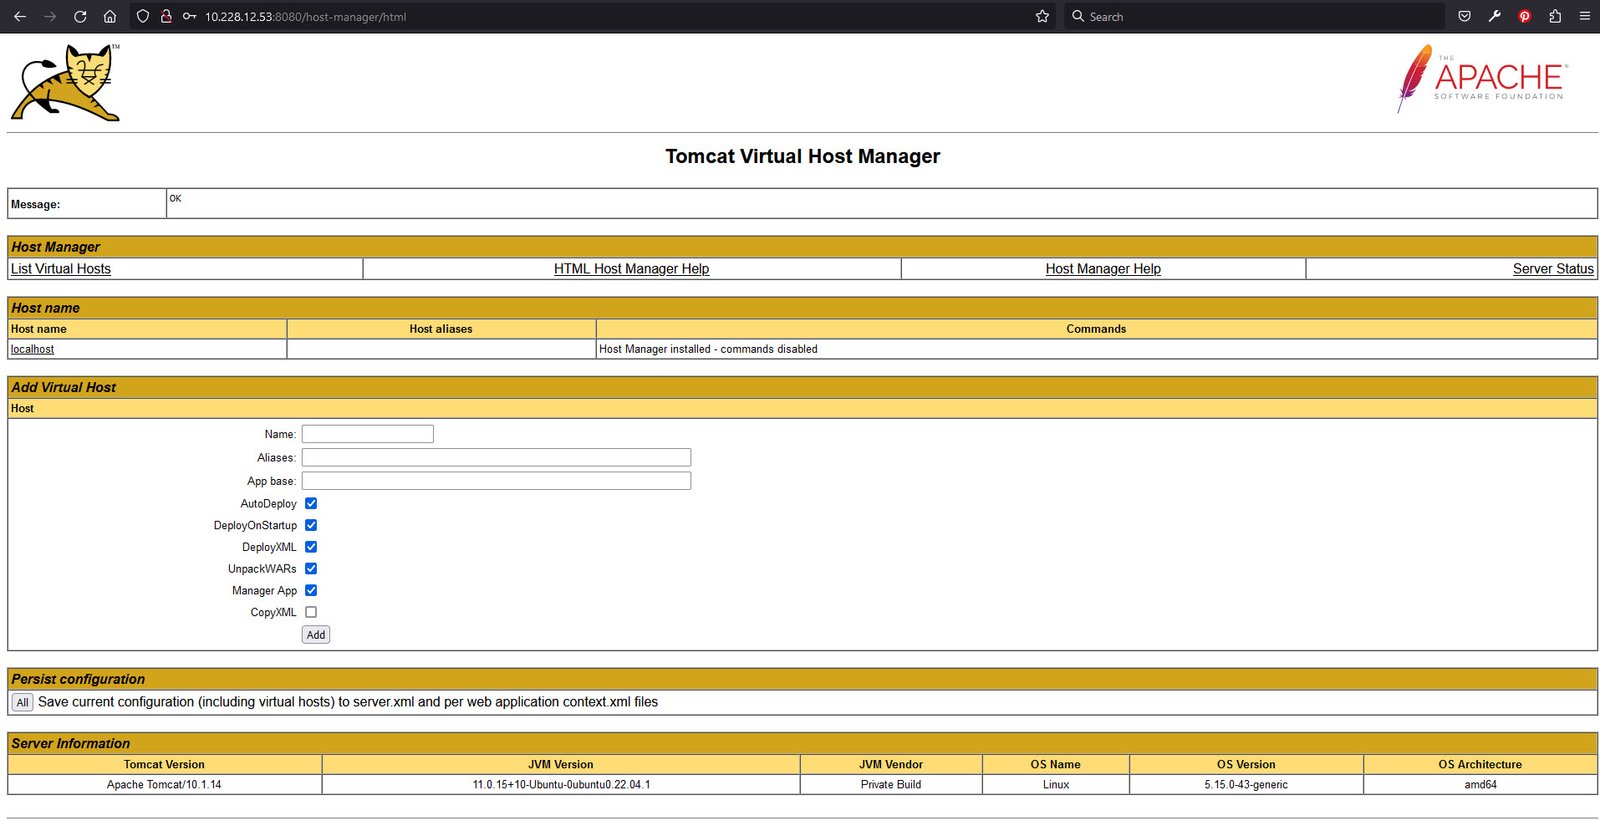
Tomcat virtual host manager is available at: http://<your_domain_or_IP_address>:8080/host-manager/html.
You’ve successfully installed and configured Apache Tomcat on your Ubuntu 22.04 LTS server. You can now deploy and manage Java web applications with ease using this powerful servlet container.
You may also like:- How To Install Python 2.7.18 From The Source
- How To Parse SSH Authentication Logs with Logstash
- A Comprehensive Guide to File System Commands in Linux
- Essential File Compression Commands in Linux
- Secure Shell (SSH) Protocol – A Comprehensive Guide
- Monitoring Active Connections in Kali Linux Using Netstat
- How To Easily Crack Wi-Fi Password
- 6 Most Useful Windows Command Prompt Commands
- Ripgrep – Searching for Specific File Types and Beyond
- Insert and Create Data in Elasticsearch