Securing your web server is paramount in today’s digital landscape, and one effective method to restrict access to specific pages or areas is by implementing basic authentication. NGINX, a popular web server and reverse proxy server, provides a straightforward way to configure basic HTTP authentication.
This article will guide you through the steps of setting up basic authentication in NGINX to enhance the security of your website.
Step 1: Install Apache Utils
Before configuring basic authentication, you need to install the necessary utility to manage user credentials. Use the following commands based on your Linux distribution:
For RHEL/CentOS:
yum install httpd-toolsFor Debian/Ubuntu:
sudo apt install apache2-utils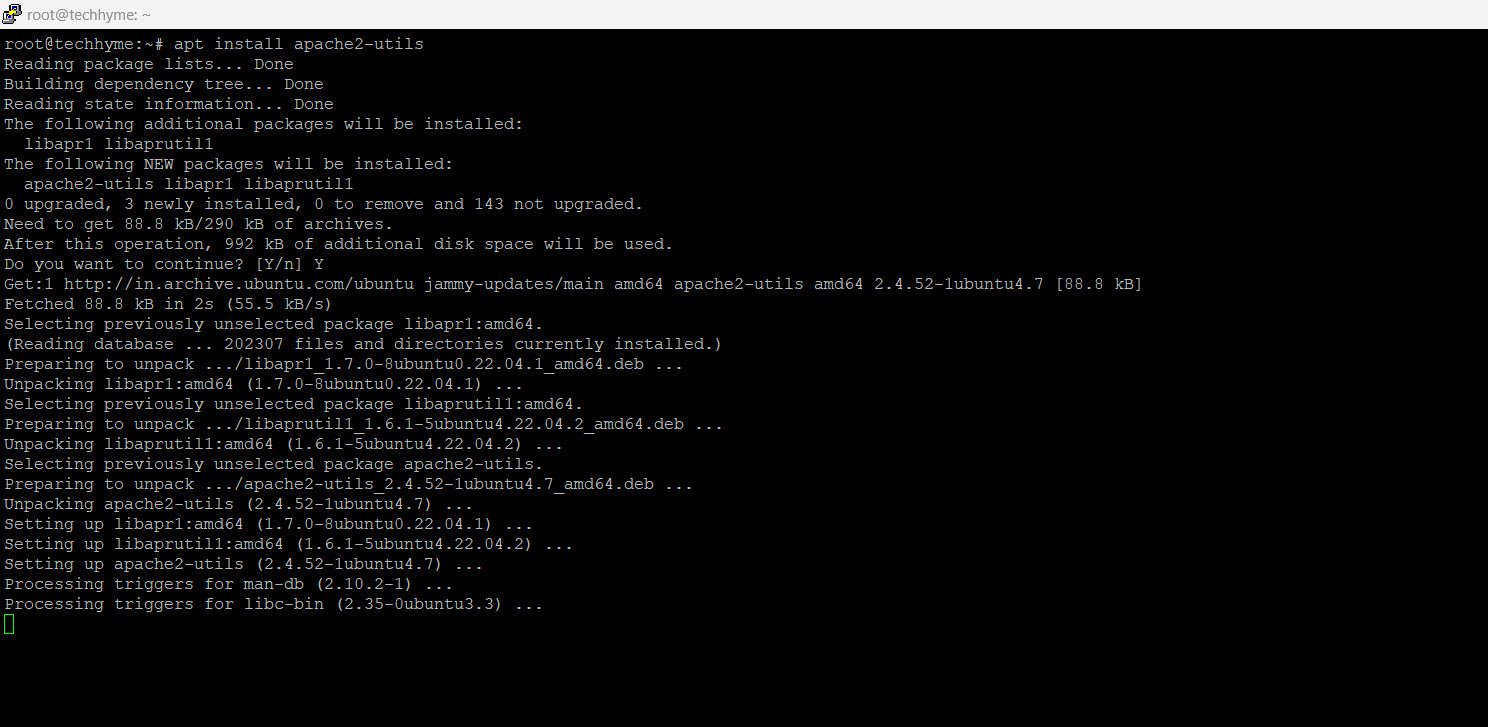
Step 2: Create User/Password
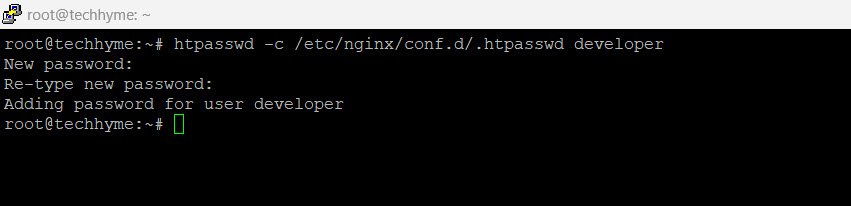
Use the `htpasswd` command to create a user and set up their password. The `-c` option is used only for the initial creation of the password file. Subsequent user additions do not require this option:
htpasswd -c /etc/nginx/conf.d/.htpasswd developerYou will be prompted to enter and confirm the password for the specified user.
For additional users:
htpasswd /etc/nginx/conf.d/.htpasswd developer2Step 3: Open NGINX Configuration File
Open your NGINX server configuration file using a text editor. Depending on your setup, the location may vary. Common locations include:
For the main configuration file:
sudo nano /etc/nginx/nginx.confFor a specific virtual host configuration file:
sudo nano /etc/nginx/sites-enabled/website.confStep 4: Password Protect NGINX
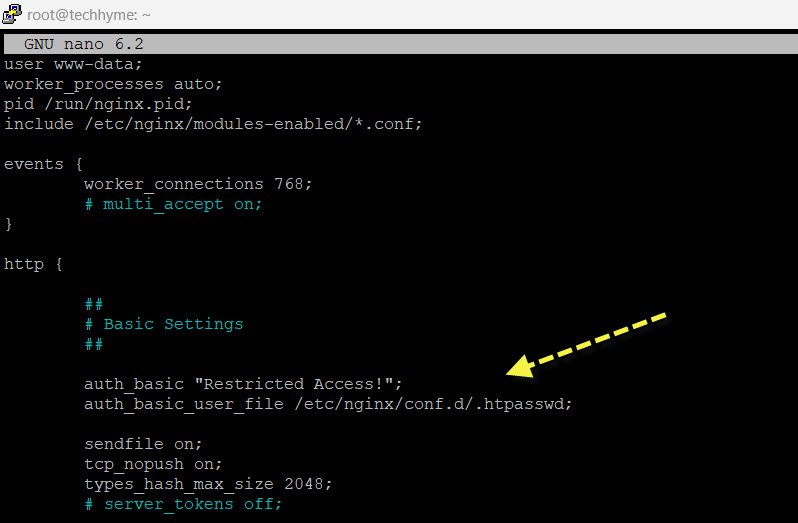
To password-protect your website, or specific sections of it, add the following directives within the appropriate block in your NGINX configuration.
For the entire `http` block (e.g., virtual hosts):
http {
  ...
  auth_basic "Restricted Access!";
  auth_basic_user_file /etc/nginx/conf.d/.htpasswd;
  ...
}
For a specific `server` block (website or domain):
server {
  ...
  auth_basic "Restricted Access!";
  auth_basic_user_file /etc/nginx/conf.d/.htpasswd;
  ...
}
For a specific location (e.g., `/admin/`):
location /admin/ {
  ...
  auth_basic "Restricted Access!";
  auth_basic_user_file /etc/nginx/conf.d/.htpasswd;
  ...
}
Step 5: Restart NGINX Server
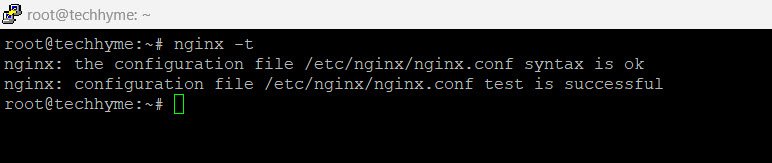
Check the syntax of your updated configuration file:
sudo nginx -tIf there are no errors, restart the NGINX server:
For Debian/Ubuntu:
sudo service nginx reload
For RHEL/CentOS:
systemctl restart nginxStep 6: Verify Basic Authentication
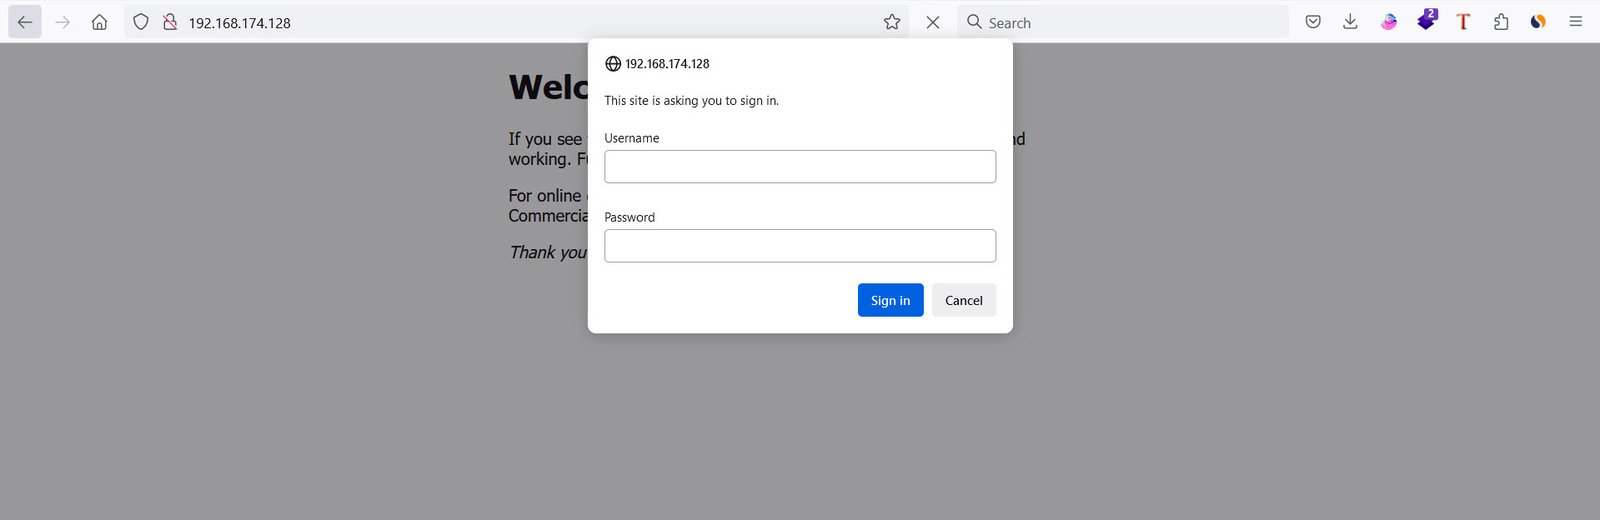
Open your web browser and visit the protected URL. You should now see an authentication screen prompting you for the username and password you created, securing the specified area of your website.
By following these steps, you have successfully configured basic authentication in NGINX, adding an extra layer of security to your web server and protecting sensitive areas of your website. Always remember to keep your password files secure and regularly review your server’s security configurations.
You may also like:- How To Install Python 2.7.18 From The Source
- How To Parse SSH Authentication Logs with Logstash
- How To Easily Crack Wi-Fi Password
- 6 Most Useful Windows Command Prompt Commands
- Ripgrep – Searching for Specific File Types and Beyond
- Insert and Create Data in Elasticsearch
- Manage Time and Date in Linux with timedatectl
- How to Set Network Adapter Priority on Windows 11
- How to Add a User to Sudoers on Ubuntu
- 25 Popular Linux IP Command Examples