Pip, short for “Pip Installs Packages,” is a package manager for Python that allows you to easily install and manage Python packages and libraries. In this article, we will walk you through the steps to install Pip in Ubuntu and show you how to use it for various tasks.
Installing Pip
To install Pip on your Ubuntu system, follow these simple steps:
1. Update Your Package List:
First, open a terminal window and update your package list to ensure you have the most up-to-date information about available packages. This can be done by running the following command:
sudo apt updateYou will be prompted to enter your password.
2. Install Pip:
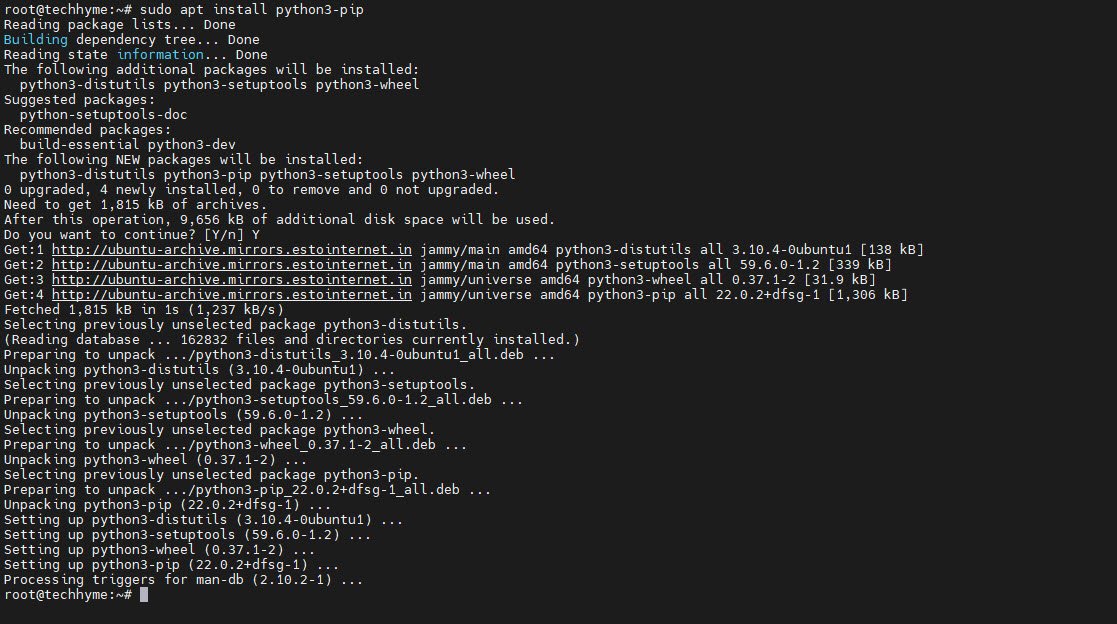
Once your package list is updated, you can proceed to install Pip using the following command:
sudo apt install python3-pipConfirm the installation by typing ‘y’ when prompted.
3. Check Pip Version:
After the installation is complete, you can verify that Pip is installed correctly by checking its version:
pip3 --versionThis command should display the installed Pip version on your system.

Using Pip for Package Management
Now that you have Pip installed, you can start using it to manage Python packages on your Ubuntu system. Here are some common Pip commands and tasks:
1. Get Help
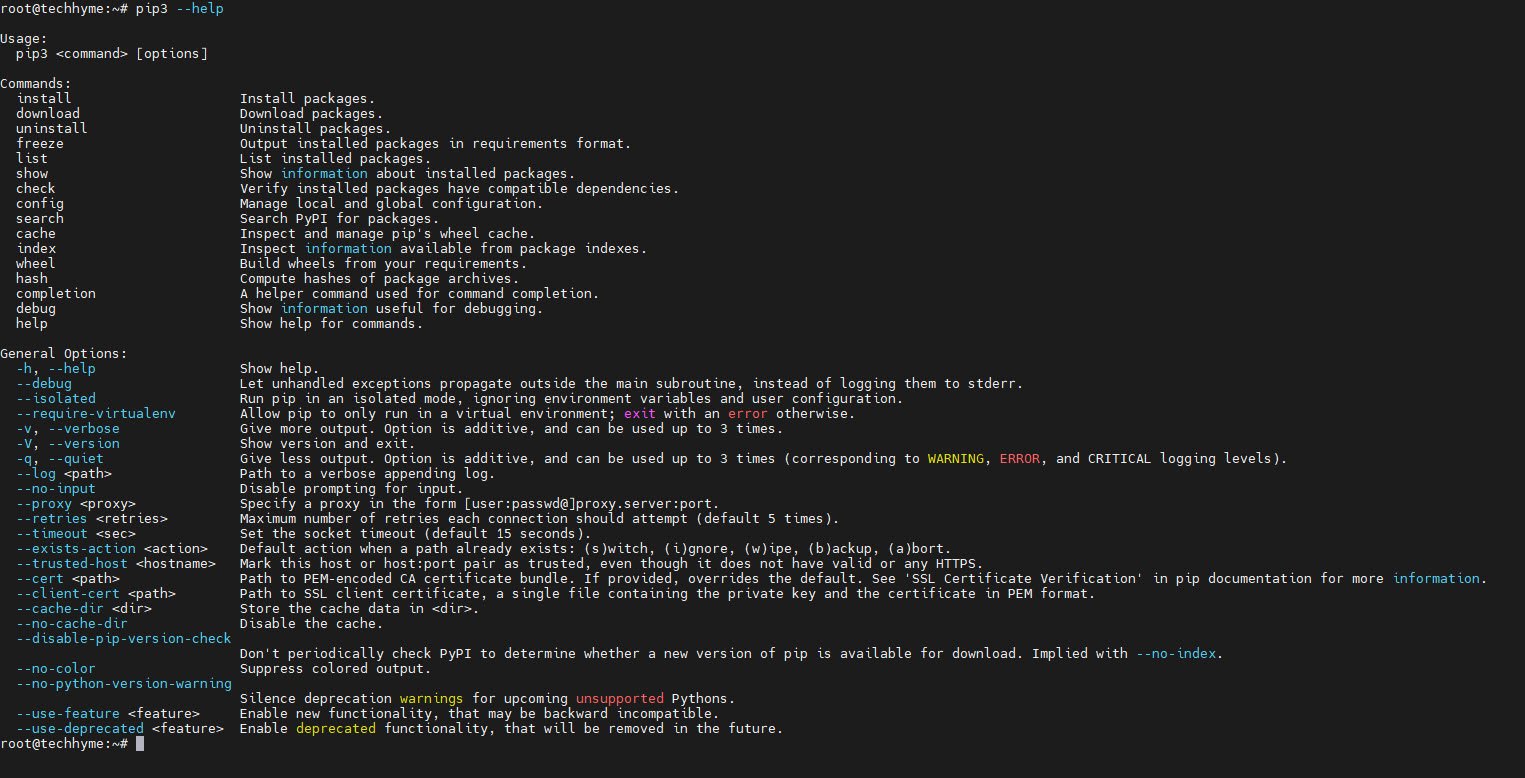
You can get information about Pip commands and options by running:
pip3 --helpAdditionally, you can get help for specific Pip subcommands, such as installing packages or listing installed packages, using the `pip3 <subcommand> –help` syntax.
2. Install a Package
To install a Python package using Pip, you can use the following command:
pip3 install <package_name>For example, to install the popular NumPy library, you can run:
pip3 install numpy

3. Install a Specific Package Version
If you need to install a specific version of a package, you can specify it using double equal signs (`==`). For instance, to install NumPy version 1.18.5:
pip3 install numpy==1.18.54. Install Packages from a Requirements File
If you have a file named `requirements.txt` that lists all the packages your project depends on, you can install them in one go using the following command:
pip3 install -r requirements.txtThis is particularly useful when you are setting up a development environment or deploying a project to a new system.
5. List Installed Packages
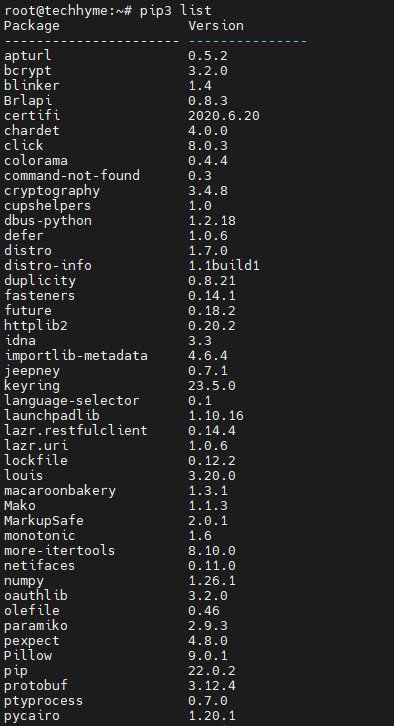
You can list all the installed packages and their versions using the following command:
pip3 listThis can help you keep track of the packages you have installed.
6. Upgrade a Package
To upgrade a package to the latest available version, you can use the `–upgrade` flag with the `pip3 install` command. For example:
pip3 install --upgrade <package_name>7. Uninstall a Package
If you no longer need a package, you can uninstall it with Pip. Simply use the following command:
pip3 uninstall <package_name>Replace `package_name` with the name of the package you want to remove.
Conclusion
Pip is an essential tool for Python developers, enabling them to easily manage packages and libraries. After installing Pip on your Ubuntu system, you can perform various package management tasks, including installation, upgrading, and uninstallation.
These commands provide a solid foundation for working with Python packages and developing Python applications on your Ubuntu machine.
You may also like:- How To Install Python 2.7.18 From The Source
- How To Parse SSH Authentication Logs with Logstash
- A Comprehensive Guide to File System Commands in Linux
- Essential File Compression Commands in Linux
- Secure Shell (SSH) Protocol – A Comprehensive Guide
- Monitoring Active Connections in Kali Linux Using Netstat
- How To Easily Crack Wi-Fi Password
- 6 Most Useful Windows Command Prompt Commands
- Ripgrep – Searching for Specific File Types and Beyond
- Insert and Create Data in Elasticsearch