Nginx is a powerful and widely used web server that offers excellent performance and flexibility. It is commonly employed to serve web content, host websites, and balance traffic. Moreover, enabling SSL encryption is a must to secure your web applications and provide users with a safe browsing experience.
In this article, we will walk you through the process of installing Nginx, configuring a basic website, and securing it with an SSL certificate using Certbot on an Ubuntu-based AWS server.
Step 1: Installing Nginx
The first step is to install Nginx on your server. You can do this by running the following command:
apt install nginx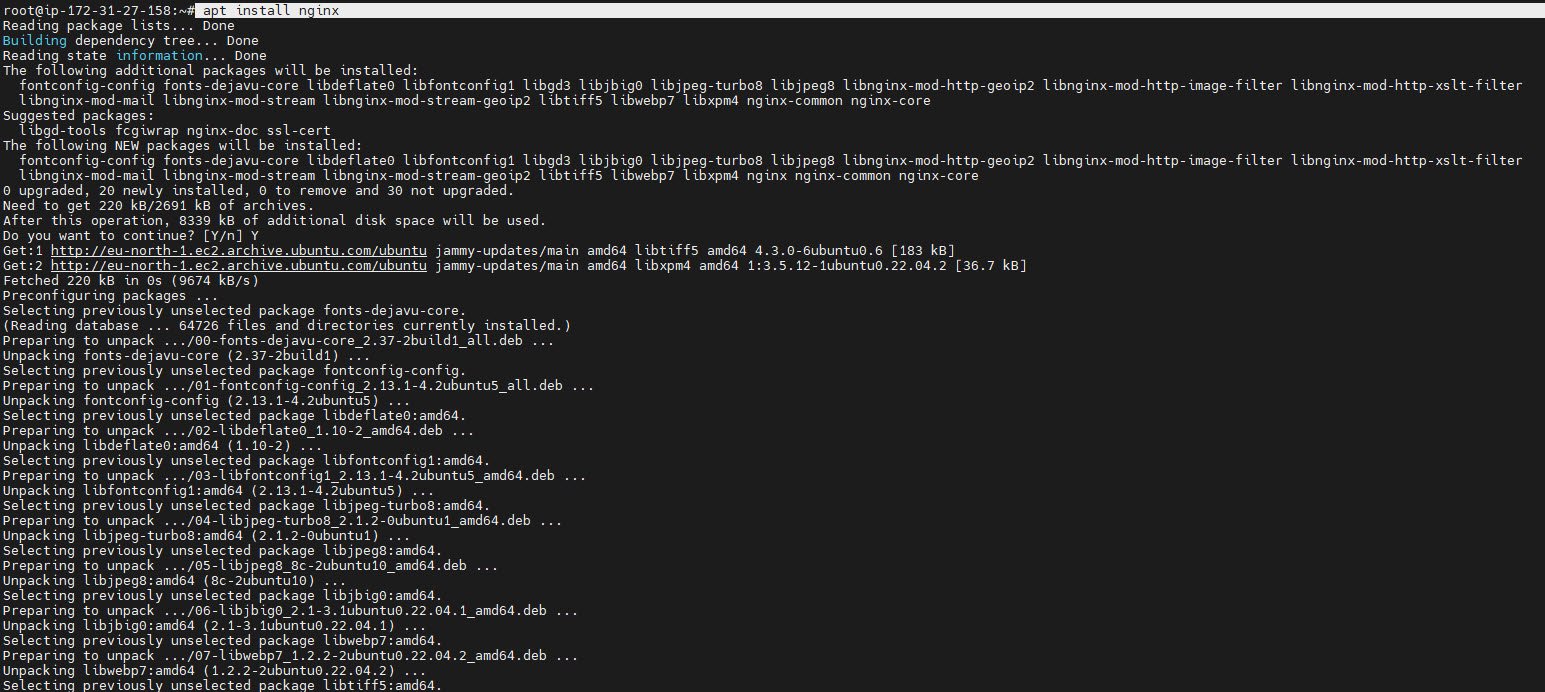
Step 2: Creating a Web Directory
Next, you need to create a directory to host your website’s files. You can create the directory and set the appropriate permissions with the following commands:
sudo mkdir -p /var/www/techhyme.linkpc.net/html
sudo chown -R $USER:$USER /var/www/techhyme.linkpc.net/html
sudo chmod -R 755 /var/www/techhyme.linkpc.net/


Now, let’s create a sample HTML index page with the help of nano editor by editing the following file:
nano /var/www/techhyme.linkpc.net/html/index.htmlOur index page contains the following and you can use the same too:
<html>
    <head>
        <title>Welcome</title>
    </head>
    <body>
        <h1>Success! Welcome to Techhyme.com</h1>
    </body>
</html>
Step 3: Configuring Nginx
Create a new Nginx server block configuration file for your website. You can use the text editor of your choice, but in this example, we’ll use nano editor:
nano /etc/nginx/sites-available/techhyme.linkpc.net
Inside the file, add the following Nginx server block configuration, customizing it for your domain:
server {
             listen 80;
             root /var/www/techhyme.linkpc.net/html;
             index index.html;

             server_name techhyme.linkpc.net www.techhyme.linkpc.net;

             location / {
                                 try_files $uri $uri/ =404;
             }
}
Save the file and exit the text editor.

Step 4: Enabling the Nginx Configuration
Now, create a symbolic link to enable the Nginx server block configuration:
sudo ln -s /etc/nginx/sites-available/techhyme.linkpc.net /etc/nginx/sites-enabled/
Then, test the Nginx configuration for any syntax errors:
nginx -tIf no errors are reported, you can proceed.

Step 5: Reloading Nginx
To apply the changes, reload Nginx:
nginx -s reload
Step 6: Domain Configuration
Before setting up SSL, you need to ensure that your domain is properly configured to point to your server’s IP address. You can do this through your domain registrar’s DNS settings.
In this case, we are using freedoman.one website which provides you a free domain with DNS.
By the DNS A record, you can map the domain with the NGINX public IP address. The process is quite straightforward for most providers.

It takes time to reflect on the changes (2 mins in our case).
To check, you can use the dig command with the domain name:
dig techhyme.linkpc.netAnd if it is up and running, it will show the IP address you used with the domain as shown below.

Step 7: Installing Certbot
Certbot is a tool that automates the process of obtaining and renewing SSL certificates. Install Certbot using the following command:
snap install --classic certbot
And finally, create a symlink to the certbot directory by running the following command:
ln -s /snap/bin/certbot /usr/bin/certbot
To verify the installation, check the installed version of certbot:
certbot --version
Step 8: Obtaining an SSL Certificate
You can request a test SSL certificate to ensure that your Nginx configuration is correct:
certbot --nginx --test-cert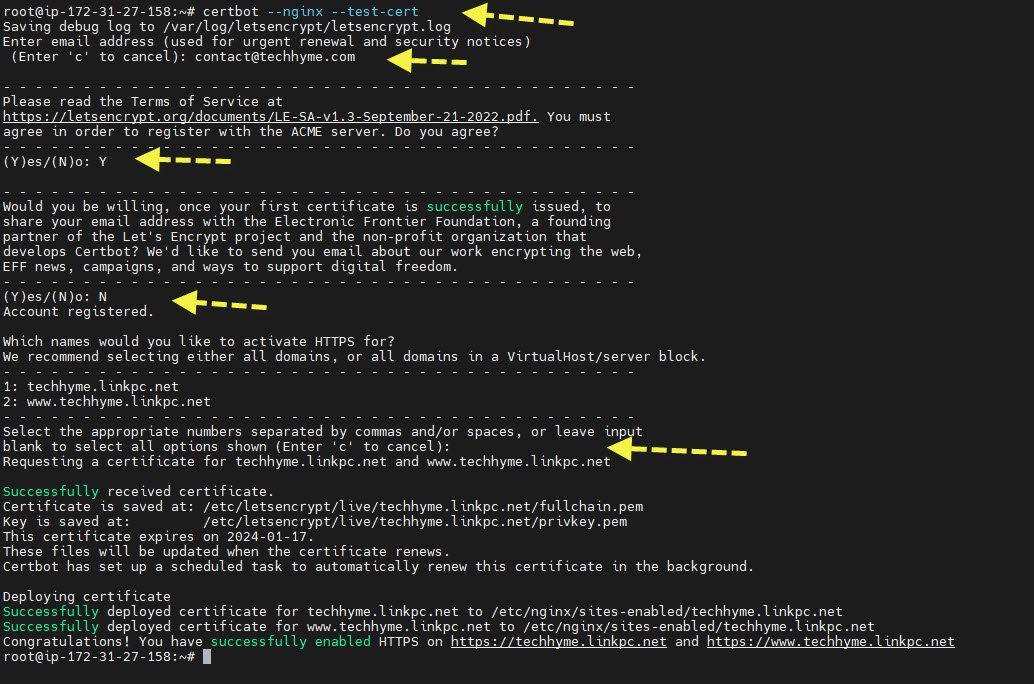
If everything is set up correctly, you can obtain the actual SSL certificate:
certbot --nginx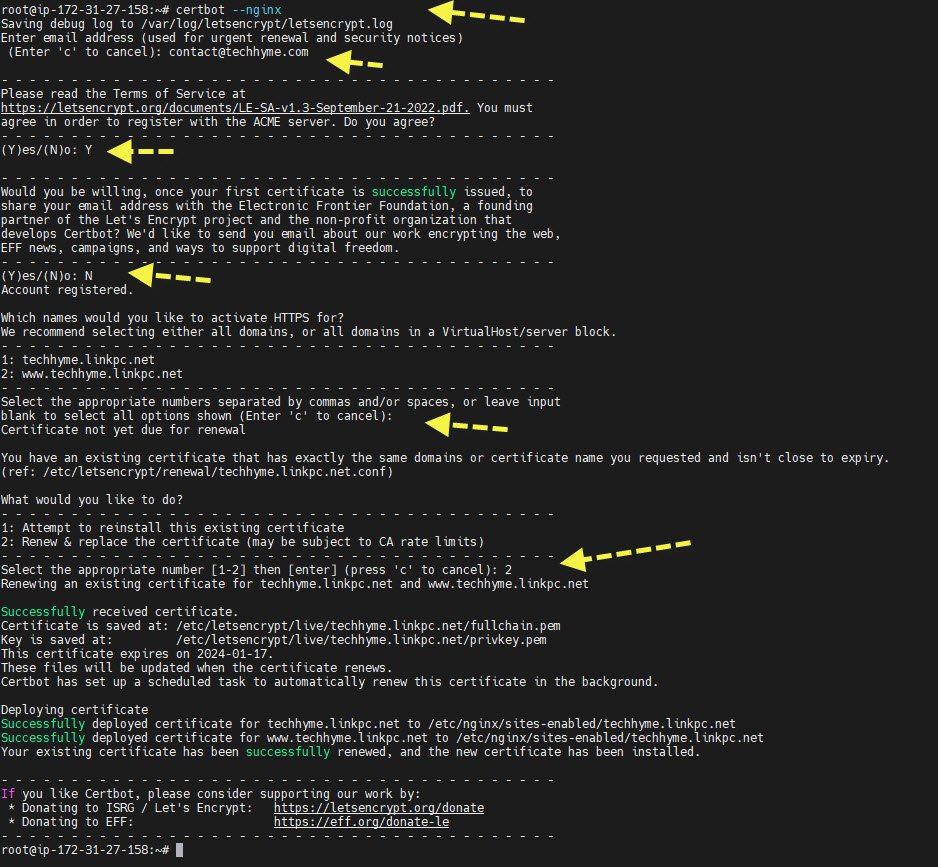
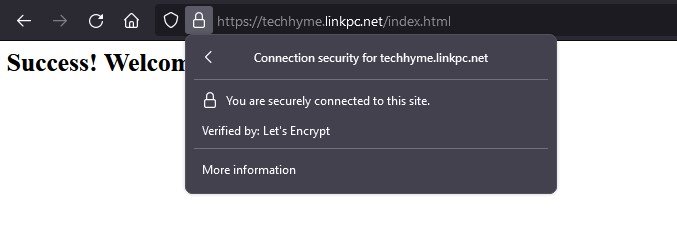
That’s it! You have secured your website with HTTPS.
And now, if you check, the connection to the site will be secured:
Step 9: Automating Certificate Renewal
To ensure your SSL certificate remains valid, you can automate the renewal process with Certbot. You can list the timers to check the renewal configuration:
systemctl list-timers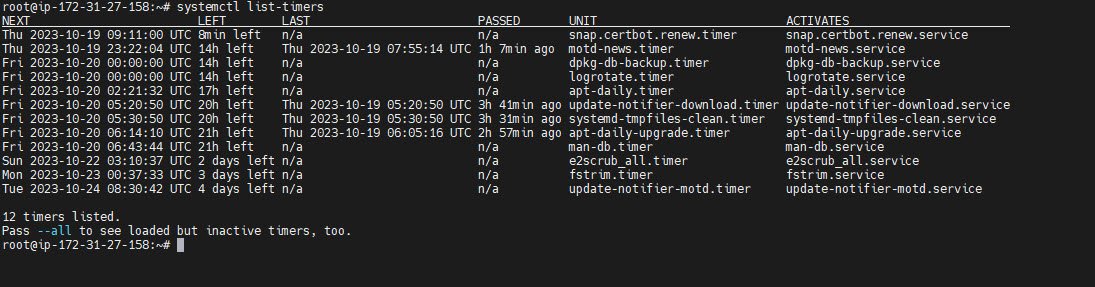
The command “certbot renew” is used to automatically renew SSL certificates obtained through Certbot. SSL certificates have an expiration date, typically lasting for 90 days. To ensure that your website remains secure and doesn’t experience any downtime due to an expired certificate, it’s essential to set up automated certificate renewal.
certbot renew
Conclusion
In this guide, we’ve walked through the process of setting up Nginx, configuring a basic website, and securing it with an SSL certificate using Certbot. By following these steps, you’ve created a more secure and reliable environment for your web applications. Your website is now served over HTTPS, ensuring the privacy and security of your users’ data.
You may also like:- How To Install Python 2.7.18 From The Source
- How To Parse SSH Authentication Logs with Logstash
- A Comprehensive Guide to File System Commands in Linux
- Essential File Compression Commands in Linux
- Secure Shell (SSH) Protocol – A Comprehensive Guide
- Monitoring Active Connections in Kali Linux Using Netstat
- How To Easily Crack Wi-Fi Password
- 6 Most Useful Windows Command Prompt Commands
- Ripgrep – Searching for Specific File Types and Beyond
- Insert and Create Data in Elasticsearch