
Ubuntu is currently one of the most popular end-user Linux distribution Operating System. Ubuntu aims to provide a fully supported and reliable, open source and free, easy to use and modify, Linux operating system. Ubuntu provides both long-term and short-term releases.
Ubuntu is released in several editions, each designed for a distinct group of users or functions. Editions install different collections of software such as the KDE, the XFce desktop, servers, educational software, and multimedia applications. ISO images can be downloaded directly or using a BitTorrent application.
The edition which we are using here for this demonstration is Ubuntu Desktop Edition which provides standard functionality for end users.
Also Read:
- How to Setup FTP Server in Ubuntu
- How To Install SSH Server in Ubuntu
- Setting Up New Virtual Machine with VMware Workstation 16 Pro
Ubuntu is designed never to let anyone directly access the root user. The root user has total control over the entire system. Instead, certain users are granted administrative access with which they can separately access administrative tools and perform specific administrative tasks. Even though a root user exists, a password for the root user is not defined so that access to the user is never allowed.
Furthermore, Ubuntu does not enable the root account during installation and you will not be asked to create a root password. Instead, you will create a normal user account with sudo privileges. This user can run sudo command to perform administrative tasks.
You can, however, activate the root user by using the passwd command to create a root user password.
Command: sudo passwd
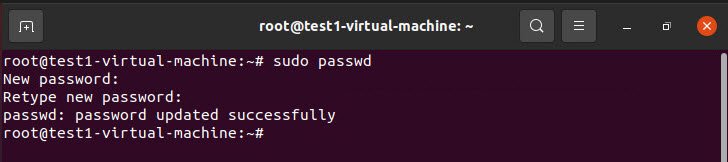
The above command will set the password of root user.
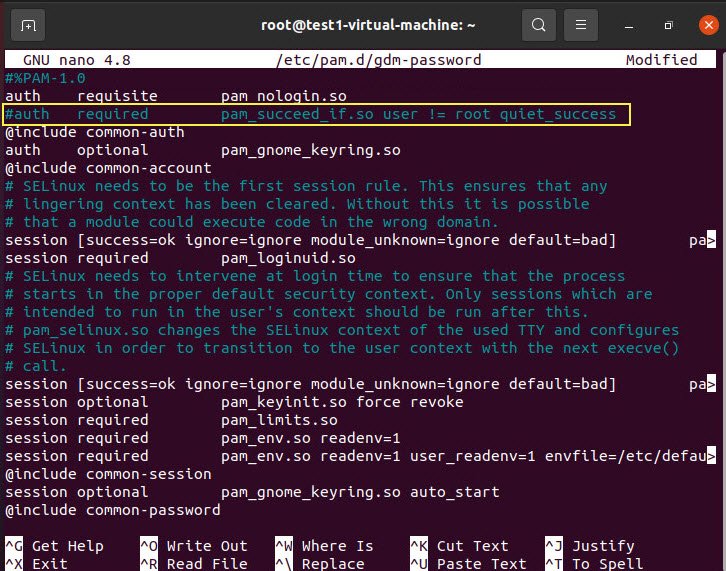
Next, you need to edit the PAM (Pluggable Authentication Module) authentication daemon configuration file /etc/pam.d/gdm-password and comment line which denies root access to graphical user interface.
Use your favorite editor such as Nano editor to edit the file /etc/pam.d/gdm-password and put # in front of the line containing:
#auth required pam_succeed_if.so user != root quiet_success
Next, step is to edit the /etc/gdm3/custom.conf GDM (Gnome Display Manager) configuration file to allow root login.
To do so edit file /etc/gdm3/custom.conf to add the AllowRoot=true line as shown below:

At last, reboot your Ubuntu Operating System and try to login the root user by graphical user interface.
For any query or doubt, feel free to contact us at hymeblogs@gmail.com.
You may also like:- How To Parse SSH Authentication Logs with Logstash
- How To Easily Crack Wi-Fi Password
- 6 Most Useful Windows Command Prompt Commands
- Ripgrep – Searching for Specific File Types and Beyond
- Insert and Create Data in Elasticsearch
- Manage Time and Date in Linux with timedatectl
- How to Set Network Adapter Priority on Windows 11
- How to Add a User to Sudoers on Ubuntu
- 25 Popular Linux IP Command Examples
- Top 11 Nmap Commands for Remote Host Scanning